
Beginner baking skills is all you need to try this basket. If you can braid hair then you can braid the handle and the finished edge on the basket.

You will need
Basic Bread Dough
1 egg for wash
Prepare the dough as per the instructions in basic bread dough for shaping. Preheat the oven to 350 F.

Prepare a pie baking dish by covering the inside of the dish with aluminium foil. Transfer the dough to a floured working surface and roll it into a large rectangle with a rolling pin. The thickness should be about 1/4 of an inch. The picture before is close to half an inch thick.

Using a pizza cutter cut 1/4 inch wide strips.

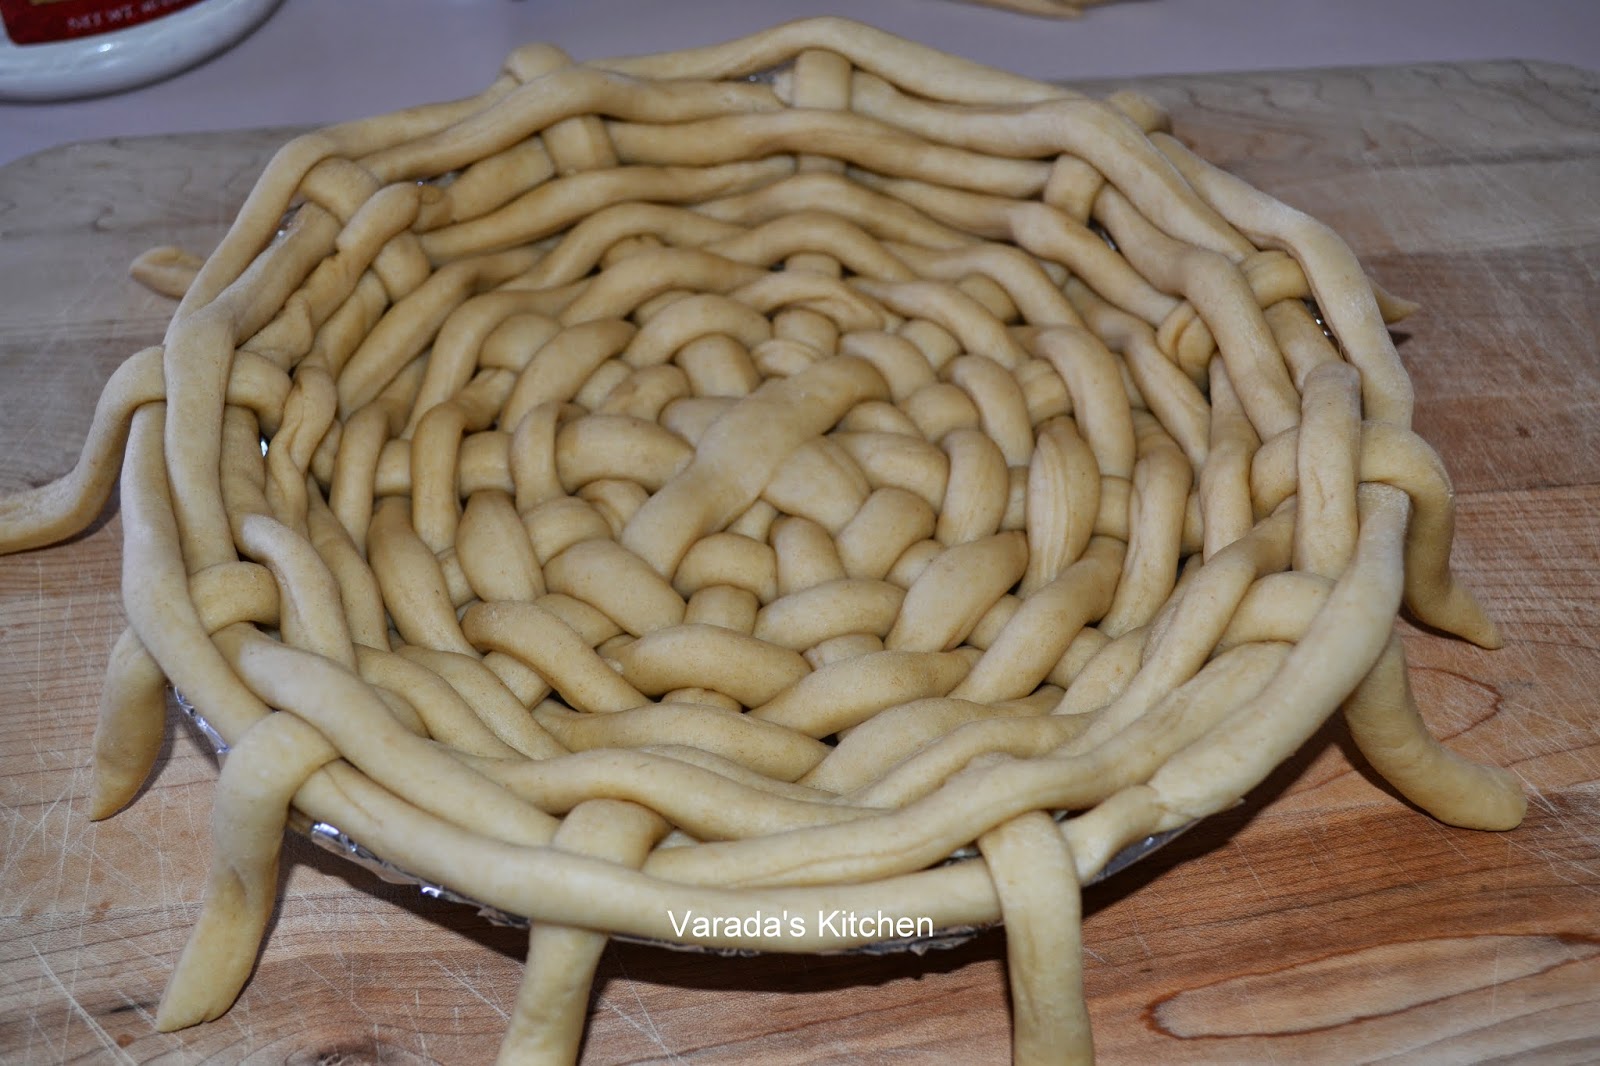
Place one of the strips on the work surface separate from the others and roll it with the palm of your hand to form a rope. Repeat for another five strips and place them on the pie dish.

Roll more strips into rope. Weave the rope through the 6 base ropes placed in the dish. Work in concentric circles. Always start under so the joints are hidden.

Continue until the entire surface is covered.
Take three ropes and form a braid.

Place the braid on the edge of the prepared basket and press down gently.

In a separate bowl beat the egg with 2 tbsp. water. Apply the wash over the entire surface of the basket using a pastry brush. You can skip the egg wash if you want, it is mainly for color.

Bake the basket for 20 minutes. If the edge browns while the center is undone, cover the edges with aluminum foil.

Continue to bake for another 10-15 minutes until the center is golden brown.

Prepare the handle by braiding 3 more ropes. Place it on an inverted oven safe mixing bowl that has been covered in aluminum foil. You may have to use your imagination to ensure you have a gentle curve on the handle.


Place the handle on the basket and attach with toothpicks.
Decorate with flowers. I used carved vegetables, red pepper, leek, radish and spring onion for the flowers.

Enjoy the yummy bread when you are done with using it as a centerpiece.
Such wonderful basket ........ This quite difficult but looks amazing!!
ReplyDeleteyou are so creative varada, this is extraordinary!!!
ReplyDeleteI am just speechless. This is amazing!!!!
ReplyDeleteAnd THAT is what I call creativity and craftiness!!!
ReplyDeleteNice
ReplyDeleteI was so amazed and inspired by this, I made it. Turned out great!! I modified a but by adding more salt, added cumin,carom seeds plus chopped cilantro. My 5 year old did most of weaving part as she loved the idea of bread basket!!!
ReplyDeleteThanks again for sharing your art with us
Janhavi
I am so glad you tried it and it turned out great. It must have been nice to have a little helper. All those additions would have made the bread quite tasty too.
DeleteThis bread basket looks so beautiful!
ReplyDeleteAmazing share. Shall give it a try. You have shared all the steps so nicely. Can you please share the temperature set up for baking. Thanks
ReplyDeleteThe temperature is provided in the post above. It is 350 F. I am glad you are going to try it out. LeT me know how it turns out.
DeleteI am not sure if you will see this post, as I see the last comment was in 2018. However, I wanted to let you know that "I am thrilled to see your post to making the Edible Spring Basket (and also your other post for Basic Bread Dough Shaping). I made a bread basket (not an edible one) years and years ago to fill for others with Easter themed goodies. However, it has been so long that I forgot how I did it. And besides it was not edible like the one you have here in "Varada Kitchen and Garden." I definitely will be making it for Easter; as well as one that I can fill for my great nieces and nephews. Again, thanks for such clear instructions for a beautiful, edible basket!
ReplyDeleteThank you for leaving a comment! I hope you have fun with this basket. I am sure your nieces and nephews will love it.
Delete