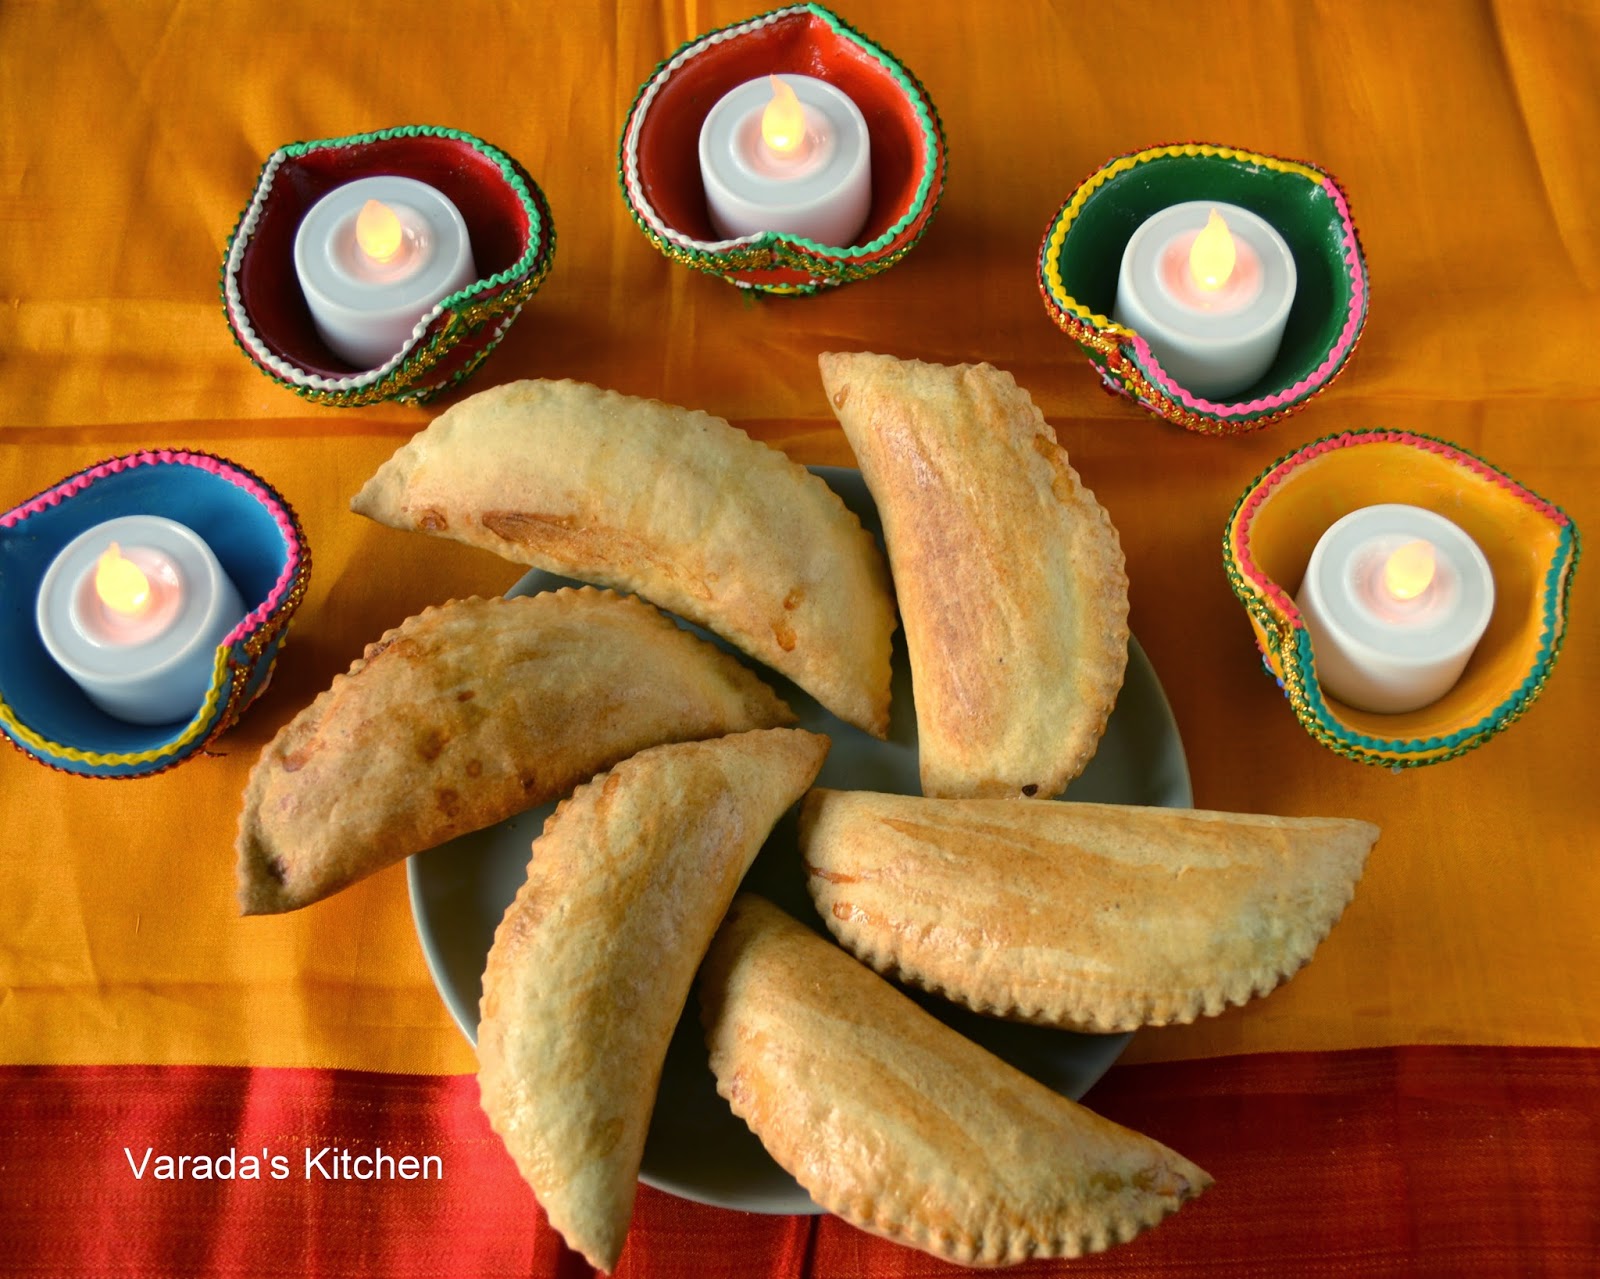
Karanji is an must have faral item on the Maharashtrian Diwali faral platter. Two types of karanji are made. One is with fresh coconut and the other is with dry coconut flakes. The one made for Diwali is with dry coconut flakes. Traditionally the karnaji is deep fried but I baked it as I have done with all the faral recipes I made this year.
The karanji 'pari' or shell is crunchy but not hard. The stuffing is made of dry coconut, roasted poppy seeds, roasted semolina (rawa) and powdered sugar. Generally dry coconut flakes are used but I used shredded dry coconut and I believe that helped to keep the filling well distributed throughout the karanji. My daughter could not resist having one while it was still warm.
As a child I remember coming home from school to find fresh made karanjis. My mother always made them with the help of the maid while we were out of the house. I can understand why. Then as a teenager I remember helping my mother with karanjis. I always got very tired of the amount of time it took to deep fry them but on the whole we enjoyed ourselves. I remember being very strict about how many could be eaten before Diwali. With all the effort I would put in I would be pretty mad if they were all gone before Diwali and we had to make them again. Now I don't really care, in a way I am happy if everyone wants to eat them. Time passes and our roles change.
It is tradition to make at least one modak when making karanji, one puri when making shankarpale and one kadbola when making chakli. You see, just like Spanish, the Marathi language classifies everything as masculine or feminine. So at least one feminine piece is made with the masculine faral and vice versa. Karanji is feminine and hence the masculine modak. I will let you draw your own inference as for the reason behind the tradition.
You will need (makes 15 karanjis and 2 modaks)
For the shell
1 cup rawa (semolina)
1 cup all purpose flour
3 tbsp. melted warm ghee or clarified butter
~ 1/3 cup lukewarm milk or as needed
For the filling
1 cup shredded dry coconut
2 tbsp. poppy seeds
1 tsp. ghee
1/4 cup rawa (semolina)
1/2 cup + 2 tbsp. powdered sugar
1 pod cardamom, shelled and seeds crushed
1/4 cup milk for sealing the karanji and brushing
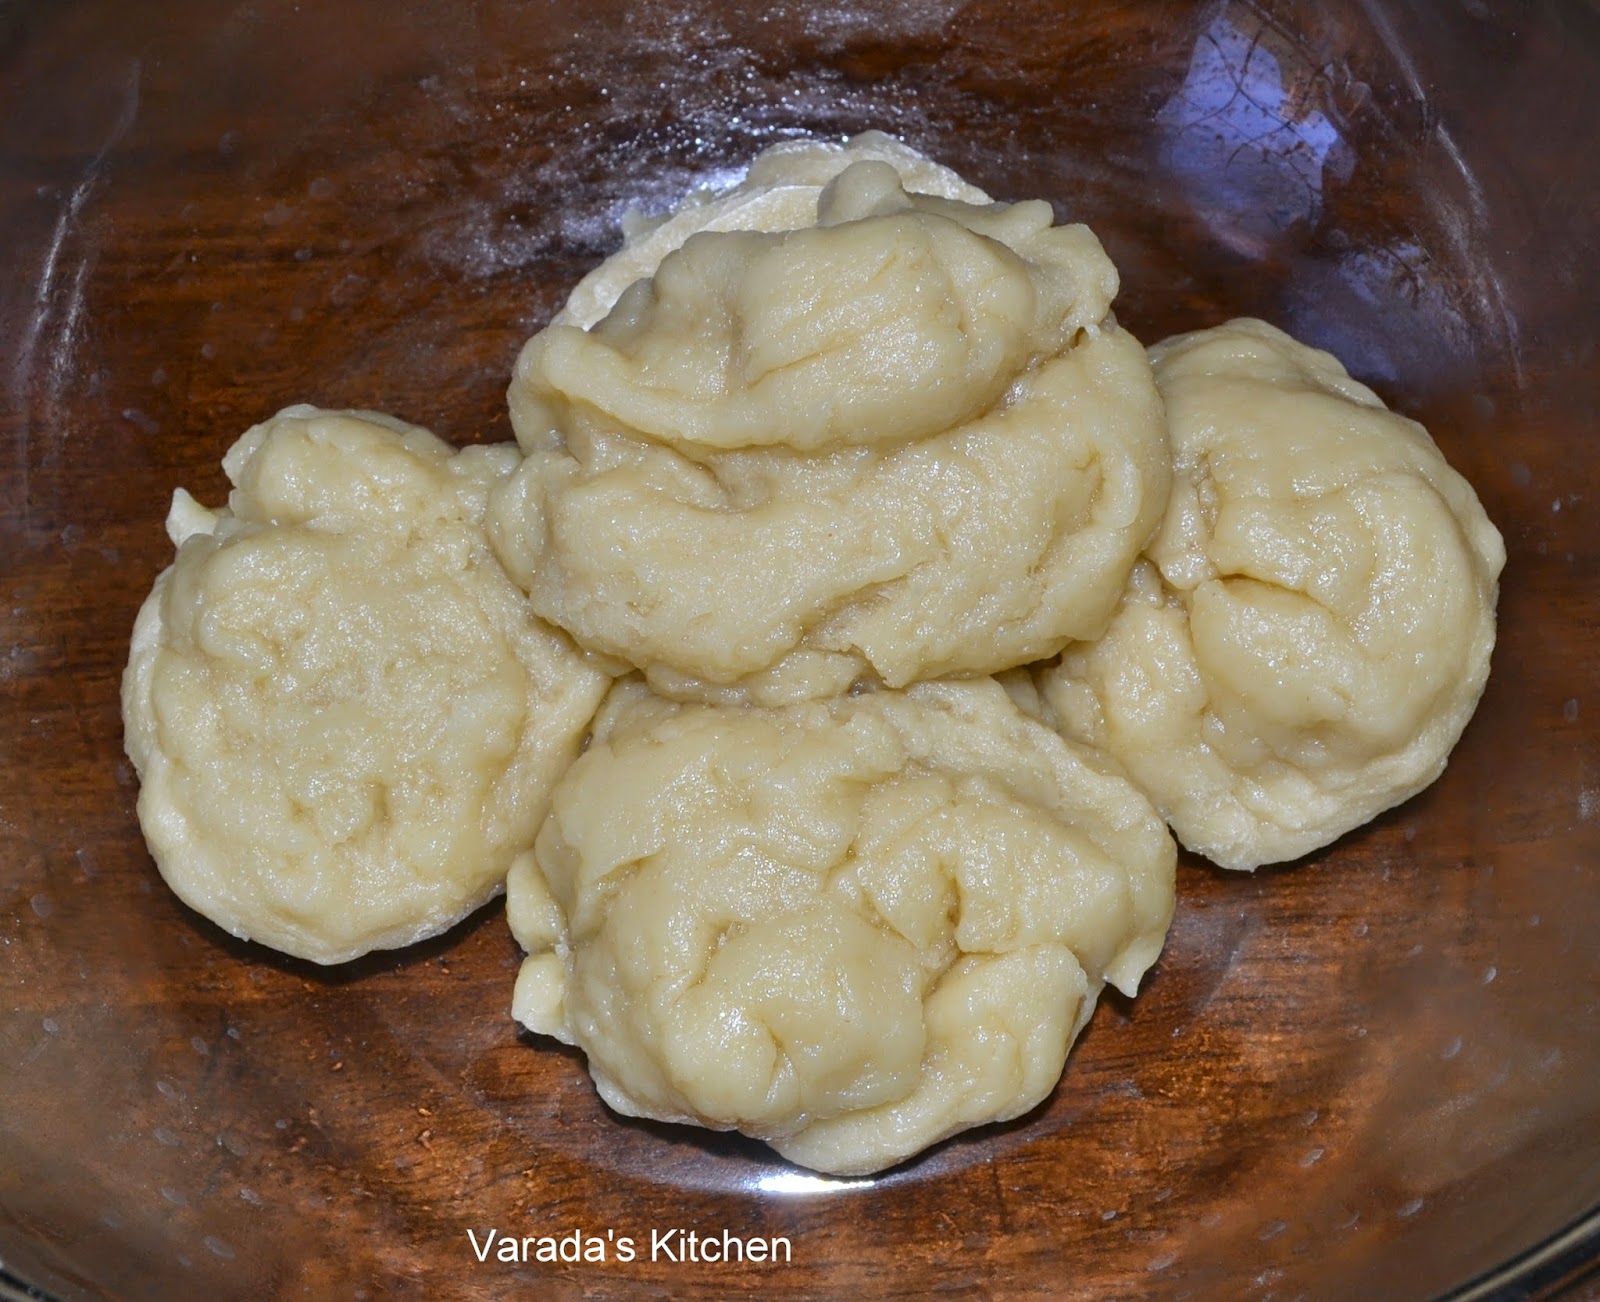
To make the shell, combine the semolina and all purpose flour in a bowl. Rub in the melted ghee. Using a little milk at a time form a ball of dough. Do not make the dough too soft. Reserve the remaining milk. Cover the dough and keep aside for an hour.
Meanwhile make the filling. Roast the shredded coconut taking care to ensure it down not brown. Take it off heat and place in a mining bowl. Next roast the poppy seeds in the same pan. Keep aside to cool when done. Next melt the ghee in the same pan and roast the semolina in it. Again, ensure it is well roasted without turning brown. Take it off heat and add it to the roasted coconut. Grind the roasted and cooled poppy seeds to a powder. Add them to the coconut along with the powdered sugar and cardamom powder. Mix it well and keep aside until needed.
After an hour break the dough into pieces and run it through the food processor. If it is too dry add a tablespoon of milk and run it again. It should be soft and pliable. If not add another tablespoon of milk and run it through again. Transfer the softened dough to the mixing bowl and knead a little. Cover with a moistened tea towel.
Preheat the oven to 375 F. Prepare a baking sheet with parchment paper. Pour a little
Break away a portion of dough the size of a large marble. Keep the rest of the dough covered. Knead the small portion of dough in the palm of your hand and place it on a work surface.
Using a rolling pin roll the dough to form a thin round disc.
Place the filling in the center. Moisten the perimeter with milk.
Fold the dough over to form a half moon shaped dumpling. Press it down with your fingers to seal.
Using a special decorative cutter cut the edges off. If you don't have a cutter use the tines of a fork to form a decorative edge.
Remove the discarded dough and place it separately from the rest of the dough under the tea towel. Place the prepared karanji on the baking sheet. Keep it covered and work with the rest of the dough. When the sheet is full brush the karanji with the milk and bake for 28-32 minutes or until brown. Flip them over once after 15-17 minutes. If you have sealed the edges right the karanji will puff up and stay that way.
Transfer to a cooling rack. Store in an airtight container when completely cooled.
Enjoy!
Showing posts with label Marathi Faral. Show all posts
Monday, October 20, 2014
Sunday, October 19, 2014
Baked Bhajani Chakli
I do not have the ability to mill grains so I started out with store bought flours. I roasted them separately and then combined them together with roasted coriander and cumin powder. Thereafter I followed the traditional process to prepare the dough. Once the dough was prepared I shaped the chakli and baked them.
Chakli is an integral part of the Diwali faral. It is one of the must have savory faral. I kept the chakli mild so we could all enjoy it.
You will need
Special equipment to shape the chakli
For the bhajani
3 cups rice flour
2 cups channa dal flour (besan or bengal gram flour)
1/2 cup urad dal flour
1/2 cup moong dal flour
1/2 cup coriander seeds
1/4 cup cumin seeds
For the chakli
3 cups water
2 tbsp. oil
1/4 cup sesame seeds
1 tbsp. ova (ajwain, carom seeds)
1 tsp. red chili pepper powder (optional)
2 tsp. salt (adjust to taste)1 tbsp. ova (ajwain, carom seeds)
1 tsp. red chili pepper powder (optional)
3 cups bhajani
For the chakli
Bring the water to a boil in a pan along with the oil, salt, sesame seeds and red chili pepper. Working quickly lower the heat and add the bhajani. Mix it well with the water for a couple of minutes. Take the pan off of the heat, cover and keep aside for half an hour. Knead the dough well or run it through a food processor until you have a soft pliable dough. Keep this dough covered with a moist tea towel while you work.
Preheat the oven to 350 F. Prepare a baking sheet with parchment paper. Prepare the chakli mold. Break off a lemon size ball of the dough. Knead well in the palm of your moistened hands. Place it inside the mold. Press the lever to form the chakli. Try not to make them too big so they are baked evenly. Continue until you fill the baking sheet.
Bake for 20-30 minutes flipping them over once after 10 minutes. Transfer to a cooling rack and continue with the remaining dough. Store in an airtight container when completely cooled.
Enjoy!
This is my entry for week three, day three of BM #45 for the theme Healthy tea time snacks. Check out the Blogging Marathon page for the other Blogging Marathoners doing BM#45.
Sunday, October 12, 2014
Bhajke Pohe Chivda (Flattened Rice Chivda / Poha Chivda)
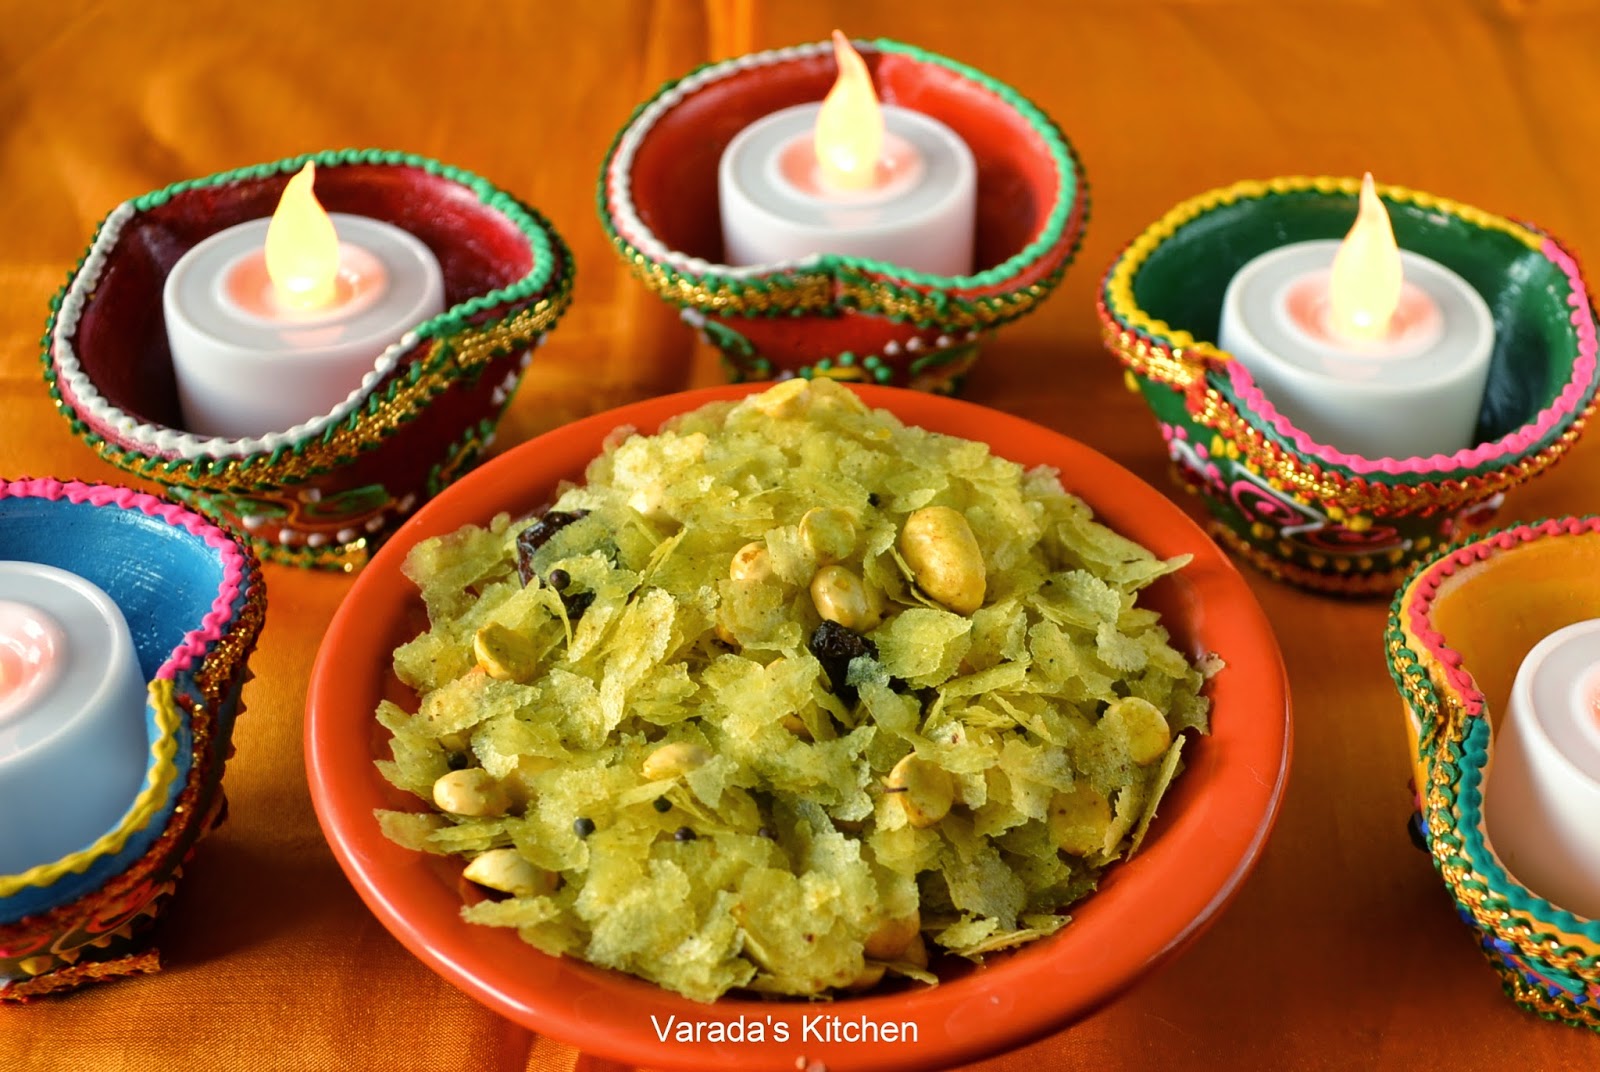
Chivda made with pohe or flattened rice is one of the favorite savory faral dishes on the Maharashtrian Diwali platter. This chiva is similar to churmure chivda, which is made with puffed rice.
I like to use thin pohe for this chivda. The pohe are spread on a flat tray or baking sheet and put out in the sun for a couple hours. Unfortunately, it was a rainy gloomy day when I made this chivda so I used the alternative. I preheated the oven to 200 F and put the baking sheet with the pohe in it for about an hour. During the last 10 minutes I started making the chivda. The pohe were warm and crisp when I needed them.
You will need
6 cups pohe
1/4 cup oil (I used olive oil)
1 tsp. mustard seeds
2 Serrano peppers, cut into 1/2 inch pieces along the length
7-8 curry leaves
juice of half a lime
1 cup daala (roasted yellow gram)
a handful raisins
1 tsp. sugar
If it is a sunny day and you are able to keep the pohe in the sun then put the pohe on a sheet, cover with a cloth or plastic sheet and keep in the sun for a couple hours. If keeping the pohe in the sun is not an option then preheat oven to 200 F. Spread the pohe on a baking sheet and put it in the oven for an hour. After every 15 minutes shake the pohe and put them back in the oven. The pohe will not change color, they will become crispy.
Gather all the ingredients needed for the chivda.
During the last 10 minutes of roasting the pohe start making the chivda. Heat oil in a deep pan and add the mustard seeds, the curry leaves and pieces of chilli pepper.
When the mustard seeds crackle add the lime juice and stand back. The lime juice will cause the oil to splatter. Once it stops add the turmeric powder, red chilli powder and salt. Mix well.
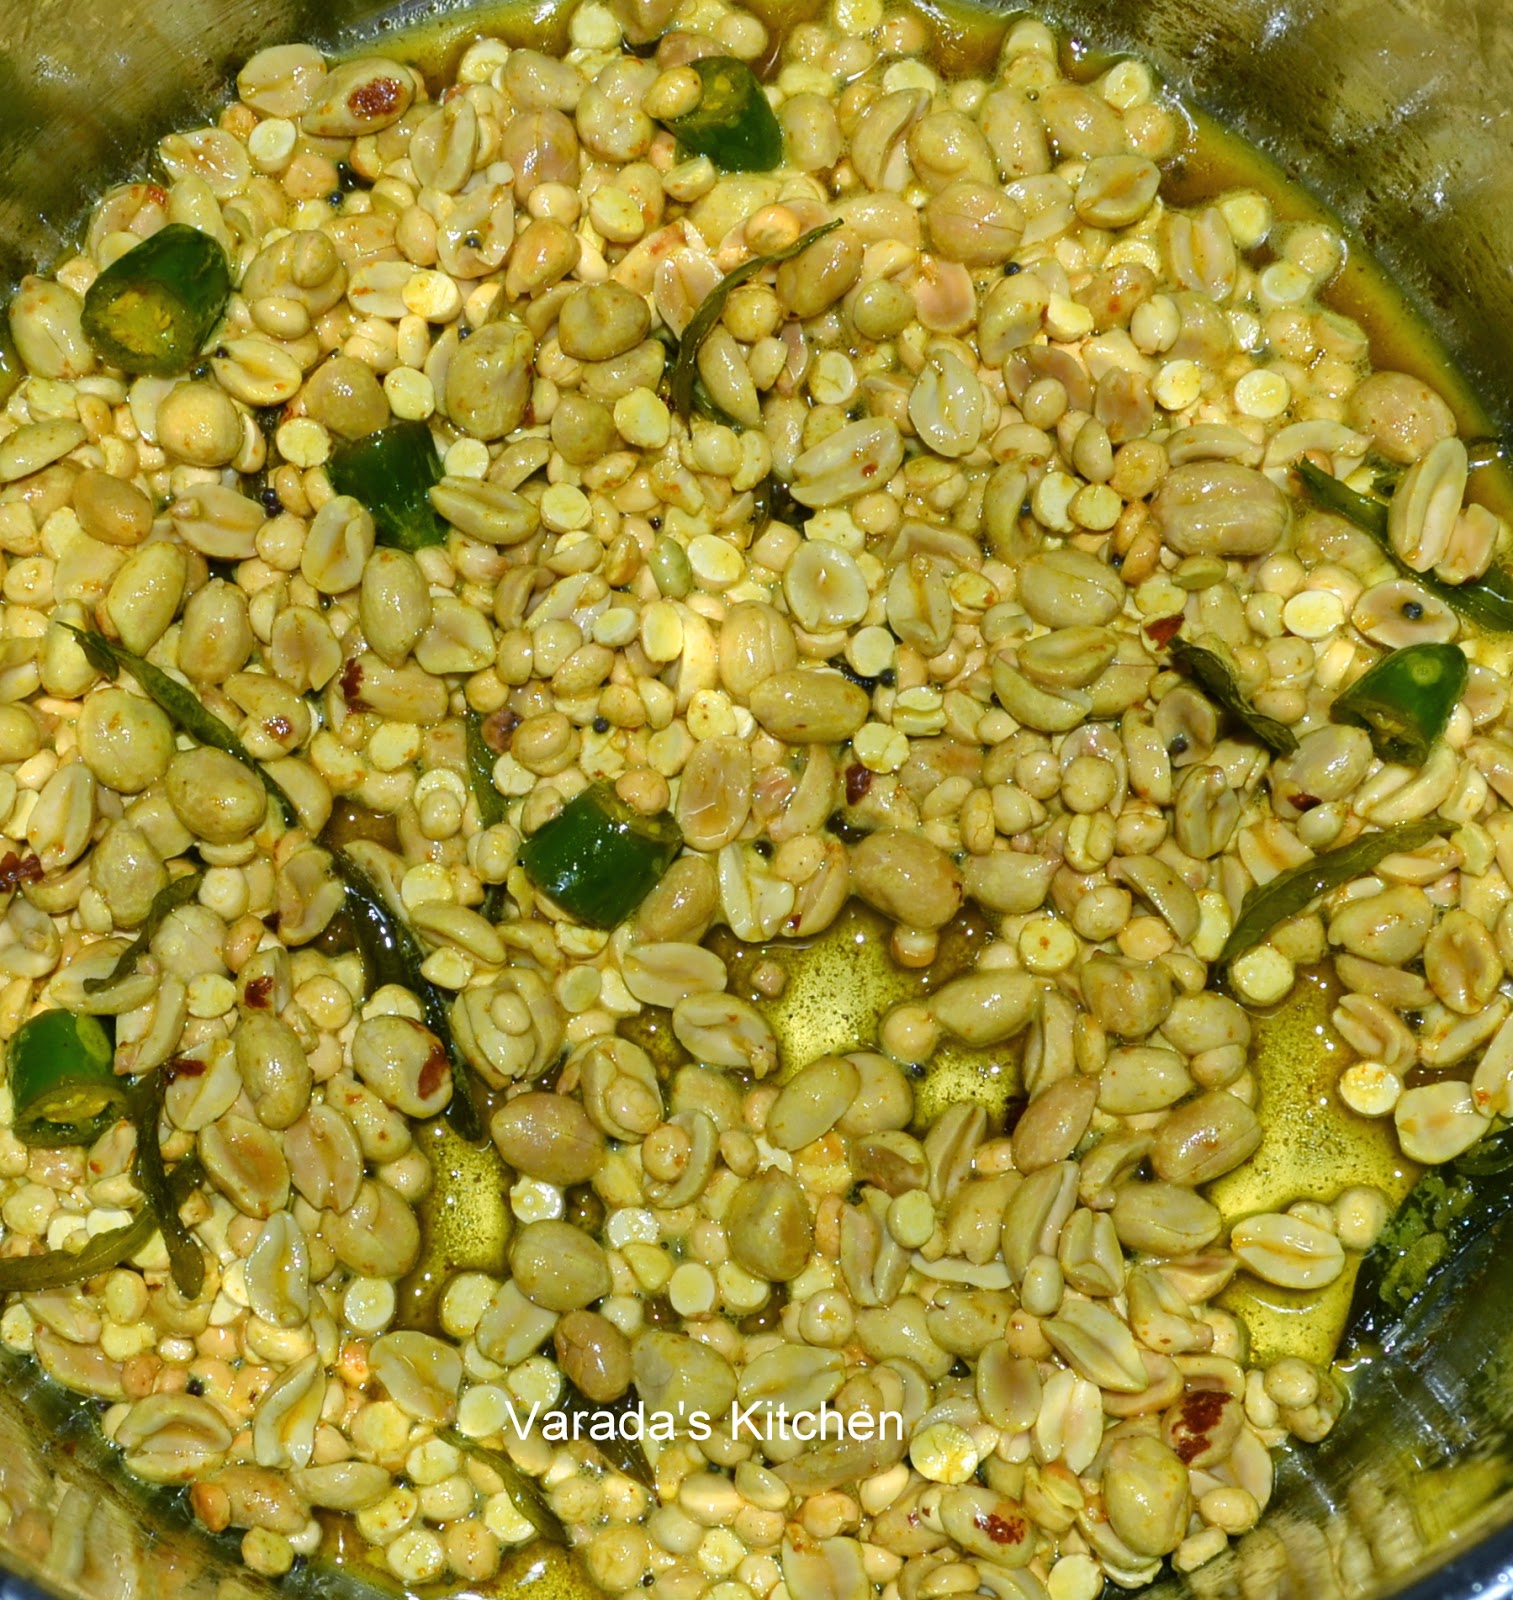
Now add the peanuts and saute them for a minute.
Add the daala (roasted yellow gram) and continue to saute for another minute.
Add the raisins and saute for a minute.
By this time the roasted pohe should be done. Add them to the pan along with the sugar. Turn off heat and working quickly mix everything together. Transfer to another container and allow to cool.
The chivda is ready!
Enjoy!
Note:
Turning off heat after adding the pohe and then transferring them to another container ensures that the chivda does not reek of oil.
I like to use thin pohe for this chivda. The pohe are spread on a flat tray or baking sheet and put out in the sun for a couple hours. Unfortunately, it was a rainy gloomy day when I made this chivda so I used the alternative. I preheated the oven to 200 F and put the baking sheet with the pohe in it for about an hour. During the last 10 minutes I started making the chivda. The pohe were warm and crisp when I needed them.
You will need
6 cups pohe
1/4 cup oil (I used olive oil)
1 tsp. mustard seeds
2 Serrano peppers, cut into 1/2 inch pieces along the length
7-8 curry leaves
juice of half a lime
1/2 tsp. turmeric powder
1/4 tsp. red chilli powder (I used paprika)
salt to taste
1 1/2 cups roasted unsalted peanuts1 cup daala (roasted yellow gram)
a handful raisins
1 tsp. sugar
If it is a sunny day and you are able to keep the pohe in the sun then put the pohe on a sheet, cover with a cloth or plastic sheet and keep in the sun for a couple hours. If keeping the pohe in the sun is not an option then preheat oven to 200 F. Spread the pohe on a baking sheet and put it in the oven for an hour. After every 15 minutes shake the pohe and put them back in the oven. The pohe will not change color, they will become crispy.
Gather all the ingredients needed for the chivda.
During the last 10 minutes of roasting the pohe start making the chivda. Heat oil in a deep pan and add the mustard seeds, the curry leaves and pieces of chilli pepper.
When the mustard seeds crackle add the lime juice and stand back. The lime juice will cause the oil to splatter. Once it stops add the turmeric powder, red chilli powder and salt. Mix well.
Now add the peanuts and saute them for a minute.
Add the daala (roasted yellow gram) and continue to saute for another minute.
Add the raisins and saute for a minute.
By this time the roasted pohe should be done. Add them to the pan along with the sugar. Turn off heat and working quickly mix everything together. Transfer to another container and allow to cool.
The chivda is ready!
Enjoy!
Note:
Turning off heat after adding the pohe and then transferring them to another container ensures that the chivda does not reek of oil.
Saturday, October 11, 2014
Microwave Besan Ladoo / Bengal Gram Flour Sweets
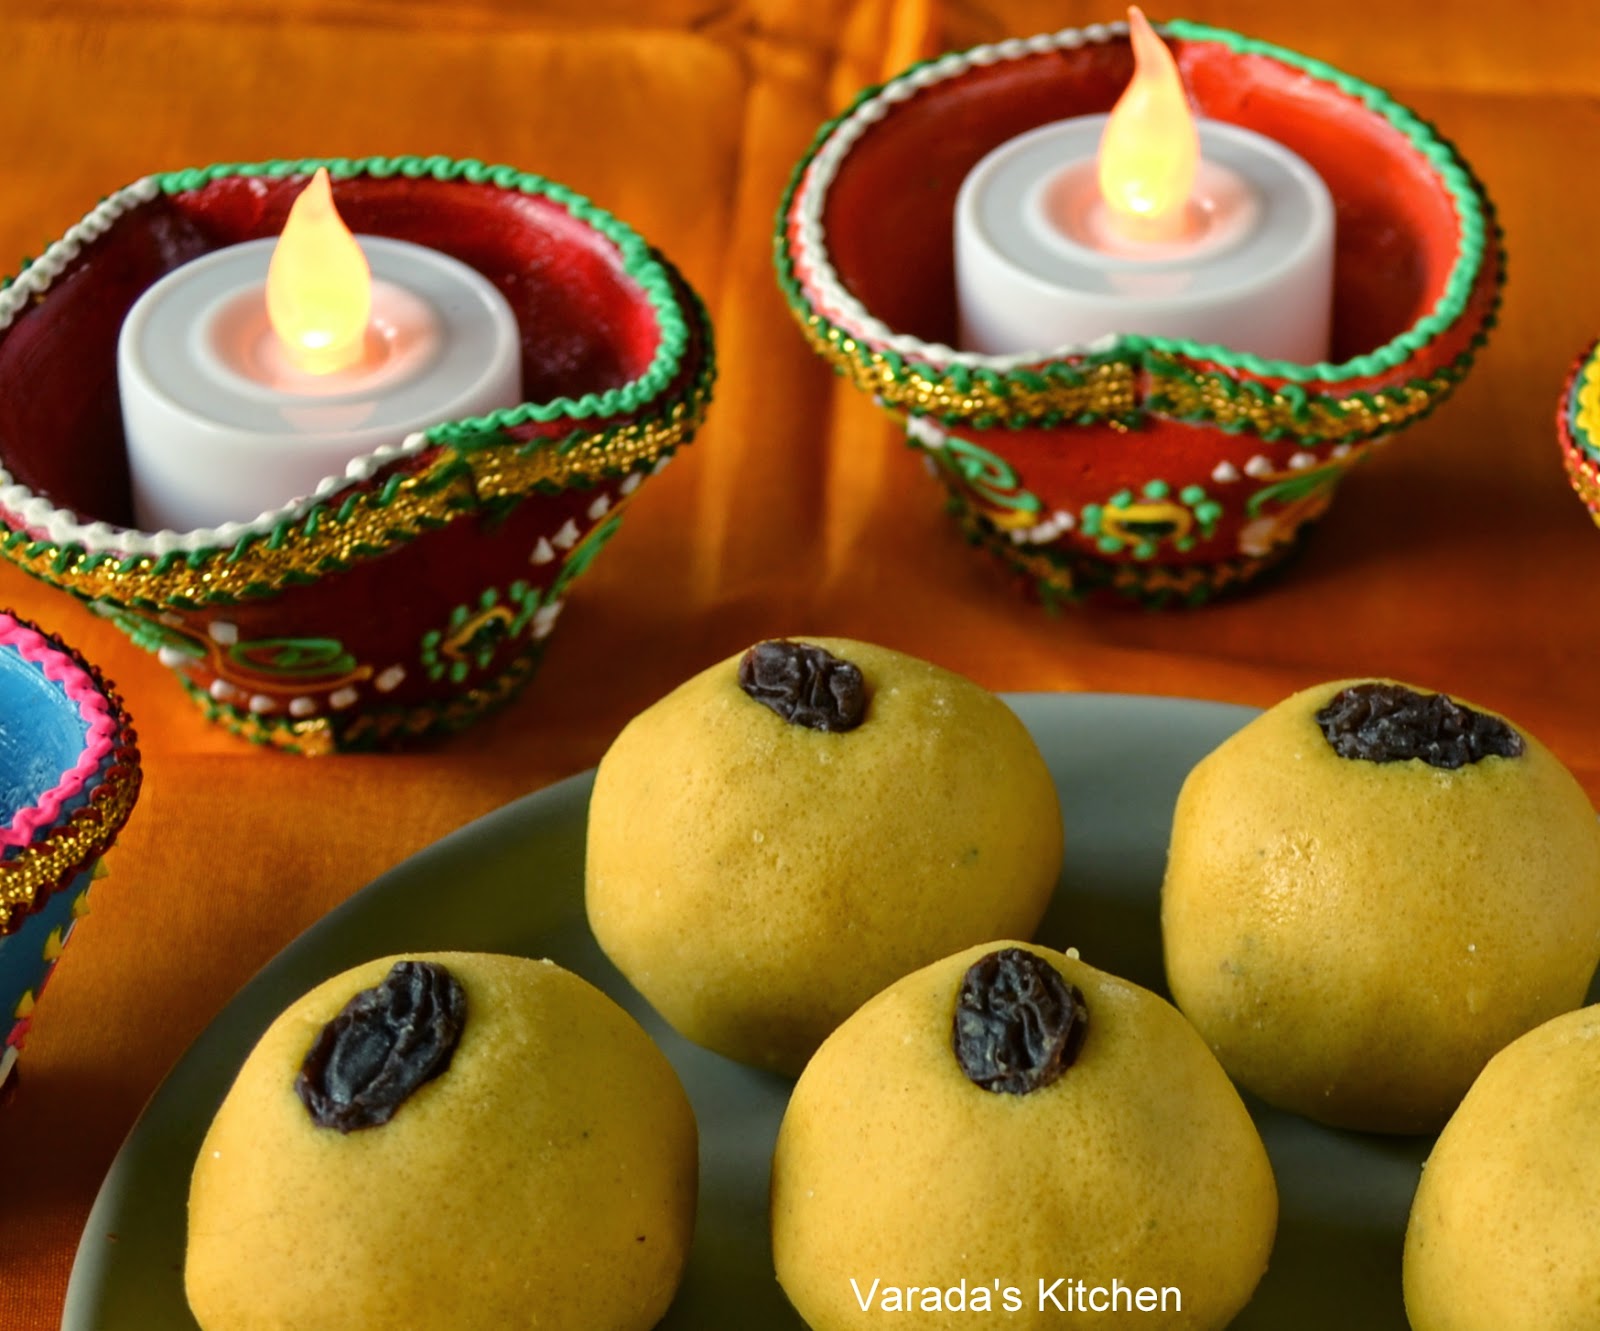
Besan ladoos are a staple on the Diwali faral menu. They are also one of the faral dishes that are frequently made all through the year. I love besan ladoos but I do not like the effort it takes to make them.
It takes a really long time to roast besan or bengal gram flour. The flour burns quickly so it has to be watched and roasted on low heat. This takes forever.
This microwave recipe make it easy to make delicious melt in your mouth besan ladoos. I love shortcuts so I make these often. Thanks to the magic of the microwave the kitchen smelled of cooked besan after just five minutes instead of the half hour of constant stirring on the stove top.
You will need
2 cup besan
1/4 cup ghee
1 cup powdered sugar (I use granulated sugar powdered in a blender)
15 raisins
5 cashews, split and cut in to pieces (I left them out as my daughter is not fond of nuts)
2 pods cardamom
Sift besan in a sifter. Shell and pound the cardamom seeds to a powder.
In a microwavable bowl melt the ghee by heating it in the microwave for about a minute. Mix in the besan using a fork.
Microwave the besan mixture for a minute. Take the bowl out and mix everything together again. This will prevent burning. Microwave for another 3 minutes taking the mixture out to mix together after every minute. Add the cashews and heat for another minute. The mixture should change color from a yellow to a light pumpkin. If needed place in the microwave for another minute.
Let the mixture cool down until it can be handled easily. Mix together using your palm and fingers until you can feel the ghee leaching out.
Combine the powdered sugar and cardamom with the cooked besan. Taking about 2 tablespoons of mixture at a time form a ball. Place a raisin on the top and continue to work the ball in your palm until the surface is smooth and shiny. Keep aside and repeat with the remaining mixture.
The ladoos are ready.
Note: If you like the ladoos really sweet increase the sugar by 2 tbsp.
This is my entry for week two, day two of BM #45 for the theme Festival Special. Check out the Blogging Marathon page for the other Blogging Marathoners doing BM#45.
It takes a really long time to roast besan or bengal gram flour. The flour burns quickly so it has to be watched and roasted on low heat. This takes forever.
This microwave recipe make it easy to make delicious melt in your mouth besan ladoos. I love shortcuts so I make these often. Thanks to the magic of the microwave the kitchen smelled of cooked besan after just five minutes instead of the half hour of constant stirring on the stove top.
You will need
2 cup besan
1/4 cup ghee
1 cup powdered sugar (I use granulated sugar powdered in a blender)
15 raisins
5 cashews, split and cut in to pieces (I left them out as my daughter is not fond of nuts)
2 pods cardamom
Sift besan in a sifter. Shell and pound the cardamom seeds to a powder.
In a microwavable bowl melt the ghee by heating it in the microwave for about a minute. Mix in the besan using a fork.
Microwave the besan mixture for a minute. Take the bowl out and mix everything together again. This will prevent burning. Microwave for another 3 minutes taking the mixture out to mix together after every minute. Add the cashews and heat for another minute. The mixture should change color from a yellow to a light pumpkin. If needed place in the microwave for another minute.
Let the mixture cool down until it can be handled easily. Mix together using your palm and fingers until you can feel the ghee leaching out.
Combine the powdered sugar and cardamom with the cooked besan. Taking about 2 tablespoons of mixture at a time form a ball. Place a raisin on the top and continue to work the ball in your palm until the surface is smooth and shiny. Keep aside and repeat with the remaining mixture.
The ladoos are ready.
Note: If you like the ladoos really sweet increase the sugar by 2 tbsp.
This is my entry for week two, day two of BM #45 for the theme Festival Special. Check out the Blogging Marathon page for the other Blogging Marathoners doing BM#45.
Friday, October 10, 2014
Baked Shankarpale
Shankarpale are the diamond shaped sweet cookies that are a part of every Marathi family's Diwali faral. They go very well with the other Diwali staples like chakli, karanji and chivda. They are also a great snack on their own. However, shankarpale along with most other faral recipes made for Diwali are deep fried! In my kitchen, I have put a moratorium on deep fried foods.
I knew I could not bring myself to deep fry the Diwali faral. I had to find an alternate solution for my dilemma. A few months ago I had made baked matar karanji, another Maharastrian deep fried favorite. We liked it a lot. So it was natural I try a baked version of the shankarpale.
I had to experiment to fine tune this recipe and run a few tests before I was able to find the right baking temperature. I first tried 350 F for 9-12 minutes on each side. But the shankarpale had an aftertaste of flour. The color was fine but they were not cooked through. Next I reduced the temperature to 300 F and increased the time to 12-15 minutes on the first side and 9 minutes on the second side. These were better but not the best. The last test was to keep the temperature at 300 F and bake on the first side for 22-28 minutes. The second side was baked for 9 minutes. Perfection!
The ingredients and process of shaping are identical to the traditional recipe. The difference is in how they are cooked.
You will need (for 5 cups of shankarpale)
1/2 cup water
1/2 cup oil (or melted ghee / clarified butter)
1/2 cup + 2 tbsp. sugar
2.5 cups + 2 tbsp. all purpose flour
a pinch salt
pastry cutter or sharp serrated knife
In a pan combine the water, oil and sugar. Put it on medium heat.
The sugar will dissolve and you will begin to see tiny bubbles on the bottom. Just before the mixture comes to a boil turn of the heat. DO NOT LET IT BOIL.
Pour the mixture in a wide bowl. You want to let it cool to a temperature that comfortable to touch but is still warm. Sift and mix the flour into the mixture a little at a time. When all the flour has been incorporated knead the dough well. I put it in my food processor and pulse, you could use an electric mixture with a dough hook. Transfer the soft dough to the bowl and cover with a wet tea cloth.
Preheat the oven to 300 F. Divide the dough into tangerine sized portions. I got five. Work with one portion at a time keeping the rest covered with the towel.
Roll out the dough into a 1/4 inch thick disc. If sticky use a drop of oil. Do not use flour.
Using the pastry cutter cut the disc in a criss cross pattern to form diamonds. Collect the pieces and place them under the tea towel. Repeat with the remaining discs.
Place a parchment paper on a cookie sheet. Place the shaped shankaerpale in a single layer on the sheet. Bake for 22-28 minutes until the bottom is browned evenly. Quickly flip the shankarpale over and put them back in the oven for another 6-9 minutes or until the underside is browned.
Take the shankarpale out of the oven and leave them on the sheet for a minute or two. Transfer to a paper towel lined bowl and allow them to cool. Store them in an airtight container once they are completely cooled. They should last 2-3 weeks.
Enjoy!
This is my entry for week two, day one of BM #45 for the theme Festival Special. Check out the Blogging Marathon page for the other Blogging Marathoners doing BM#45.
I knew I could not bring myself to deep fry the Diwali faral. I had to find an alternate solution for my dilemma. A few months ago I had made baked matar karanji, another Maharastrian deep fried favorite. We liked it a lot. So it was natural I try a baked version of the shankarpale.
I had to experiment to fine tune this recipe and run a few tests before I was able to find the right baking temperature. I first tried 350 F for 9-12 minutes on each side. But the shankarpale had an aftertaste of flour. The color was fine but they were not cooked through. Next I reduced the temperature to 300 F and increased the time to 12-15 minutes on the first side and 9 minutes on the second side. These were better but not the best. The last test was to keep the temperature at 300 F and bake on the first side for 22-28 minutes. The second side was baked for 9 minutes. Perfection!
The ingredients and process of shaping are identical to the traditional recipe. The difference is in how they are cooked.
You will need (for 5 cups of shankarpale)
1/2 cup water
1/2 cup oil (or melted ghee / clarified butter)
1/2 cup + 2 tbsp. sugar
2.5 cups + 2 tbsp. all purpose flour
a pinch salt
pastry cutter or sharp serrated knife
In a pan combine the water, oil and sugar. Put it on medium heat.
The sugar will dissolve and you will begin to see tiny bubbles on the bottom. Just before the mixture comes to a boil turn of the heat. DO NOT LET IT BOIL.
Pour the mixture in a wide bowl. You want to let it cool to a temperature that comfortable to touch but is still warm. Sift and mix the flour into the mixture a little at a time. When all the flour has been incorporated knead the dough well. I put it in my food processor and pulse, you could use an electric mixture with a dough hook. Transfer the soft dough to the bowl and cover with a wet tea cloth.
Preheat the oven to 300 F. Divide the dough into tangerine sized portions. I got five. Work with one portion at a time keeping the rest covered with the towel.
Using the pastry cutter cut the disc in a criss cross pattern to form diamonds. Collect the pieces and place them under the tea towel. Repeat with the remaining discs.
Place a parchment paper on a cookie sheet. Place the shaped shankaerpale in a single layer on the sheet. Bake for 22-28 minutes until the bottom is browned evenly. Quickly flip the shankarpale over and put them back in the oven for another 6-9 minutes or until the underside is browned.
Take the shankarpale out of the oven and leave them on the sheet for a minute or two. Transfer to a paper towel lined bowl and allow them to cool. Store them in an airtight container once they are completely cooled. They should last 2-3 weeks.
Enjoy!
This is my entry for week two, day one of BM #45 for the theme Festival Special. Check out the Blogging Marathon page for the other Blogging Marathoners doing BM#45.
Tuesday, January 14, 2014
Tilgul for Sankrant (Sesame seeds and Peanut wadi)
Today is Sankrant. It is the day the sun begins its journey from the southernmost point as seen from the earth towards the north. It is celebrated on the 14th of January every year. Sankrant is the rare Hindu festival that is celebrated by the Solar calendar.
My earliest memories of Sankrant, is memory of tilgul. The smell of roasted sesame seeds and peanut with cardamom. In Goa, it is also a memory of a big event on the social calendar. Women dressed up in fine sarees visiting their neighbors to exchange tilgul and other sweets. It is a memory of happy times.
This is my grandmother's recipe. The resulting tilgul is melt in your mouth soft and smells really good. I have never enjoyed the jaw breakers that are made in the name of tilgul. My mother, and my grandmother before her, used jaggery. I use white polished sesame seeds. You could use the unpolished brown sesame seeds too.
You will need
2 cups sesame seeds, roasted and ground coarsely
1 cup peanuts, roasted and ground coarsely
1 cup packed jaggery
1 tbsp. ghee (clarified butter)
2 tbsp. water
6 cardamon pods
Prepare a baking sheet with edges or similar flat surface by rubbing it with a little ghee. Keep aside. Shell the cardamom pods and pound the seeds. Keep aside.
Heat the jaggery, ghee and water in a pan until the sugar melts. Let it come to a boil. As soon as it starts to bubble turn off the heat. Add the powdered sesame seeds, peanuts and cardamom. Mix well. Transfer it to the baking sheet. Using the moistened bottom of a glass pat down the mixture in a level 1 to 2 inch thick layer. Cut it into 2 inch squares and let them rest for 15-20 minutes. Using a spatula remove the squares and store in a air tight container. The tilgul last for 2-3 weeks.
This is my grandmother's recipe. The resulting tilgul is melt in your mouth soft and smells really good. I have never enjoyed the jaw breakers that are made in the name of tilgul. My mother, and my grandmother before her, used jaggery. I use white polished sesame seeds. You could use the unpolished brown sesame seeds too.
You will need
2 cups sesame seeds, roasted and ground coarsely
1 cup peanuts, roasted and ground coarsely
1 cup packed jaggery
1 tbsp. ghee (clarified butter)
2 tbsp. water
6 cardamon pods
Prepare a baking sheet with edges or similar flat surface by rubbing it with a little ghee. Keep aside. Shell the cardamom pods and pound the seeds. Keep aside.
Heat the jaggery, ghee and water in a pan until the sugar melts. Let it come to a boil. As soon as it starts to bubble turn off the heat. Add the powdered sesame seeds, peanuts and cardamom. Mix well. Transfer it to the baking sheet. Using the moistened bottom of a glass pat down the mixture in a level 1 to 2 inch thick layer. Cut it into 2 inch squares and let them rest for 15-20 minutes. Using a spatula remove the squares and store in a air tight container. The tilgul last for 2-3 weeks.
Subscribe to:
Posts (Atom)