Showing posts with label Sourdough or Leaven. Show all posts

Monday, December 17, 2018

Edible Lattice Bread Basket

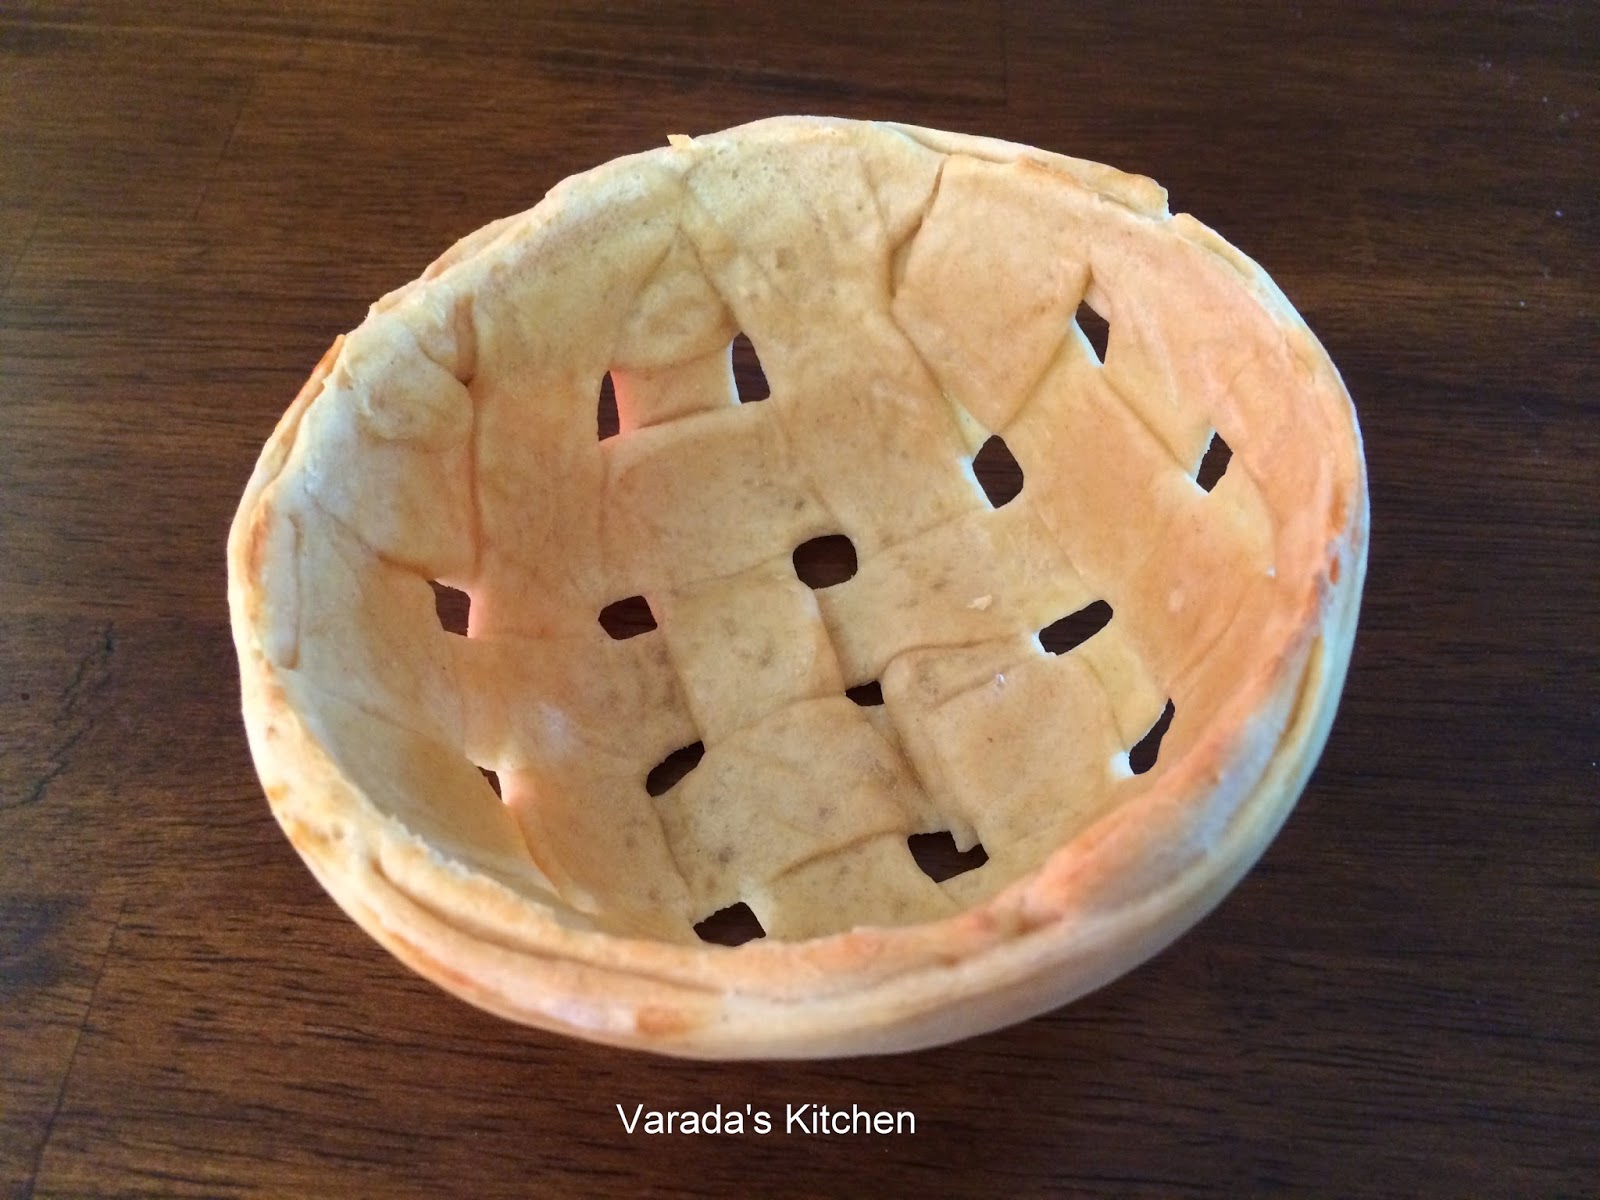
I few years back I baked two woven bread baskets. I have since found this edible spring basket referenced in a few easter articles. Both of my earlier versions of baskets used ropes and the weave was tight. I was very happy with those baskets but I wanted to try something different. I wanted a make a basket with open holes that looked like it was part of the weave. This is what I came up with.


This basket was not made with ropes. Instead I made the lattice using flat strips of dough. I used a different technique with the weave. Instead of weaving it on the mold I wove it on a flat surface and then transferred it to the mold. This caused the holes to form in between the strips something I was looking for. In the end I was very happy with the result.


This basket is a lot easier to make than the two I made before. It is much smaller and uses a small amount of dough. The weaving technique is simpler too. I used my sourdough starter for this recipe but you could use commercial yeast if you wanted to. If you use commercial yeast refer to this basic dough recipe to prepare your dough.

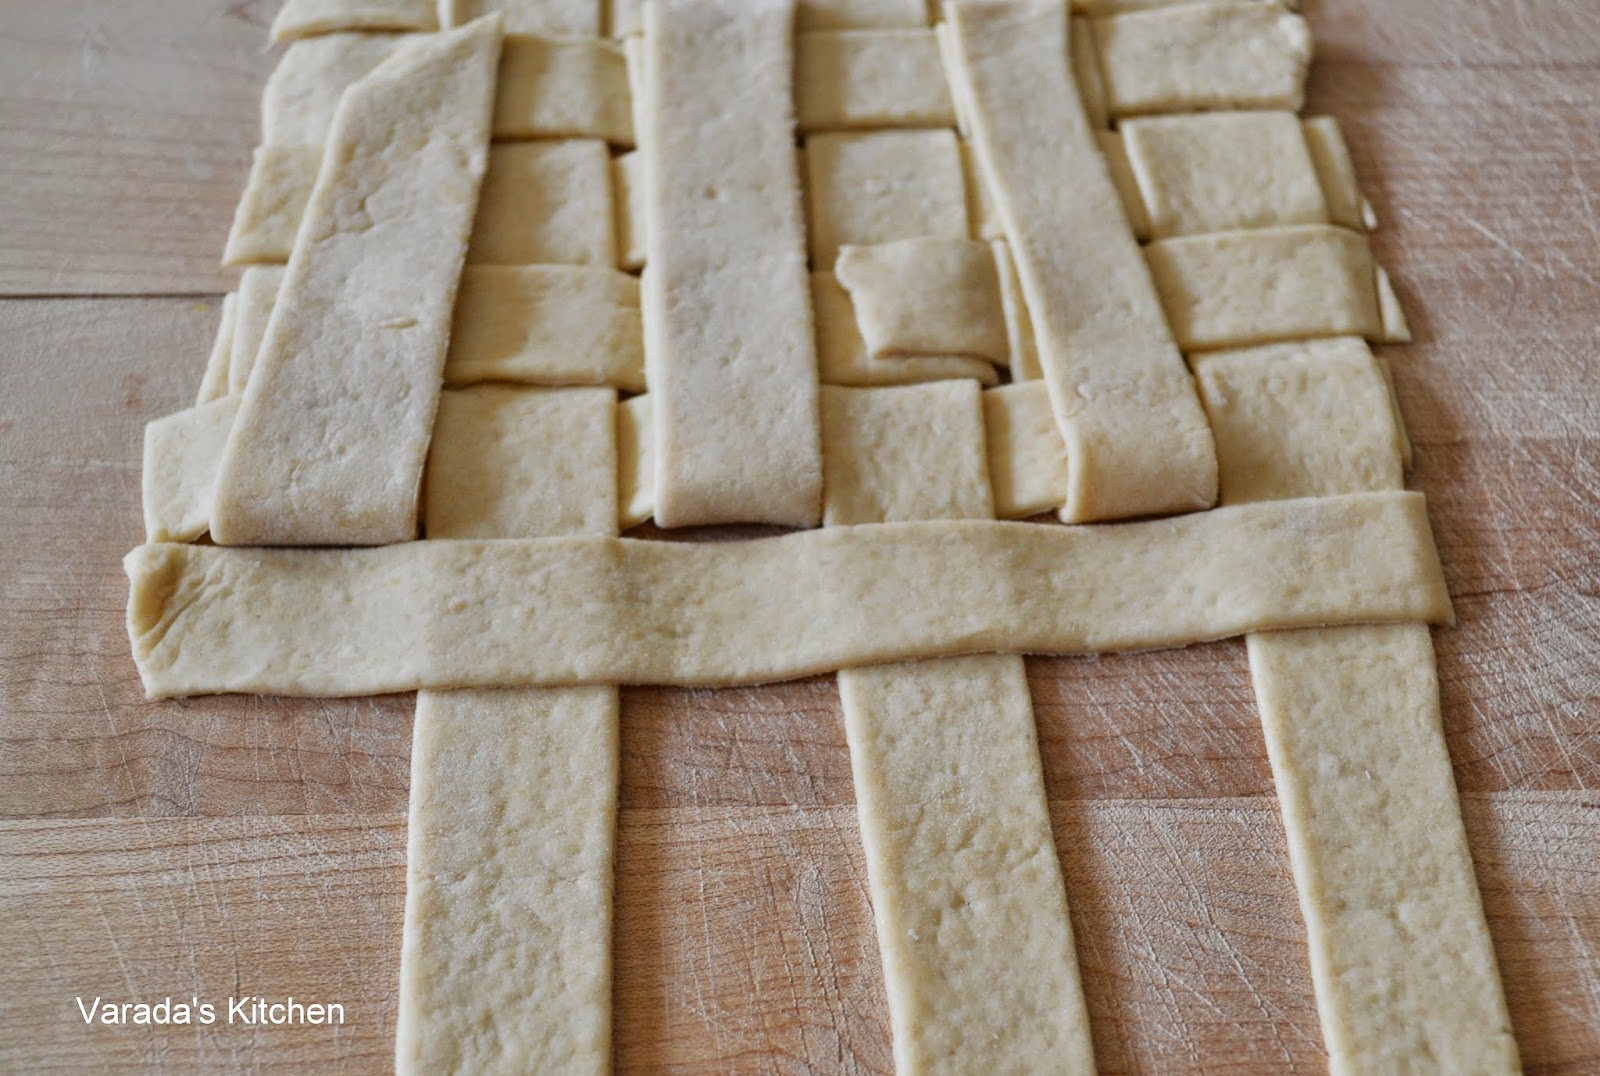
Roll out a large rectangle from the dough. Using a small custard or similar bowl to ensure you have coverage cut a portion of the rectangle as the base (portion on left below). Cut this rectangle into wide strips being careful not to cut all the way through. Cut the remaining dough into wide strips cutting all the way through. These strips are to be used for weaving.


Preheat the oven to 375 F. On the base fold back alternating strips. Place a strip horizontally such that it covers end to end. Unfold the folded strips. Now fold back the other set of alternating strips and place a weaving strip horizontally.


Continue working the weave until you get to the end. Cover the outside of the bowl with foil. Place the woven lattice over the bowl taking care to see it does not unravel. Cut off the access.


Trim the edges to get a smooth edge around the edge of the bowl.


Using the discarded dough roll out a strip long enough to circle the edge of the bowl with a little overlap. Trim the strip to get neat edges and place it around the bowl. Seal the ends together by pressing the overlapping ends over one another.


Place the bowl on a baking sheet and bake for 10-15 minutes. The bowl should begin to brown slightly. Allow it to cool on a rack for a few minutes. Unfold the foil over the bowl and remove the bowl carefully. Now carefully peel off the foil from the bread.


Enjoy!

Wednesday, December 5, 2018

No Knead Light Sourdough Wheat Loaf

Last week I had the sudden urge to have sandwiches for breakfast. I decided to bake myself a loaf of bread. I got some fresh squeezed orange juice from Whole Foods to go along with the breakfast sandwiches. I put the sourdough starter out on the counter top to come to room temperature and bubble up. That is when I realized my favorite loaf recipe uses commercial yeast. I don't buy that stuff anymore so I decide to convert my old recipe to use the starter instead.


In case you are not into baking with sourdough here is the original recipe. It is simple and makes a super flavorful loaf. Do not get intimidated with the time it takes. That is what makes it so flavorful.


I followed these instructions that I had written up long ago to convert recipes to sourdough. The original recipe I had was in cup measure so I converted it to weight. I got 560 gm of flour and 430 gm water. Once you have these two numbers you can easily convert the recipe. If you are interested the math is as follows: First I calculated 40% of 560 and got 112 or round to 110. This is the weight of starter needed for this recipe. Since my starter is 50% flour and 50% water I reduce both water and flour by 110/2 which is 55 gm. My new flour by weight is 560-55=505 gm or rounded to 500 gm. The water needed by weight is 430-55=375 gm.

You will need for 1 loaf
110 gm 100% sourdough starter
505 gm flour (I used whole wheat flour, you can use 50% all purpose or any combination)
375 gm water
10 gm salt
3 tbsp. oil (vegetable oil or olive oil)

Mix all the ingredients in a bowl and keep aside. After 15 minutes, reach over the far side of the dough and pull it over the top. Turn the bowl 45 degrees and repeat. Repeat two more time and keep aside. Fold and turn every 15 minutes another 3 times. Cover the bowl and let it rest for 4-6 hours.


Keep you loaf pan ready. Remove the dough from the bowl to a floured working surface. Fold over from both sides and place seam side down in the loaf pan. Cover and place in the refrigerator overnight.

When you are ready to bake preheat the oven to 375 F. When the oven is heated remove the loaf from the refrigerator and take off the cover. Score the top of the loaf with a sharp blade or knife. Sprinkle a little flour over the top to add some interest. Bake for 50-60 minutes. Check after about 30 minutes and if the top is browning too quickly, tent it with foil.

Take the loaf out of the oven and let it sit for a couple minutes. Slide the loaf out of the pan and cool it on a cooling rack.


Slice and enjoy!

Tuesday, April 7, 2015

100% Whole Wheat Sourdough Soft Dinner Rolls

Dinner rolls or pieces of bread to accompany dinner go as far back as recorded history. In fact in a lot of countries even today people make some kind of bread to accompany dinner. Dinner rolls can be baked spaced apart from each other or placed next to each other in one pan. The latter is called laadi pav in India and is made famous by Pav Bhaji.


I have two types of dinner rolls in this space. I have the 100 % whole wheat eggless and the 50% whole wheat eggless. Both use commercial yeast. I realized I had not posted this sourdough recipe. I made these as the base for the vegetarian sliders. Though the tops of the buns did not brown visibly the texture was soft with an even crumb.


You will need
You will need for 9 pav
200 gm 80% sourdough starter
400 gm water
40 gm olive oil
660 gm bread flour
16 gm salt

Combine all the ingredients in a mixing bowl and form a soft dough. The dough will be a little sticky and wet. Cover and keep aside for half and hour.


Stretch and fold the dough to strengthen it over the next hour. Reach over the far side of the dough, pull it up and fold over the top towards you. Make a quarter and repeat until you have gone all the way around twice. This is one turn. Repeat with two more turns spacing them half an hour apart. The dough will become smooth and elastic by the time you are done. Cover and keep aside for 6 hours. Divide into 9 portions and shape each one as a ball. Place in a parchment covered baking sheet with sides. Cover and keep refrigerated overnight.


The next morning you are ready to bake at any time. Leave the dough in the refrigerator until the oven is preheated and ready. Preheat at 350 F.


Place the baking sheet into the oven straight from the refrigerator. Bake for 30-40 minutes or until cooked and a toothpick inserted in the center comes out clean. These buns will not brown as much. Take them out of the oven and on to a cooling rack for about 5 minutes. Serve hot.


Enjoy!

Monday, December 1, 2014

Sourdough Whole Wheat and Rye Boule

For the longest time I would drool over the artisan loaves online and in real bakeries. I wanted that bread coming out of my oven. But I had no clue how to go about baking bread that looked as appealing as it tasted. Then earlier this year I learnt about sourdough artisan bread. I found a group of bakers who were willing to help a newbie like me. They were baking the kind of artisan loaf I wanted to bake. A loaf with good oven spring, color, shape and score lines. And of course open crumb when cut.


To bake artisan bread I had to get over a few hurdles. I needed a starter. Then I needed to learn the basic artisan baking technique - recipes that use nothing but flour, water, salt and sourdough starter. Some hurdles I created for myself. I knew that these loaves are baked at very high temperatures but I was afraid to crank up the oven past 475F. I few online friends talked me out of this fear last week and I agreed to set the oven at 500 F. Nothing bad happened. The last hurdle was scoring. Without scoring I would never bake the beautiful loaves that I admired so much.


Recently I got a very useful tip online. Using a sharp razor blade to score the shaped dough works just as well as an expensive lame. I knew that the score lines should be deep enough to cut the surface but not so deep as to scar the bread. A razor blade held almost horizontal to the surface does the job. This sourdough whole wheat and rye bread is the result of my ongoing experiments.

You will need the following bakers percentage
50% white whole wheat flour
10% rye flour
40% all purpose flour
82% water
2% salt
10% fed starter

Refresh your starter as given here. I used 100 gm of fed starter. In a large mixing bowl mix together all the flours and water. Let it rest for half and hour.

Add the salt and the fed starter and mix together well. You may need to break up the dough with your fingers and reform it again a couple times to get all the salt and starter incorporated. Cover and keep aside.

Refer to this recipe for details on how to fold, turn and then shape the dough.

Over the next hour and a half fold and turn the dough three times. Let it rise covered for another hour and a half.

Flour a working surface and transfer the dough to the surface. Shape the dough as a boule. Transfer to a clean bowl seam side down. Cover and keep refrigerated overnight.

Next morning preheat the oven to 500 F along with the dutch oven. When the oven is preheated removed the shaped loaf from the refrigerator. Transfer it to a work surface. Using a sharp razor blade score a pattern of your choice.


Remove the dutch oven carefully from the oven. It will be very hot. Drop the loaf in the oven. I use a parchment paper on the bottom. Cover and return it to the oven as quickly as possible. Let it bake covered for 15-20 minutes. Remove the cover and allow the loaf to bake/brown for another 15-20 minutes.


Transfer to a cooling rack. Let it cool completely before you slice it.


Enjoy!


Tuesday, November 18, 2014

Vegetarian Calzone

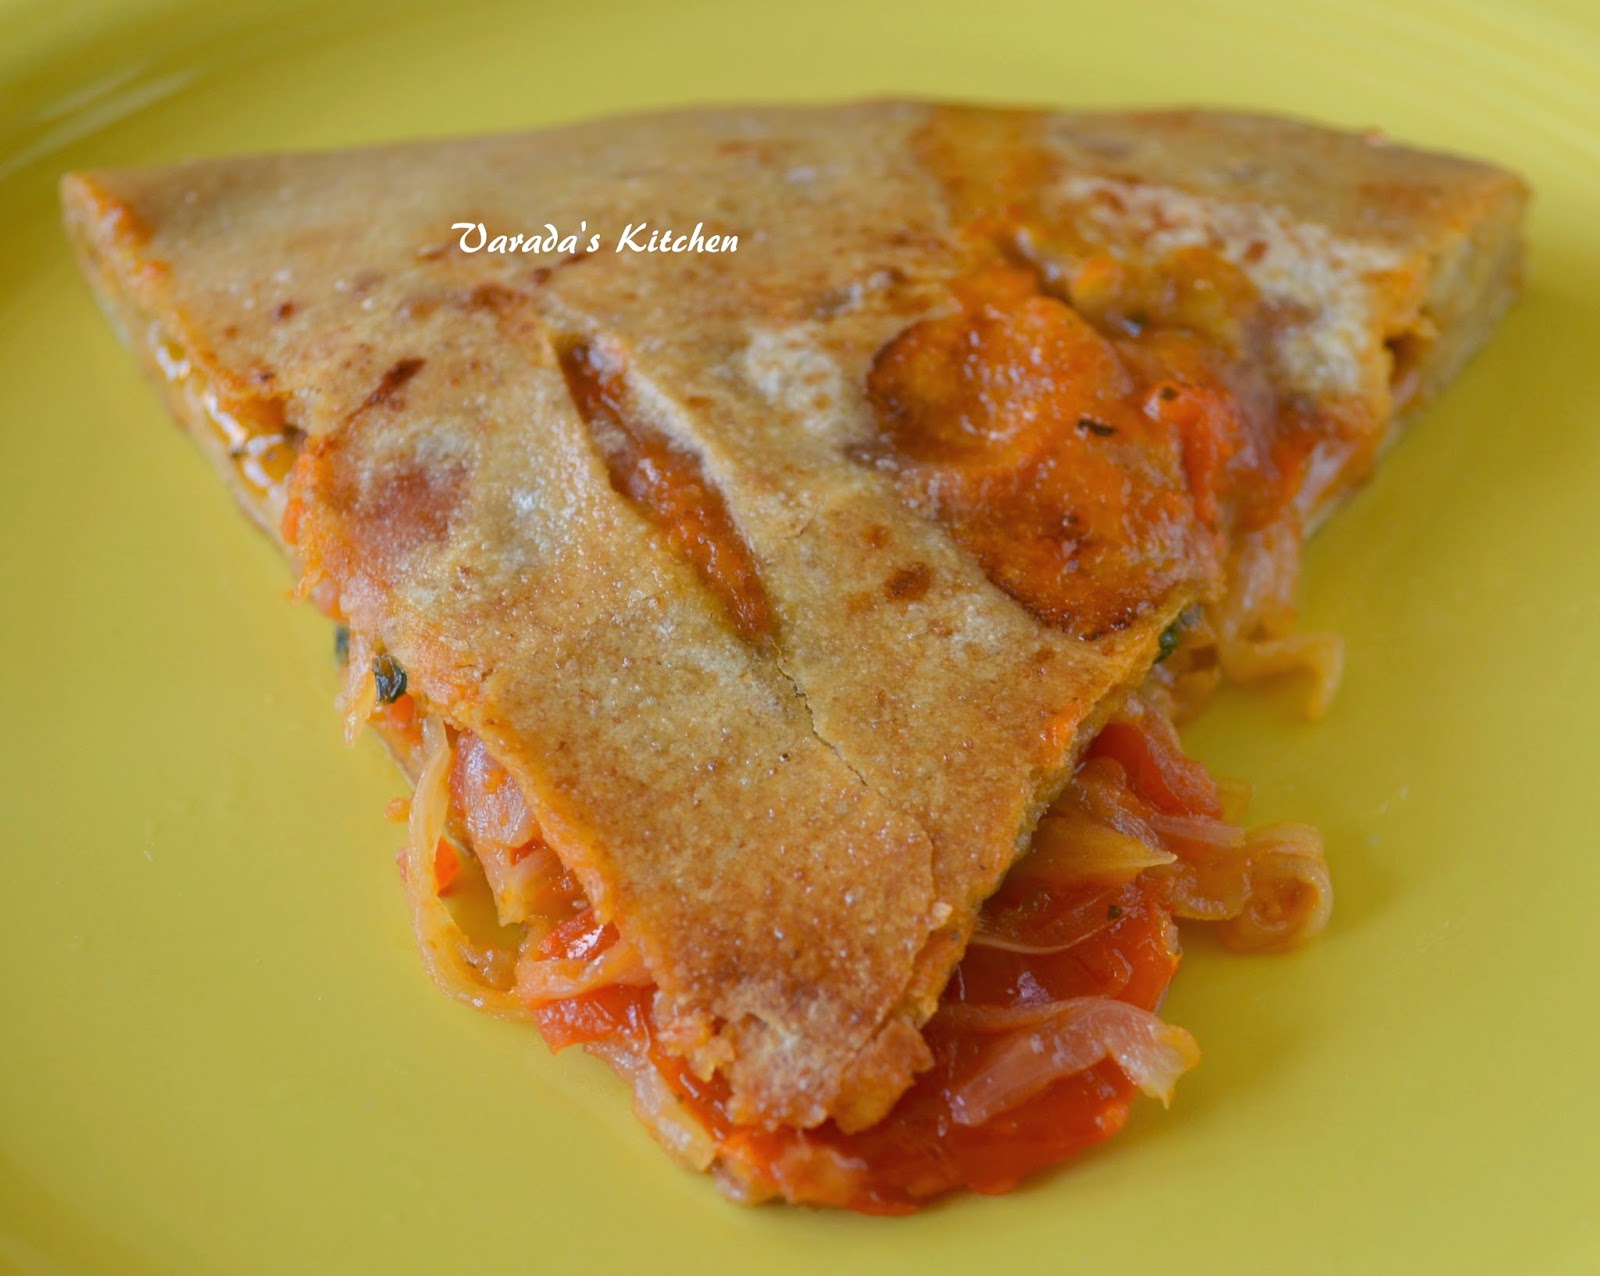
Calzone is a pizza folded in half with the stuffing inside. I make calzones as a variation of pizza and bake them in my cast iron pan. My daughter loves them. In fact she was so hungry when I made these, I forgot to press the edges with the tines of the fork to give it a decorative edge. There was no difference in taste, though, and the calzone was gone pretty quickly.


I use the same wild yeast leavened dough as I use for my regular pizza. The taste is great and filling choices are endless.You can use any vegetables you like. Since the dough is folded in half you can vegetables that you might no use on regular pizza. It is a lot easier to use mozzarella cheese as you do not have to watch it as much as you do on a regular pizza. Just add a little shredded cheese and pizza sauce with the vegetables. I used my go to recipe for pizza sauce.


Calzones are very filling as they have close to twice the quantity of dough in each slice. Making thin crust helps in reducing the amount of dough.

You will need
200 gm ball of pizza dough (I used this recipe)
1 medium onion
12-15 leaves spinach
1 tomato
3 tbsp pizza sauce
3 tbsp shredded parmesan cheese

Slice the onion and saute on medium heat to caramelize it. Keep it aside. Cut the tomato in half and drain the seeds and juice. Slice and keep aside. Wash and dry the spinach leaves. Break them into pieces.

Preheat oven to 425 F. Get you cast iron pan out and keep it ready. Flour working surface and transfer the ball of dough to it. Using floured hands work the dough until you a flat disc. Follow instructions here. Place the pizza base in the cast iron pan. Add the caramelized onion, spinach, tomato and shredded cheese to one half leaving about an inch on all sides.


Add the tomato sauce over the top.


Fold the pizza base in half to form the calzone. Seal the edges.


Using a sharp blade make three cuts on the flap to allow steam to escape.


Bake for 10 minutes. If you like a brown crust rub a little butter over the top and bake for another 15 minutes.


The calzone is done. Cut it as needed.


Enjoy!


Monday, November 17, 2014

Fruit Dessert Pizza and First Blog Anniversary

I started this blog seven years ago but had to abandon it when life got really busy. I started blogging in earnest last year. One year and 500 odd recipes later here I am celebrating my blog's first 'real' anniversary. I decided I had to post something sweet to mark such a sweet milestone. So today I am posting the recipe for dessert pizza. I also thought it would be very appropriate to set myself a new challenge. A food photography challenge. This is a challenge for anyone who likes to click pictures of food and is working to get better at it. More about that here. Moving to the recipe for the day.


When my daughter was in 1st grade Pizza Hut was running a reading initiative and awarded pizza hut child buffet coupons. My daughter won a few and we used a couple of them. The pizza she loved the most was the dessert pizza. Today I have recreated that pizza using cinnamon apples.

You will need
For the base
2 cups whole wheat flour
1 cup water
1 1/2 tbsp. vegetable oil
1 tsp. salt
1/4 tsp. instant yeast

For the topping
1 apple, peeled, cored and diced
1/4 cup brown sugar
1 tbsp. all purpose flour
a pinch cinnamon powder
a pinch nutmeg
a pinch salt

For the crumb topping
2 tbsp. all purpose flour
2 tbsp. rolled oats
1 tbsp. brown sugar
1 tbsp. butter
a pinch cinnamon

For the glaze
1/4 cup powdered sugar
1 tbsp. milk
1 tsp. butter
1 couple drops vanilla extract

To make the base mix all the ingredients in a bowl except the water. Heat the water so it is lukewarm. Add the water to the flour and form a soft dough. Knead well and keep aside overnight.

To make the topping add all the ingredients for the topping to a pan and heat it until the apples are soft and the sugar has melted, about 3-5 minutes.


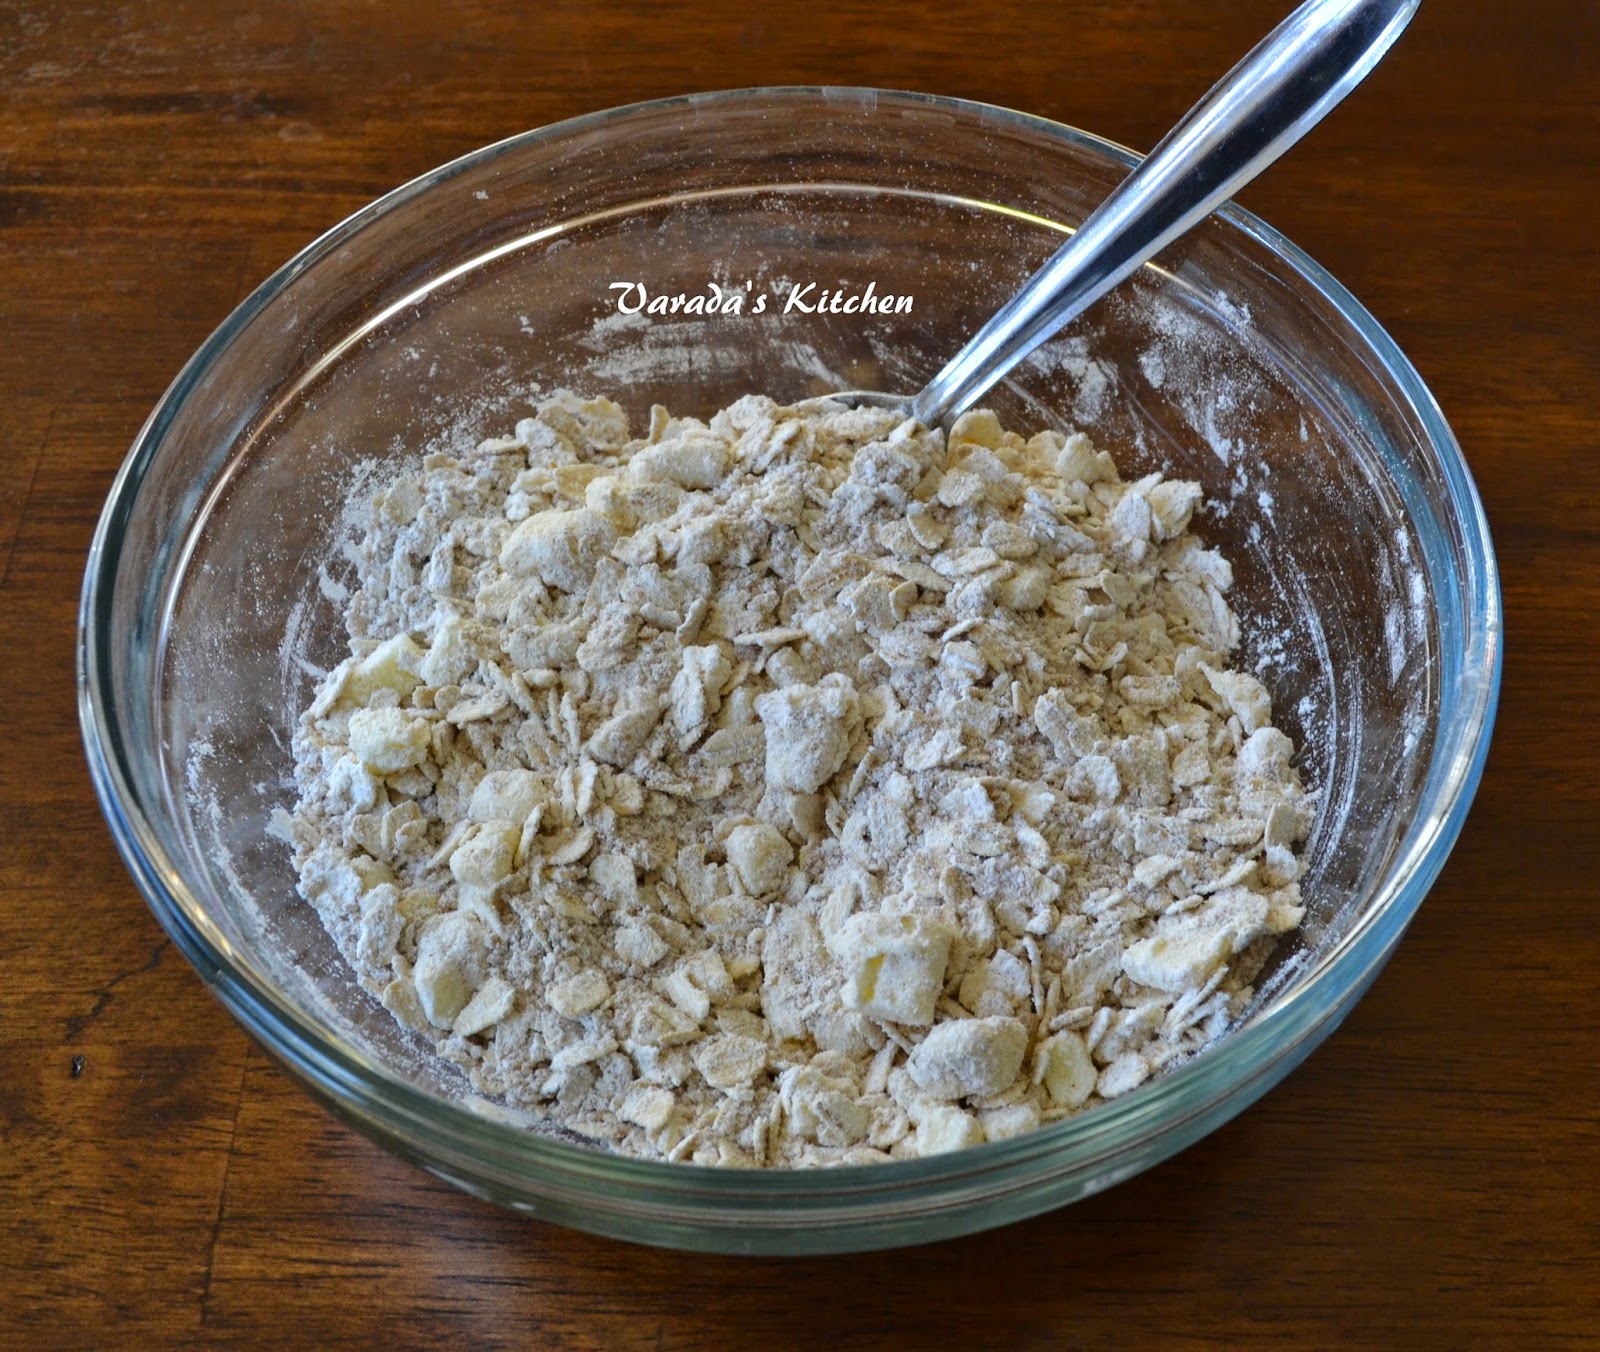
Combine all the ingredients for the crumb topping in a separate bowl. Keep aside.


Preheat oven to 400 F. Flatten the pizza dough with your knuckles. Form a wide disc by running the edges through your fingers. Work till the disc is the size of your pizza pan. Place it on the pan and prick with the tines of a fork. Bake it for 4-5 minutes. Take it out of the oven and spread the apple mixture over the top. Next spread the crumb mixture over the apples.


Bake for 10-15 minutes or until.


Combine all the ingredients for the glaze and drizzle it over the top. You could use less milk and make the glaze thicker if you want.


Leftover pizza can be refrigerated and eaten over two or three days.


Enjoy!


Monday, November 3, 2014

Sourdough Baguette Take two

As the title states this is my second attempt at baking the perfect baguette. When I made my first attempt I had a new wild yeast starter and the baguette was my first bread fully leavened with the starter. That the dough rose was a big thing and so I was very happy with the results. A short eight months later my expectation is higher. An open crumb, thin crust, nice color and good scoring all in one baguette is the new dream. This baguette may not pass the stringent French rules with its length and weight specifications but I am sure no one would call it anything other than a baguette. Baking bread that crackles and speaks to me as it cools makes me happy. That is the bread that my family likes to snack on because it is tasty. Though I would have liked an evenly open crumb I am happy to have achieved my current goal.


The impetus behind this attempt came from Pradnya who blogs at The Pumpkin Farm. She set us this challenge as part of the tame the yeast event. I have to thank her for getting me to try the baguette again. I used my starter for this bread but I have given the recipe to use commercial yeast as well. The end result should be very similar as it is the technique as much as the ingredients that determine the end result.


I had watched videos on how the baguette is shaped without letting the gas escape. But I had never really looked into scoring techniques. I learnt that from my friends at Artisan Bakers. I bought a razor blade, the kind I remember my Dad shaving with when I was really little. I used it to score the bread. I have always loved the darker colored bread peeking though the score marks and could not believe how easy it was to make it happen. If you use this technique make sure you get an odd number of score lines, they are supposed to look better than an even number. I could have overlapped the score marks a little more and that would have given me a straighter edge but for now I am happy with this loaf.


I baked my first artisan boule using the recipe from the book Flour Water Salt Yeast by Ken Forkish. Now I find myself using that technique for most breads I bake. I even used it very successfully for the sourdough buns I baked a few months back. I use a shorter (~5 hour) bulk fermentation following by overnight proofing. I put the cold shaped dough directly in the hot preheated oven without allowing it to come to room temperature. I followed the same technique on this loaf too. Except I put a cast iron pan in the oven in addition to my baking sheet. When I transferred the loaf to the oven I filled the pan with ice cubes. This created the much needed steam to form a thin, crunchy crust.

For one baguette
If you are using a sourdough starter
You will need
105 gm white whole wheat flour (I used King Arthur)
90 gm all purpose flour
130 gm water
100 gm fed sourdough starter
6 gm salt

Alternately, if you are using commercial yeast
You will need
150 gm white whole wheat flour
100 gm all purpose flour
175 g water
6 gm salt
2 gm or 1/2 tsp. instant yeast

If using starter
Feed your starter. I keep 50 gm starter in the refrigerator. I feed it with 50-75 gm each of flour and water first thing in the morning and let it sit on the kitchen counter for a few hours. At around 2-3 pm I am ready to mix the dough. 50 gm of the starter goes back in the refrigerator for next time and the rest is used as needed in recipes. For this bread I needed 100 gm of starter so I refreshed the mother with 50 gm each of water and flour.

In a large mixing bowl add all the flour after running it through a sieve. Now mix in all of the water so that no lumps of dry flour are visible. Cover and keep aside for 20-30 minutes. This is called autolyse a process which gets the enzymes in the flour going by mixing it with water and letting it rest.

After half an hour sprinkle the salt over the dough. Add the sourdough starter or commercial yeast whichever you choose to use. Mix it in with the dough. You should break up the dough with your fingers and reform it at least twice to get all the ingredients to mix up well. Cover and keep aside.


Over the next two hours stretch and fold the dough to strengthen it. The dough will be wet and not very stiff. Moisten your hands with water before handling the dough. You reach for the dough on the far side, stretch it up and fold it over towards you. Turn the bowl 90 degrees and repeat. When you go all around once you have completed one turn. You will gradually notice a difference in the appearance of the dough. It will get smoother and easier to work with. Cover and keep aside for another 3 hours for a total of 5 hours of bulk fermentation.


Prepare a baking sheet that fits in your refrigerator by spreading a couche over it. I don't have a couche so I used a dry tea towel. Flour the tea towel and keep aside until needed. Flour your working surface and your hands. Transfer the dough to the working surface. Without letting the trapped gas escape form the dough into a floppy rectangle. Do not take too much time to get the shape right. Fold the top third over the dough and press down with the heel of your palm to create tension over the fold.


Now fold the bottom over the top and do the same with your palm. Now bring the top and bottom together and press down gently again. This exercise is meant to create tension in the outer surface of the dough. Seal the edge along the length. Cup your hands over the roll of dough and gently roll back and forth to make it longer to the desired length. For sandwiches you may want it slightly thicker. I made it thin and long.


When you are satisfied with the length transfer it to the waiting floured tea towel. Pull up the edges of the towel next to the shaped baguette to help it retain its shape. Professional bakers place baguettes next to each other separated by the pulled up couche. However, I baked just the one so I placed wooden spoons on either side of the folded up towel to help the baguette hold its shape.


Cover the baguette with the rest of the towel and place it in the refrigerator overnight. You can bake the baguette any time the next morning.


Preheat the oven to 500 F. Ideally place your baking stone and the cast iron pan in the oven when it is heating. Since I do not have a baking stone I put my baking sheet in when the temperature reached 450 F. I placed the empty cast iron pan in at the same time.

Let the oven heat for 5 minutes after it reaches 500 F. Keep a bowl of ice cubes or boiling water ready. Take the shaped baguette out of the refrigerator and put it on the kitchen counter. The cold dough will be firm and easy to handle. Handle it gently.


Take it out of the towel and ideally put it on a well floured peel. I do not have a peel so I floured the back of a baking sheet and used it to transfer the baguette to the sheet in the oven. Just before putting the loaf in the oven score it using a very sharp razor blade. The cuts should be almost vertical and a third of each cut should overlap. The overlap prevents the dough from looking lumpy.


Put the loaf on the hot baking stone, or in my case hot baking sheet, in the oven. Being very careful to protect the oven glass transfer the boiling water or ice cubes to the hot cast iron pan. Close the oven door and let the bread bake for 10 minutes. Remove the cast iron pan and allow the baguette to bake for another 15 minutes. I removed the baguette after 10 but next time I will keep it in for the additional 5 minutes for a darker color.


Remove the baguette from the oven and put it on a cooling rack. Allow it to cool completely before cutting into it.


Enjoy!