Showing posts with label Loaf. Show all posts

Wednesday, December 5, 2018

No Knead Light Sourdough Wheat Loaf

Last week I had the sudden urge to have sandwiches for breakfast. I decided to bake myself a loaf of bread. I got some fresh squeezed orange juice from Whole Foods to go along with the breakfast sandwiches. I put the sourdough starter out on the counter top to come to room temperature and bubble up. That is when I realized my favorite loaf recipe uses commercial yeast. I don't buy that stuff anymore so I decide to convert my old recipe to use the starter instead.


In case you are not into baking with sourdough here is the original recipe. It is simple and makes a super flavorful loaf. Do not get intimidated with the time it takes. That is what makes it so flavorful.


I followed these instructions that I had written up long ago to convert recipes to sourdough. The original recipe I had was in cup measure so I converted it to weight. I got 560 gm of flour and 430 gm water. Once you have these two numbers you can easily convert the recipe. If you are interested the math is as follows: First I calculated 40% of 560 and got 112 or round to 110. This is the weight of starter needed for this recipe. Since my starter is 50% flour and 50% water I reduce both water and flour by 110/2 which is 55 gm. My new flour by weight is 560-55=505 gm or rounded to 500 gm. The water needed by weight is 430-55=375 gm.

You will need for 1 loaf
110 gm 100% sourdough starter
505 gm flour (I used whole wheat flour, you can use 50% all purpose or any combination)
375 gm water
10 gm salt
3 tbsp. oil (vegetable oil or olive oil)

Mix all the ingredients in a bowl and keep aside. After 15 minutes, reach over the far side of the dough and pull it over the top. Turn the bowl 45 degrees and repeat. Repeat two more time and keep aside. Fold and turn every 15 minutes another 3 times. Cover the bowl and let it rest for 4-6 hours.


Keep you loaf pan ready. Remove the dough from the bowl to a floured working surface. Fold over from both sides and place seam side down in the loaf pan. Cover and place in the refrigerator overnight.

When you are ready to bake preheat the oven to 375 F. When the oven is heated remove the loaf from the refrigerator and take off the cover. Score the top of the loaf with a sharp blade or knife. Sprinkle a little flour over the top to add some interest. Bake for 50-60 minutes. Check after about 30 minutes and if the top is browning too quickly, tent it with foil.

Take the loaf out of the oven and let it sit for a couple minutes. Slide the loaf out of the pan and cool it on a cooling rack.


Slice and enjoy!

Friday, April 10, 2015

Ciabatta

Ciabatta is of Italian origin and is one of the lightest bread you can bake. The bread dough is made with almost 85% hydration. It is wet, sticky and very tricky to work with. When the dough is placed in a very high temperature oven the water evaporates leaving behind a well risen and extremely light loaf. Ciabatta makes a great sandwich bread.


I like working with high hydration dough but most of mine are about 75%. Working with 85% is something else altogether. It is hard to shape as it does not hold the shape very well. The dough is sticky but you cannot add too much flour as it absorbs the flour quickly.


I searched for a good formula for this bread but did not find any. Finally I made my own. I mixed just enough dough for one loaf. I used 200 gm of flour and calculated everything else. I mixed the dough very late one night, after 11:30 pm and left it in the refrigerator for the bulk fermentation. Next day I shaped the dough and gave it a short proofing time (about three hours). I then baked it in my dutch oven. I am really pleased with the result.

You will need
200 gm bread flour
170 gm water
3 gm instant yeast
3 gm salt
2 gm sugar

Combine all the ingredients in a mixing bowl with wet hands. Form a very wet dough. Knead for about 5 minutes until  you feel the texture of the dough change. It will be smooth and elastic and not as sticky. It will be very wet and will not form a shape. Cover and keep for 6-8 hours for the bulk fermentation.


Transfer to a lightly floured working surface and shape like a slipper. Pull the dough along the length and fold over.


Place on a parchment paper sprinkled with flour and keep aside for an hour.


Preheat the oven with the dutch oven inside to 500 F. Place the shaped dough on a parchment paper inside the dutch oven. Put the lid back on and bake for 15 minutes. Remove the lid and bake another 20-25 minutes until you get the desired color. Remove from the oven and place on a cooling rack to cool completely before slicing.


Enjoy!

Wednesday, April 8, 2015

5 - Strand Water Challah / Eggless Challah

Challah is a braided bread enriched with eggs and oil. A little sugar adds a hint of sweetness. This week is all about traditional bread. Artisan loaves replicated in my kitchen. What makes challah special is the braids. I have tried braiding before, this post is all about braiding 4, 6, 8 and 9 strand braids. But I had never tried a 5 strand bread, so this challah is made with 5 strands. Another specialty of this bread is that it is not enriched with eggs. It has oil and a little sugar but no egg. And unlike most eggless bakes it has no egg substitute. You just drop the egg from the recipe, adjust the quantity of liquid with water and you have water challah.


The challah is a very soft bread. The crumb is not very open but it is visibly soft. I had wondered how the absence of eggs and no other substitute could produce the same result. But it does. The picture below of the crumb was shot at night so it is not very good. But I had to share it. The bread was all gone by morning.


Baking the braids is tricky. Oven spring can sometimes ruin the appearance with unwashed dough peeking through between the darker washed dough. To prevent this from happening use a simple tip I got from one of the ladies from my Facebook baking group. Allow the dough to over proof. Poke it with your finger, if the dough springs back let it rest a little longer. If it takes a while to bounce back it is ready for the oven. Bake at 350 F for a good 40 minutes to get the dark golden color. Another tip I got from the same person after I shared this picture - use a corn starch wash to get a shine similar to an egg wash. Will use this tip next time.

You will need (for 1 long loaf)
For the dough
2 1/4 cups flour
3/4 cup warm water
2 tbsp oil
3/4 tsp yeast
1 1/2 tsp sugar
1 tsp salt

For the wash
1 tbsp. cream (I used whipping cream)
1 tsp. butter (optional)

Combine all the ingredients in a mixing bowl and form a soft dough. Knead the dough for 5-8 minutes until it is smooth and elastic.


Cover and keep aside until it doubles in volume. The time could be anywhere from an hour to 2 and a half hours depending upon weather and temperature in your kitchen.


Transfer the dough to a floured working surface and divide into five portions by weight. Roll each of the portions into a rope.


To braid, bring together the ropes at one end. I followed instructions on this video. Start the braiding on one end.


Continue to braid without pulling on the ropes. Place them with the help of gravity. You do not want a tight braid.


Continue braiding to the end.


Tuck the end in for a neat finish. Transfer to a baking sheet covered with parchment paper.


Cover with a tea cloth and let it rest for an hour or two. Poke your finger in the dough. If it does not spring back then the dough is ready for the oven. Preheat the oven to 350 F. Brush the top with cream making sure you get it in all the crevices.


Pop it in the oven for 30-40 minutes or until the top is deep brown and the bottom sounds hollow when tapped. Brush with butter is desired.


Allow it to cool completely before slicing.


Enjoy!

Monday, April 6, 2015

Whole Wheat Sourdough Batard

After all the fun last week it is time to move on to some real bread. This week I will post my attempts at recreating old bread recipes. These traditional artisan loaves are usually very tasty. They need work and time to allow the flavors to develop. But the end result makes it all worthwhile. The yeast in these recipes is either homegrown, a combination of commercial yeast with homegrown or just commercial yeast. The dough is either plain or enriched. The first of the lot is a sourdough batard.


My first attempt at baking the batard did not go so well. The bread tasted great but was a little misshapen. I had decided to try a single score line through the length of the bread but at the last minute I made two. I guess I didn't quite do it right because the bread bulged to one side. I knew the next time I baked the batard I would stick to the single score.


I finally got my chance to bake the batard again and this time I got it right. The score line through the middle allowed for a even oven spring. I was happy with the look and taste of the bread. The crumb was open and even if I don't have a very good picture of the crumb I am going to share it.


This was a recipe I put together with whole wheat flour and sourdough. It is similar to the baguette recipe but the proofing times were all crazy. I started it on a Sunday afternoon but forgot about it. The fold and stretch technique I use to strengthen the dough was not done on time. It was a little delayed. That left me with no time at night to let it rise. So I put it in the refrigerator overnight. Next day I did not get to it until late evening. That was an almost 24 hour bulk fermentation. I shaped the dough and placed it on a floured paper towel and put it back in the refrigerator. It was two and a half days before I got a chance to bake it. The taste was awesome. I have to say the long bulk fermentation may have helped. The next bread I make I will try an extended bulk fermentation again.

For one batard
You will need
200 gm white whole wheat flour
130 gm water
100 gm fed sourdough starter
20 gm olive oil
6 gm salt

In a large mixing bowl add the dry ingredients. Then add the wet ingredients and combine to form a very soft dough. The hydration on this dough is over 70%. Keep aside covered for half an hour. Take the bowl and reach to the far side of the dough. Pull it up over the top of the dough towards you and tuck in. Turn the bowl a quarter turn. Repeat the stretch and fold. Repeat until you go all around twice. Cover and keep aside. Repeat the stretch and fold another two times. You will notice a difference in the texture. At the end of the last fold and stretch the dough will be smooth and elastic. Cover and keep aside for 6-8 hours or overnight in the refrigerator.

Take the cover out and transfer the dough to a floured work surface. Press down on the dough with floured hands. Fold the far side towards you about 3/4th of the way and press down gently with the heel of your palm. Fold the side close to you over the top and press down, like sealing an envelop. Now fold the dough in half and seal. Roll it a little to form the desired shape. Transfer to a floured towel and keep aside for the second rise. I usually keep it overnight (10-12 hours) in the refrigerator.

Preheat oven to 450 F. Place a baking sheet in the oven as it is heating. Remove the dough from the refrigerator. Using a very sharp blade or a lame score the top of the loaf end to end.


Transfer to the hot baking sheet and let it bake for 15 minutes. Lower the temperature to 400 F and bake another 25 minutes or until the top is brown. Remove from oven and allow it to cool completely on a cooling rack before slicing.


Enjoy!


Monday, November 3, 2014

Sourdough Baguette Take two

As the title states this is my second attempt at baking the perfect baguette. When I made my first attempt I had a new wild yeast starter and the baguette was my first bread fully leavened with the starter. That the dough rose was a big thing and so I was very happy with the results. A short eight months later my expectation is higher. An open crumb, thin crust, nice color and good scoring all in one baguette is the new dream. This baguette may not pass the stringent French rules with its length and weight specifications but I am sure no one would call it anything other than a baguette. Baking bread that crackles and speaks to me as it cools makes me happy. That is the bread that my family likes to snack on because it is tasty. Though I would have liked an evenly open crumb I am happy to have achieved my current goal.


The impetus behind this attempt came from Pradnya who blogs at The Pumpkin Farm. She set us this challenge as part of the tame the yeast event. I have to thank her for getting me to try the baguette again. I used my starter for this bread but I have given the recipe to use commercial yeast as well. The end result should be very similar as it is the technique as much as the ingredients that determine the end result.


I had watched videos on how the baguette is shaped without letting the gas escape. But I had never really looked into scoring techniques. I learnt that from my friends at Artisan Bakers. I bought a razor blade, the kind I remember my Dad shaving with when I was really little. I used it to score the bread. I have always loved the darker colored bread peeking though the score marks and could not believe how easy it was to make it happen. If you use this technique make sure you get an odd number of score lines, they are supposed to look better than an even number. I could have overlapped the score marks a little more and that would have given me a straighter edge but for now I am happy with this loaf.


I baked my first artisan boule using the recipe from the book Flour Water Salt Yeast by Ken Forkish. Now I find myself using that technique for most breads I bake. I even used it very successfully for the sourdough buns I baked a few months back. I use a shorter (~5 hour) bulk fermentation following by overnight proofing. I put the cold shaped dough directly in the hot preheated oven without allowing it to come to room temperature. I followed the same technique on this loaf too. Except I put a cast iron pan in the oven in addition to my baking sheet. When I transferred the loaf to the oven I filled the pan with ice cubes. This created the much needed steam to form a thin, crunchy crust.

For one baguette
If you are using a sourdough starter
You will need
105 gm white whole wheat flour (I used King Arthur)
90 gm all purpose flour
130 gm water
100 gm fed sourdough starter
6 gm salt

Alternately, if you are using commercial yeast
You will need
150 gm white whole wheat flour
100 gm all purpose flour
175 g water
6 gm salt
2 gm or 1/2 tsp. instant yeast

If using starter
Feed your starter. I keep 50 gm starter in the refrigerator. I feed it with 50-75 gm each of flour and water first thing in the morning and let it sit on the kitchen counter for a few hours. At around 2-3 pm I am ready to mix the dough. 50 gm of the starter goes back in the refrigerator for next time and the rest is used as needed in recipes. For this bread I needed 100 gm of starter so I refreshed the mother with 50 gm each of water and flour.

In a large mixing bowl add all the flour after running it through a sieve. Now mix in all of the water so that no lumps of dry flour are visible. Cover and keep aside for 20-30 minutes. This is called autolyse a process which gets the enzymes in the flour going by mixing it with water and letting it rest.

After half an hour sprinkle the salt over the dough. Add the sourdough starter or commercial yeast whichever you choose to use. Mix it in with the dough. You should break up the dough with your fingers and reform it at least twice to get all the ingredients to mix up well. Cover and keep aside.


Over the next two hours stretch and fold the dough to strengthen it. The dough will be wet and not very stiff. Moisten your hands with water before handling the dough. You reach for the dough on the far side, stretch it up and fold it over towards you. Turn the bowl 90 degrees and repeat. When you go all around once you have completed one turn. You will gradually notice a difference in the appearance of the dough. It will get smoother and easier to work with. Cover and keep aside for another 3 hours for a total of 5 hours of bulk fermentation.


Prepare a baking sheet that fits in your refrigerator by spreading a couche over it. I don't have a couche so I used a dry tea towel. Flour the tea towel and keep aside until needed. Flour your working surface and your hands. Transfer the dough to the working surface. Without letting the trapped gas escape form the dough into a floppy rectangle. Do not take too much time to get the shape right. Fold the top third over the dough and press down with the heel of your palm to create tension over the fold.


Now fold the bottom over the top and do the same with your palm. Now bring the top and bottom together and press down gently again. This exercise is meant to create tension in the outer surface of the dough. Seal the edge along the length. Cup your hands over the roll of dough and gently roll back and forth to make it longer to the desired length. For sandwiches you may want it slightly thicker. I made it thin and long.


When you are satisfied with the length transfer it to the waiting floured tea towel. Pull up the edges of the towel next to the shaped baguette to help it retain its shape. Professional bakers place baguettes next to each other separated by the pulled up couche. However, I baked just the one so I placed wooden spoons on either side of the folded up towel to help the baguette hold its shape.


Cover the baguette with the rest of the towel and place it in the refrigerator overnight. You can bake the baguette any time the next morning.


Preheat the oven to 500 F. Ideally place your baking stone and the cast iron pan in the oven when it is heating. Since I do not have a baking stone I put my baking sheet in when the temperature reached 450 F. I placed the empty cast iron pan in at the same time.

Let the oven heat for 5 minutes after it reaches 500 F. Keep a bowl of ice cubes or boiling water ready. Take the shaped baguette out of the refrigerator and put it on the kitchen counter. The cold dough will be firm and easy to handle. Handle it gently.


Take it out of the towel and ideally put it on a well floured peel. I do not have a peel so I floured the back of a baking sheet and used it to transfer the baguette to the sheet in the oven. Just before putting the loaf in the oven score it using a very sharp razor blade. The cuts should be almost vertical and a third of each cut should overlap. The overlap prevents the dough from looking lumpy.


Put the loaf on the hot baking stone, or in my case hot baking sheet, in the oven. Being very careful to protect the oven glass transfer the boiling water or ice cubes to the hot cast iron pan. Close the oven door and let the bread bake for 10 minutes. Remove the cast iron pan and allow the baguette to bake for another 15 minutes. I removed the baguette after 10 but next time I will keep it in for the additional 5 minutes for a darker color.


Remove the baguette from the oven and put it on a cooling rack. Allow it to cool completely before cutting into it.


Enjoy!

Friday, September 26, 2014

Whole Wheat English Muffin Loaf / Basic Homemade Bread Recipe

I needed a loaf of bread to make Welsh rabbit or a cheese topped toast. I found this recipe here and and adapted it. The original recipe called for all purpose flour. I replaced it with King Arthur whole white wheat flour.


The liquid in this recipe is heated to 120 degrees allowing the dough to rise quickly. There is just one rise in the loaf pan. The bread turned a lovely golden brown on the top. It is a little dense as most whole wheat breads are but has an even crumb. It is perfect for toasting.

You will need
2 1/2 cups whole white wheat flour
1/2 cup all purpose flour
1 cup + 2 tbsp. milk
1/2 cup water
2 tbsp. olive oil
1/4 tsp. baking soda
1 tsp. instant yeast
1.5 tsp. salt

Grease a loaf pan and keep aside. Sift the flours in a bowl. In a separate bowl heat the milk, water and oil to 120 degrees. 

Add the sifted flours, baking soda, yeast and salt to the milk mixture. Knead until the dough comes together and is smooth. The dough will remain sticky and will be warm. 

Transfer the dough to the loaf pan. Cover and let it rise for an hour. During the last 15 minutes preheat the oven to 400 F. 


When the rim of the dough is just above the loaf pan place the pan in the oven and bake for 20-25 minutes.


Let the loaf cool in the pan for a couple minutes.


Transfer it to a cooking rack. Slice when it is completely cool.


Enjoy!

Monday, August 4, 2014

Sandwich Milk Bread

This is the second bread suggested for this month for the new baking event 'tame the yeast'. This bread was recommended by Mirelle. It is a simple sandwich milk bread. It has a lovely flavor and the sandwiches tasted great and were filling.


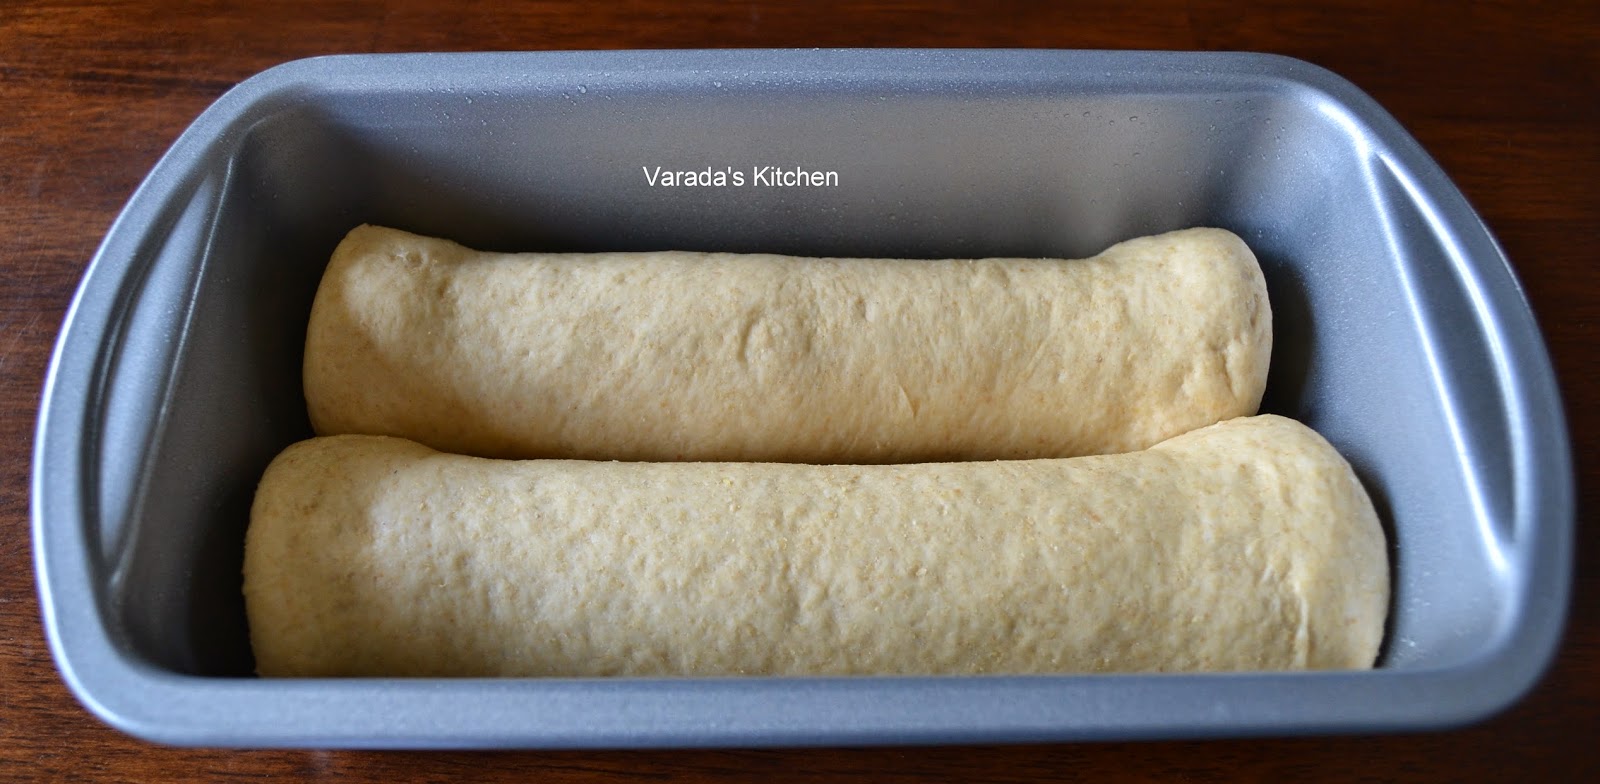
The bread has a unique shape as it is shaped by placing two rolls next to each other in the loaf pan. The bread baked to a beautiful golden brown without a wash. This is a great milk bread recipe that I will be baking again.


I switched all purpose flour for bread flour and used King Arthur white whole wheat flour. I had to add another 1/4 cup water than the original recipe called for to get a soft dough.

You will need
1 cup bread flour
1 3/4 cup white whole wheat flour
1/2 tsp. salt
1 1/2 tsp. instant dry yeast
1 tbsp. honey (I used sugar)
3/4 cup milk
1/4 cup water
1/4 cup butter

In a large mixing bowl sift the flours and add salt, yeast and sugar. In a bowl heat the milk, water and butter until the butter melts. Add the liquid to the flour and form into a soft dough. Knead until the dough is smooth and elastic.


Cover and keep aside until it doubles in volume, about an hour.


Grease a loaf pan and keep it ready. Transfer the dough to a floured surface and divide into two equal portions. Roll in a ball with a smooth top.


Roll one of the portion into a large rectangle. Start at the short side. Fold in the long sides such that the rectangle is the width of the loaf pan.


Roll in a tight roll and place on one side of the loaf pan. Repeat with the other portion and place it next to the first roll.


Cover and let it rise for another 30-40 minutes until it doubles in volume. In the last 15 minutes preheat the oven to 375 F.


Bake the loaf for 30-40 minutes until the top is golden brown and the loaf sounds hollow.


Cool on a cooling rack before cutting it into slices.


Enjoy!