This is one of the tastiest condiment you will ever make. When I first decided I wanted to try spring rolls I noted down this recipe from a magazine. I never got around to making it until I finally made fresh spring rolls. This sauce was the perfect condiment.
My daughter who is not a fan of nuts fell in love with the sauce. It is the perfect combination of sweet and sour. It goes perfectly with the flavors in the spring rolls. The amounts listed against the ingredients are estimates. Adjust as per taste.
You will need
1/2 cup peanut butter, smooth and creamy, not chunky
1/4 cup warm water
1 tbsp. lime juice
1 tbsp. soy sauce
1 tsp. sugar
For the garnish
roasted peanuts, chopped coarsely
Whisk all the ingredients for the sauce in bowl. Garnish with chopped roasted peanuts. The sauce is ready
Enjoy!
Showing posts with label Basic Vegan Recipes. Show all posts
Tuesday, July 24, 2018
Saturday, November 18, 2017
Prickly Pear Fruit Dip/Sauce
Did you know cactus fruit are sweet and flavorful? Have you ever tried them? We lived in Arizona for a very long time. We had Prickly pear and Saguaro growing in the garden. Every year we watched the local animals and birds fight over the fruit. It was hard to get some for us before the birds got to them. After we moved to Texas all we see are the small 5 inch tall cactus growing in little pots. I remember the first time I saw the little cacti at the nursery and almost cried. Imagine my surprise when I saw prickly pear fruit in the local 99 ranch market. I had to get it and make this sauce/dip.
The process is really the same as with any other fruit sauce or dip. You heat the fruit with a little sugar and strain. The aroma takes getting used to but the flavor is awesome.
You will need
3 ripe prickly pear fruit (pinkish in color, not green)
1 tbsp. sugar (or as needed, increase or decrease as per taste)
Peel the rough skin off the fruit and dice into cubes. Boil 3/4 cup of water in pan. Add the fruit and the sugar. Lower the heat and let it simmer until the fruit is cooked and can be mashed. Turn off the heat and allow it to cool for a few minutes.
Using a fine wire strainer, strain the sauce to remove the seeds and hard pulp. Discard the seeds and pulp. The sauce/dip is ready. Serve with fresh cut fruit like apples.
Enjoy with some fresh fruit!
The process is really the same as with any other fruit sauce or dip. You heat the fruit with a little sugar and strain. The aroma takes getting used to but the flavor is awesome.
You will need
3 ripe prickly pear fruit (pinkish in color, not green)
1 tbsp. sugar (or as needed, increase or decrease as per taste)
Peel the rough skin off the fruit and dice into cubes. Boil 3/4 cup of water in pan. Add the fruit and the sugar. Lower the heat and let it simmer until the fruit is cooked and can be mashed. Turn off the heat and allow it to cool for a few minutes.
Using a fine wire strainer, strain the sauce to remove the seeds and hard pulp. Discard the seeds and pulp. The sauce/dip is ready. Serve with fresh cut fruit like apples.
Enjoy with some fresh fruit!
Sunday, July 3, 2016
Walnut Kale Pesto
Pesto is a green sauce traditionally made with pine nuts, basil and olive oil. Pesto is rich in fat and while a well made sauce is very flavorful it may not always be the preferred choice. If you are looking for an alternative this recipe is for you. I had some left over cottage cheese I trying to use up and needed a sauce to bind it as a filling. The walnut kale pesto worked perfectly.
I would not say the flavor is close but this pesto will work just as well as the traditional pesto recipe. You could add a bunch of basil leaves along with the kale to bring the taste profile closer to that you are used to, but in my family we really like this recipe.
You will need
2 cups Kale leaves
1/2 cup toasted walnuts
1 clove garlic
salt to taste
Bring water to a boil in the microwave safe cup. Add the kale leaves to the water and let it sit on the counter top for a few minutes. Drain the water, rinse the leaves in cold water and you are have instant blanched kale. Alternately you could use a pan over a stove top to boil the water.
Add the kale to a food processor along with the other ingredients and pulse until you have the desired consistency.
Use in pizza, pasta or sandwiches.
I would not say the flavor is close but this pesto will work just as well as the traditional pesto recipe. You could add a bunch of basil leaves along with the kale to bring the taste profile closer to that you are used to, but in my family we really like this recipe.
You will need
2 cups Kale leaves
1/2 cup toasted walnuts
1 clove garlic
salt to taste
Bring water to a boil in the microwave safe cup. Add the kale leaves to the water and let it sit on the counter top for a few minutes. Drain the water, rinse the leaves in cold water and you are have instant blanched kale. Alternately you could use a pan over a stove top to boil the water.
Add the kale to a food processor along with the other ingredients and pulse until you have the desired consistency.
Use in pizza, pasta or sandwiches.
Tuesday, May 12, 2015
Garam Masala or Basic Spice Mix
A trip to any grocery store will show you how popular ready made spice mixes are. It takes the guess work out and it is convenient. There was a time when the basic spice mixes were family secrets passed down through the generations. Unlike pickles that were made to last a year spices mixes were not made in large quantities. The idea was to use them before they lost their freshness. If you choose one thing to continue making at home choose spice mixes. The fresh ground spices will add a fantastic flavor and aroma to your food.
This is my mother's recipe for garam masala. Actually it was my grandmothers recipe and she passed it down to my mother. Spicy curries were almost never cooked in the house when I was growing up. But this masala or spice mix was a staple. I took the picture at night and it did not come out very well. The color of the masala is brownish but the pictures shows it as yellow. I will click new pictures and update this post.
You will need
This is my mother's recipe for garam masala. Actually it was my grandmothers recipe and she passed it down to my mother. Spicy curries were almost never cooked in the house when I was growing up. But this masala or spice mix was a staple. I took the picture at night and it did not come out very well. The color of the masala is brownish but the pictures shows it as yellow. I will click new pictures and update this post.
You will need
500 gm coriander seeds (dhane)
100 gm cumin seeds (jeera)
50 gm shaha jeera
10-15 dried red chilli peppers
4-5 bay leaves (tamal patra)
5-7 gm of cinnamon stick (dalchini)
5-7 gm star anise (dagadphool)
3-4 cloves (lavanga)
8-10 black pepper (miri)
1 tbsp. oil
1 1/2 tsp. salt
Heat a flat bottom pan with the oil. Add the coriander seeds, cumin seeds, shaha jeera, red chili peppers and bay leaves. Roast until the spices fill your kitchen with their aroma and begin to change color. Turn off heat and transfer the spices to a plate. In the same pan roast the remaining spices until they start to change color. Turn off heat. Allow the spices to cool and grind to a fine powder. Allow them to cool completely, add salt and store in an airtight container.
Enjoy!
100 gm cumin seeds (jeera)
50 gm shaha jeera
10-15 dried red chilli peppers
4-5 bay leaves (tamal patra)
5-7 gm of cinnamon stick (dalchini)
5-7 gm star anise (dagadphool)
3-4 cloves (lavanga)
8-10 black pepper (miri)
1 tbsp. oil
1 1/2 tsp. salt
Heat a flat bottom pan with the oil. Add the coriander seeds, cumin seeds, shaha jeera, red chili peppers and bay leaves. Roast until the spices fill your kitchen with their aroma and begin to change color. Turn off heat and transfer the spices to a plate. In the same pan roast the remaining spices until they start to change color. Turn off heat. Allow the spices to cool and grind to a fine powder. Allow them to cool completely, add salt and store in an airtight container.
Enjoy!
Monday, May 11, 2015
Red Enchilada Sauce
Mexican cuisine is very loved in my house. Though the green sauce or verde sauce is preferred in my house I sometimes make this red enchilada sauce. It is very easy and has a surprise ingredient - cacao, that gives it a very distinct taste and color.
It is very easy to make and stores well for a couple days in the refrigerator. My daughter gives it two thumbs up.
You will need
4-5 ripe tomatoes
1/2 cup water
1 tbsp. basil
1 tbsp. oregano
1 Serrano pepper, diced fine
1 tsp. red chili pepper powder
1 tbsp. cacao shavings
salt and black pepper to taste
Dice the tomatoes and keep aside. Mix the spices except the cacao with the water. Bring to a boil.
Add the tomatoes and the chocolate. Cook until the tomatoes are softened. Add salt and pepper. Turn off the heat and let it cool. Run the mixture through a blender until smooth. Use in your recipe as needed.
Enjoy!
It is very easy to make and stores well for a couple days in the refrigerator. My daughter gives it two thumbs up.
You will need
4-5 ripe tomatoes
1/2 cup water
1 tbsp. basil
1 tbsp. oregano
1 Serrano pepper, diced fine
1 tsp. red chili pepper powder
1 tbsp. cacao shavings
salt and black pepper to taste
Dice the tomatoes and keep aside. Mix the spices except the cacao with the water. Bring to a boil.
Add the tomatoes and the chocolate. Cook until the tomatoes are softened. Add salt and pepper. Turn off the heat and let it cool. Run the mixture through a blender until smooth. Use in your recipe as needed.
Enjoy!
Saturday, January 10, 2015
Homemade Applesauce
Applesauce is one of the easiest sauces and also one of the most forgiving. It can be used as baby food, as a snack on its own or as an ingredient while baking. There are a lot of variations to this sauce. If you want a thin consistency then you may want to add a little water. If you are looking for a thicker or chunkier sauce skip the water.
I made applesauce a few times last year. But every time I remembered to click pictures it was when the sauce was needed for another recipe. I then included the applesauce recipe within the other recipe. The thought crossed my mind that maybe I should create a separate post for the applesauce. That wish has finally come true this month.
For the applesauce
1 cooking apple
2 tbsp. sugar
1/4 cup water
To make the applesauce wash, peel and core the apple. Cut it into pieces and cook in a pan with the sugar and water until mushy. Mash to prepare the applesauce. If you want a deeper color use brown sugar instead of refined sugar.
I made applesauce a few times last year. But every time I remembered to click pictures it was when the sauce was needed for another recipe. I then included the applesauce recipe within the other recipe. The thought crossed my mind that maybe I should create a separate post for the applesauce. That wish has finally come true this month.
For the applesauce
1 cooking apple
2 tbsp. sugar
1/4 cup water
To make the applesauce wash, peel and core the apple. Cut it into pieces and cook in a pan with the sugar and water until mushy. Mash to prepare the applesauce. If you want a deeper color use brown sugar instead of refined sugar.
Wednesday, December 17, 2014
Cranberry Sauce
I first made this Cranberry sauce for Thanksgiving back in 2007. It was the first time I had bought and used cranberries. I have made this sauce every year since then.
I make it in small quantities and it adds a sweet and tart flavor to the meal.
Over the years I have changed it a little with organic ingredients, fresh squeezed juice and extended cook time. What I really like about this sauce is that it is tart and sweet at the same time. It can be used as a spread or substituted for jam if needed.
You will need
6 oz. fresh organic cranberries
1/2 cup sugar
1/2 cup fresh squeezed orange juice
Add all the ingredients to a medium saucepan and bring to a boil. Simmer until berries pop. Mash gently with the back of a spoon or masher. Let the sauce simmer for about 3-5 minutes more.
Turn off heat. Chill until ready to serve. The sauce thickens as it cools.
Enjoy!
Sunday, October 26, 2014
Bread Baking Tips
I have been asked a lot of questions about baking bread. Here are some of those questions answered.
- How do I half the recipe? This is the most frequently asked question. If you work with weights halving a recipe is very easy. If you work with volume it can get tricky. I would say half all the ingredients but when mixing the dough reserve a little of the liquid. Use the reserved liquid only if needed.
- Is leavened bread good for you? Our body does not have the ability to digest whole grain without help. Soaking, fermenting and cooking help release enzymes that break down the complex carbohydrates and proteins in a form we can digest and absorb. All ancients cultures recognized the value of fermentation. Leavened bread is dough fermented with the help of yeast and bacteria. When soaked the enzymes in the flour start to break down the complex carbohydrates and proteins. The yeast and bacteria work on these further to convert them to flavorful forms we can easily digest. They also release carbon-di-oxide which helps leaven the bread.
- NEVER PUNCH DOUGH. This is a very common instruction for home recipes, but don't do it. If you need to punch the dough and have it rise again to double the volume you probably used too much yeast. Be gentle with the dough. There is really no need to punch it down in order to shape it.
- Watch the amount of yeast you use. A loaf with three cups of flour should have no more than a teaspoon of yeast. Adding more yeast does not improve the texture of the bread but cuts down on the flavor. Remember, you are trying to break down the grain and develop flavor. You are not trying to create an aerated mass. If you are in a hurry use lukewarm liquid and proof the dough in a warm place. That will help the yeast.
- To get well risen bread you need flour with a high gluten content. Gluten fibers form a network in which the gases released by the yeast are trapped. It is a lot easier to get the large uneven 'holes' of an artisan bread using high gluten flour. You can bake with low gluten flours but expect a denser bread.
- If you choose to use refined flour ensure the flour is not bleached (bromated). Try to find unbleached aged flour. In the US some brands of refined flour are bleached. Read the labels. Almost all the ready to eat bread available in the supermarket is made with bleached flour.
- Is maida the same as all purpose flour? This is the question most asked by new bakers from India. The answer is no. Maida can be compared to cake flour or pastry flour which is a much softer refined flour than all purpose flour. And maida is almost always bromated.
- Why long rise times? As mentioned earlier, soaking releases enzymes already present in the flour. These enzymes break down the complex carbohydrates into simpler sugars. This takes time especially for whole grain flours. That is the reason a resting period for dough is recommended even for unleavened breads. The yeast feeds on this sugar. Giving this process time not only helps to develop flavor but breaks down the dough in a form that our body can absorb. The resultant bread not only tastes a lot better than the one hour wonders but is good for you. Take your time baking the bread.
- Using whole grain flour. Wheat is the most commonly used flour to bake bread. Bakers use a lot of different flours, spelt, einkorn, rye, semolina just to name a few. The rise and crumb size may depend upon the gluten content of your flour/flour blend but if you control the quantity of yeast and give the dough time you can make flavorful and healthy loaves with any flour you choose.
Don't be afraid to get those hands dirty.
Thursday, September 11, 2014
Dashi (Kombu Stock)
This is a basic stock recipe that I got from here. Usually dashi is not a vegetarian stock. But this recipe uses kelp just kelp, a sea vegetable, to make the stock. Dashi is used in varying quantities in a lot of the Japanese dishes.
Heat a Kombu (kelp) leaf in 4 cups water. As the color of the water changes and well before the water boils remove the leaf.
Let the water heat some more then take it off the heat. This is the dashi or kombu stock that is used in a lot of Japanese recipes.
Heat a Kombu (kelp) leaf in 4 cups water. As the color of the water changes and well before the water boils remove the leaf.
Let the water heat some more then take it off the heat. This is the dashi or kombu stock that is used in a lot of Japanese recipes.
Saturday, May 24, 2014
Converting commercial yeast recipes to sourdough
You found a recipe you want to try but it calls for commercial yeast. You want to use your carefully maintained sourdough starter. Read on for instructions on how to convert from one to the other. Pain au lait (picture below) was the first bread I baked after using this conversion process.
Some instructions ask to replace 1/2 cup of flour with the starter. This is not very accurate and will lead to problems if you are a novice baker. The hydration level of the starter could wreak havoc with the recipe. A high hydration starter could lead to a very wet dough and a low hydration starter could lead to a dry one. A newly fed starter will work very differently from an unfed one. To avoid these problems stick to weights.
Conversion process
You need to know % of hydration of your starter - given a quantity how much water and flour the starter contains.
Find the total amount of flour by weight used in your recipe. Calculate 40% of this amount (multiple by 0.4). That is be the amount of starter you need to use in your recipe.
Next calculate the amount of flour and water in grams you starter contains. For example, 100 grams of a 78% starter has 44 gm water to 56 gm flour. Reduce the flour in the recipe by the amount of flour your starter has. Reduce the amount of total liquid in your recipe by the amount of water your starter has.
You are all set to bake your favorite recipe with your own starter.
Some instructions ask to replace 1/2 cup of flour with the starter. This is not very accurate and will lead to problems if you are a novice baker. The hydration level of the starter could wreak havoc with the recipe. A high hydration starter could lead to a very wet dough and a low hydration starter could lead to a dry one. A newly fed starter will work very differently from an unfed one. To avoid these problems stick to weights.
Conversion process
You need to know % of hydration of your starter - given a quantity how much water and flour the starter contains.
Find the total amount of flour by weight used in your recipe. Calculate 40% of this amount (multiple by 0.4). That is be the amount of starter you need to use in your recipe.
Next calculate the amount of flour and water in grams you starter contains. For example, 100 grams of a 78% starter has 44 gm water to 56 gm flour. Reduce the flour in the recipe by the amount of flour your starter has. Reduce the amount of total liquid in your recipe by the amount of water your starter has.
You are all set to bake your favorite recipe with your own starter.
Monday, May 19, 2014
Pizza Sauce
Homemade pizza sauce using fresh ingredients enhances the taste of any pizza. This sauce is a favorite with my family. We like it because it is very versatile. You can change the ingredients based on what you have in the pantry. While tomatoes are used as the base, there is no need to buy a specific kind. You can use any type of tomato in this sauce.
Ideally you would use vine ripened salad tomatoes preferably from a farmer's market. But if the only tomatoes you can find are the barely ripe grocery store variety then use a handful of cherry or grape tomatoes with it. Roma tomatoes or tomatoes or different colors everything works. Add them to some onion, garlic and oregano and you have great tasting pizza sauce.
You will need (for 6 hand tossed 10 inch pizzas)
28 oz of chopped tomatoes (6 salad tomatoes or 4 salad and 12 cherry or any other combination)
1/4 cup chopped onion
3 tbsp. olive oil
2 cloves garlic, peeled and minced
1 tbsp. dried oregano
1 tbsp. sugar
1 tbsp. fresh oregano (use dried if fresh is not available)
salt and black pepper to taste
Heat the oil in a saucepan. Add the chopped onion and cook until translucent. Add the garlic and dried oregano. Mix together until fragrant.
Add the tomatoes, sugar, salt and pepper. Cook for 15-20 minutes on medium heat until the tomatoes are completely mushy. Turn off heat and let it cool down.
At this point you can mash them, use a hand blender or transfer to a blender/food processor and puree. Add fresh oregano and continue to cook the mashed/pureed sauce for another 5 minutes. Turn off heat and cool completely.
You can store it in an airtight container in the refrigerator for up to 3 weeks.
Variation:
Add half a red bell pepper to the sauce.
Ideally you would use vine ripened salad tomatoes preferably from a farmer's market. But if the only tomatoes you can find are the barely ripe grocery store variety then use a handful of cherry or grape tomatoes with it. Roma tomatoes or tomatoes or different colors everything works. Add them to some onion, garlic and oregano and you have great tasting pizza sauce.
You will need (for 6 hand tossed 10 inch pizzas)
28 oz of chopped tomatoes (6 salad tomatoes or 4 salad and 12 cherry or any other combination)
1/4 cup chopped onion
3 tbsp. olive oil
2 cloves garlic, peeled and minced
1 tbsp. dried oregano
1 tbsp. sugar
1 tbsp. fresh oregano (use dried if fresh is not available)
salt and black pepper to taste
Heat the oil in a saucepan. Add the chopped onion and cook until translucent. Add the garlic and dried oregano. Mix together until fragrant.
Add the tomatoes, sugar, salt and pepper. Cook for 15-20 minutes on medium heat until the tomatoes are completely mushy. Turn off heat and let it cool down.
At this point you can mash them, use a hand blender or transfer to a blender/food processor and puree. Add fresh oregano and continue to cook the mashed/pureed sauce for another 5 minutes. Turn off heat and cool completely.
You can store it in an airtight container in the refrigerator for up to 3 weeks.
Variation:
Add half a red bell pepper to the sauce.
Thursday, May 15, 2014
How do I Maintain Sourdough Starter / Once a Week Baking with Sourdough Starter / Baking Schedule
Updated: 10/26/2018
I have had the starter for almost 5 years now. Yesterday a blogging friend asked a question about maintaining starters and that prompted me to revisit this post. Everything in this post holds true today too but my baking habits have changed. I do not bake every week anymore. Sometimes I bake weekly, other times I bake after 2-3 months. My starter works perfectly every single time. I have updated this post for the infrequent baker.
Original post:
If you are here then you have a new/active sourdough starter that is just about ready to use to bake bread or you have one that you are already actively using to bake bread. You need some help in getting the process into a schedule that fits your families needs. You have come to the right place.
If you do not have a starter yet then you should get one started. All it takes is flour, water and time. I used the book Flour Water Salt Yeast by Ken Forkish to get me started. I now have an active starter that I keep in the refrigerator to be revived when needed.
It was when I started to maintain the starter that I realized I needed a schedule to ensure I had an active and bubbling starter when I was ready to bake. While there is a lot of information available on how to schedule a baking cycle and the proportion of the flour/water for the feed there is very little on how to customize this for your needs.
Another problem is that most processes described online result in some amount of discarded or spent starter. The quantity of the feed directly impacts the amount of discarded or spent starter. A very small quantity is needed to keep the starter going, the rest is discarded. While you could find recipes for discarded and spent starter a better idea would be to work the quantities of the feed and tweak your process to never have to discard your precious starter.
When I was a weekly baker I refrigerated and refreshed the starter every week. I revived the starter on Saturday morning and mixed the dough on Saturday afternoon/evening. I returned the starter to the refrigerator after I had taken out what I needed to mix the dough. I baked on Sunday. If you do not wish to bake as frequently don't worry. The same process can work for you. Just start on the day before you are ready to bake.
NOTE:
1. ALL QUANTITIES ARE BY WEIGHT. THIS WOULD NOT WORK AS WRITTEN IF YOU WERE TO MEASURE BY VOLUME.
2. I use 100% hydration, equals parts of water and flour. This process will work with most high hydration starters. To increase hydration you can gradually, over a few weeks, increase the percent of water to flour. I had started with a 85% starter as the pictures show and increased to 100%.
My schedule is as follows
The day before I am ready to bake
I take out all 50 gm of my starter from the refrigerator and place it on the counter top for 30 minutes. It starts to bubble and is ready to be fed.
I transfer it to a mixing bowl. Feed it with equal parts of flour and water, usually 50 gm or 75 gm each, giving me 100 gm or 150 gm for use in my recipes. If I need close to 300 gm then I use larger quantities of water and flour for the feed.
Covered with a plate, it rests on the counter top for the next 4-8 hours depending upon the weather. When it starts to bubble it is ready to be used. Please note a 100% hydration starter will have a thinner consistency than the picture below. Someday I will update the pictures here.
4-8 hours after feeding, typically the same afternoon/evening
I transfer all but 50 gm of starter to a separate mixing bowl. The 50 gm left behind is to be stored.
I put this 50 gm of starter back in the mason jar and refrigerate it until the next baking day. Again please note higher hydration starters have a thinner consistency.
I use the fed starter I have moved to a separate bowl to mix the dough as needed.
Baking day
I follow the recipe for the bread or pizza. Most sourdough recipes, with the exception of crackers, call for overnight bulk rise and fermentation. The day after the dough is mixed you are ready to bake. For crackers the dough is ready in an hour.
If you are looking for ideas on what to bake, there are a lot of recipes in this space. Search for sourdough or look through the recipes to find the sourdough recipes.
I have had the starter for almost 5 years now. Yesterday a blogging friend asked a question about maintaining starters and that prompted me to revisit this post. Everything in this post holds true today too but my baking habits have changed. I do not bake every week anymore. Sometimes I bake weekly, other times I bake after 2-3 months. My starter works perfectly every single time. I have updated this post for the infrequent baker.
Original post:
If you are here then you have a new/active sourdough starter that is just about ready to use to bake bread or you have one that you are already actively using to bake bread. You need some help in getting the process into a schedule that fits your families needs. You have come to the right place.
If you do not have a starter yet then you should get one started. All it takes is flour, water and time. I used the book Flour Water Salt Yeast by Ken Forkish to get me started. I now have an active starter that I keep in the refrigerator to be revived when needed.
It was when I started to maintain the starter that I realized I needed a schedule to ensure I had an active and bubbling starter when I was ready to bake. While there is a lot of information available on how to schedule a baking cycle and the proportion of the flour/water for the feed there is very little on how to customize this for your needs.
Another problem is that most processes described online result in some amount of discarded or spent starter. The quantity of the feed directly impacts the amount of discarded or spent starter. A very small quantity is needed to keep the starter going, the rest is discarded. While you could find recipes for discarded and spent starter a better idea would be to work the quantities of the feed and tweak your process to never have to discard your precious starter.
When I was a weekly baker I refrigerated and refreshed the starter every week. I revived the starter on Saturday morning and mixed the dough on Saturday afternoon/evening. I returned the starter to the refrigerator after I had taken out what I needed to mix the dough. I baked on Sunday. If you do not wish to bake as frequently don't worry. The same process can work for you. Just start on the day before you are ready to bake.
NOTE:
1. ALL QUANTITIES ARE BY WEIGHT. THIS WOULD NOT WORK AS WRITTEN IF YOU WERE TO MEASURE BY VOLUME.
2. I use 100% hydration, equals parts of water and flour. This process will work with most high hydration starters. To increase hydration you can gradually, over a few weeks, increase the percent of water to flour. I had started with a 85% starter as the pictures show and increased to 100%.
My schedule is as follows
The day before I am ready to bake
I take out all 50 gm of my starter from the refrigerator and place it on the counter top for 30 minutes. It starts to bubble and is ready to be fed.
I transfer it to a mixing bowl. Feed it with equal parts of flour and water, usually 50 gm or 75 gm each, giving me 100 gm or 150 gm for use in my recipes. If I need close to 300 gm then I use larger quantities of water and flour for the feed.
Covered with a plate, it rests on the counter top for the next 4-8 hours depending upon the weather. When it starts to bubble it is ready to be used. Please note a 100% hydration starter will have a thinner consistency than the picture below. Someday I will update the pictures here.
4-8 hours after feeding, typically the same afternoon/evening
I transfer all but 50 gm of starter to a separate mixing bowl. The 50 gm left behind is to be stored.
I put this 50 gm of starter back in the mason jar and refrigerate it until the next baking day. Again please note higher hydration starters have a thinner consistency.
I use the fed starter I have moved to a separate bowl to mix the dough as needed.
Baking day
I follow the recipe for the bread or pizza. Most sourdough recipes, with the exception of crackers, call for overnight bulk rise and fermentation. The day after the dough is mixed you are ready to bake. For crackers the dough is ready in an hour.
If you are looking for ideas on what to bake, there are a lot of recipes in this space. Search for sourdough or look through the recipes to find the sourdough recipes.
Sunday, March 16, 2014
Goda Kala Masala (Maharashtrian Masala)
Goda masala is a Maharashtrian masala that is very different from the regular garam masala. It is used to flavor some classic marathi dishes like Bharli wangi or stuffed eggplant.
Kala Masala has dried coconut in it which reduces its shelf life. Stored in an airtight container it lasts for a fortnight.
You will need
1/4 cup coriander seeds
1 tbsp. cumin seeds
1 clove
1/2 inch piece cinnamon
1/4 cup dried coconut flakes
1 tbsp. olive oil
Heat a tbsp. of oil and roast the coriander and cumin seeds. When they get crispy transfer them to a bowl of a dry grinder. Add the clove and cinnamon to the pan. Roast for a few minutes until crisp and transfer to the bowl. Now roast the coconut flakes and when they start to turn brown turn off heat and transfer them to the bowl. Dry grind to a powder and store.
Kala Masala has dried coconut in it which reduces its shelf life. Stored in an airtight container it lasts for a fortnight.
You will need
1/4 cup coriander seeds
1 tbsp. cumin seeds
1 clove
1/2 inch piece cinnamon
1/4 cup dried coconut flakes
1 tbsp. olive oil
Heat a tbsp. of oil and roast the coriander and cumin seeds. When they get crispy transfer them to a bowl of a dry grinder. Add the clove and cinnamon to the pan. Roast for a few minutes until crisp and transfer to the bowl. Now roast the coconut flakes and when they start to turn brown turn off heat and transfer them to the bowl. Dry grind to a powder and store.
Wednesday, February 12, 2014
Marinara Sauce
Marinara sauce is the most popular Italian sauce known the world over. It is a vegetarian sauce supposed to date back to 17th century Naples. The name marinara appears to be derived from 'marinade' rather than 'marine'. However, people from Australia may beg to differ. Their marinara contains seafood.
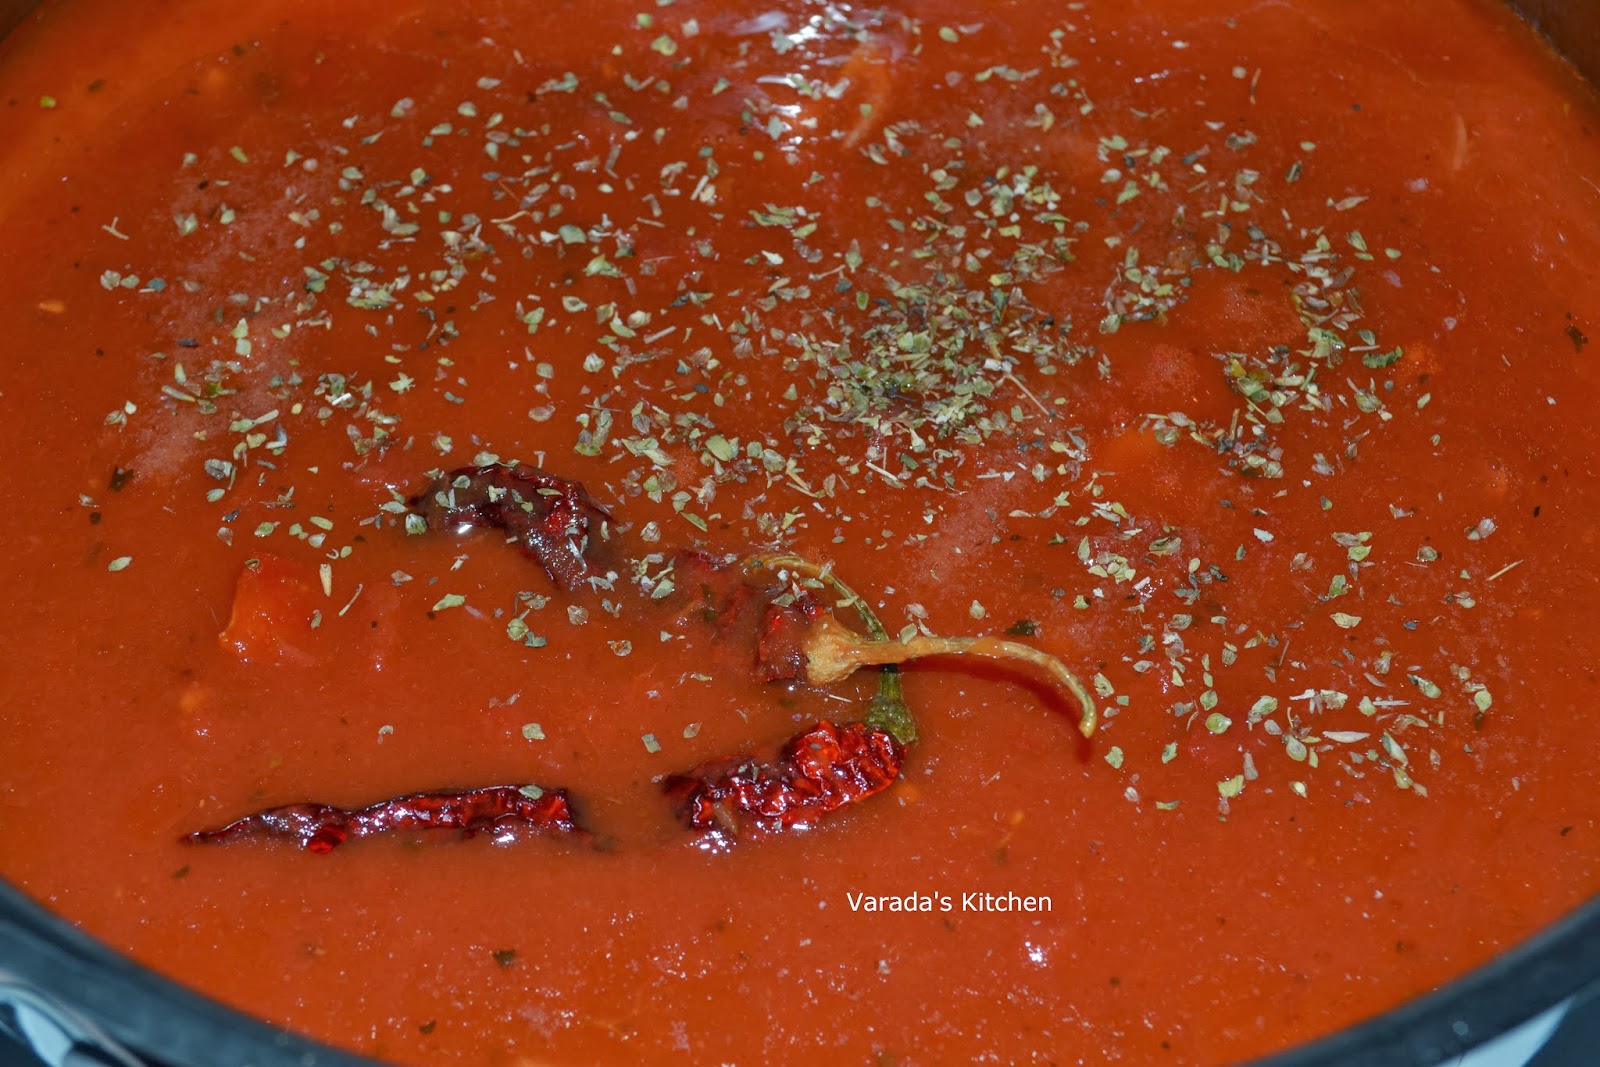
Marinara is the simplest of the basic sauces and takes less than half an hour to prepare. To make good marinara you need good quality tart tomatoes. Try to find good quality ripe tomatoes to provide the tart flavor. Unless you grow tomatoes in your yard or have a really good source you might want to use canned tomatoes. Use good olive oil. You can substitute fresh basil for the dried oregano if you wish.
This sauce is used as a base or starting point for other tomato based sauces. It is used in stews, as a dip for bread sticks and nuggets or to top pizzas. However, it is most commonly used to top cooked pasta.
This sauce can be stored without refrigeration for a few days thanks to the acid in the tomatoes. It lasts longer when refrigerated.
You will need
6 large tomatoes
3 tbsp. olive oil
3 pods garlic
1 tbsp. oregano
2 dried red chilies
salt to taste
Bring water to a boil in a large pan. Score and put the tomatoes int he water. Take them out after 5 minutes and let them cool a little. Peel the skin off, you can remove the seeds if you like. Dice the tomatoes and keep aside. Remove the shell from the garlic and slice it. In a large skillet heat the olive oil. Add the garlic slices to the hot oil and let them sizzle. Do not let them brown.
Add the tomatoes, red chilies and oregano. Season with salt to taste.
Bring it to a quick boil and let it simmer for about 15 minutes. Taste and adjust salt and oregano. Turn off the heat and remove the chilies.
Use as needed.
Marinara is the simplest of the basic sauces and takes less than half an hour to prepare. To make good marinara you need good quality tart tomatoes. Try to find good quality ripe tomatoes to provide the tart flavor. Unless you grow tomatoes in your yard or have a really good source you might want to use canned tomatoes. Use good olive oil. You can substitute fresh basil for the dried oregano if you wish.
This sauce is used as a base or starting point for other tomato based sauces. It is used in stews, as a dip for bread sticks and nuggets or to top pizzas. However, it is most commonly used to top cooked pasta.
This sauce can be stored without refrigeration for a few days thanks to the acid in the tomatoes. It lasts longer when refrigerated.
You will need
6 large tomatoes
3 tbsp. olive oil
3 pods garlic
1 tbsp. oregano
2 dried red chilies
salt to taste
Bring water to a boil in a large pan. Score and put the tomatoes int he water. Take them out after 5 minutes and let them cool a little. Peel the skin off, you can remove the seeds if you like. Dice the tomatoes and keep aside. Remove the shell from the garlic and slice it. In a large skillet heat the olive oil. Add the garlic slices to the hot oil and let them sizzle. Do not let them brown.
Add the tomatoes, red chilies and oregano. Season with salt to taste.
Bring it to a quick boil and let it simmer for about 15 minutes. Taste and adjust salt and oregano. Turn off the heat and remove the chilies.
Use as needed.
Tuesday, February 11, 2014
Vegetable Stock
Vegetable stock is used to add flavor and body to a lot of dishes. Soups and stews taste a lot better with fresh stock. Most store bought stock is full of preservatives and even if one were to find preservative free stock the flavor may not be to your liking. Making fresh stock at home gives you the ability to control the flavors in the recipe in which the stock is to be used.
I love this recipe because it produces flavorful stock every time that does not overpower your final dish.
You will need
1 potato
2-3 stalks celery
1 carrot
1/2 onion (optional)
5-6 sprigs fresh thyme
1 bay leaf
Chop the potato, celery, carrot and onion (if using) into cubes.
Bring 8-10 cups of water to a boil. Lower the heat and add the chopped vegetables, bay leaf and thyme. Do not add salt or oil.
Let the liquid simmer for about 40 minutes. Turn off heat.
Let it cool completely before straining. Store in the refrigerator for up to 5 days.
Note:
If you need to use the stock immediately, you do not have to wait for it to cool completely. Allowing the liquid to cool allows more of the flavors to seep into it.
You can adjust the proportions of the vegetables to change the flavor of the stock.
I love this recipe because it produces flavorful stock every time that does not overpower your final dish.
You will need
1 potato
2-3 stalks celery
1 carrot
1/2 onion (optional)
5-6 sprigs fresh thyme
1 bay leaf
Chop the potato, celery, carrot and onion (if using) into cubes.
Bring 8-10 cups of water to a boil. Lower the heat and add the chopped vegetables, bay leaf and thyme. Do not add salt or oil.
Let the liquid simmer for about 40 minutes. Turn off heat.
Let it cool completely before straining. Store in the refrigerator for up to 5 days.
Note:
If you need to use the stock immediately, you do not have to wait for it to cool completely. Allowing the liquid to cool allows more of the flavors to seep into it.
You can adjust the proportions of the vegetables to change the flavor of the stock.
Monday, February 10, 2014
Blueberry sauce
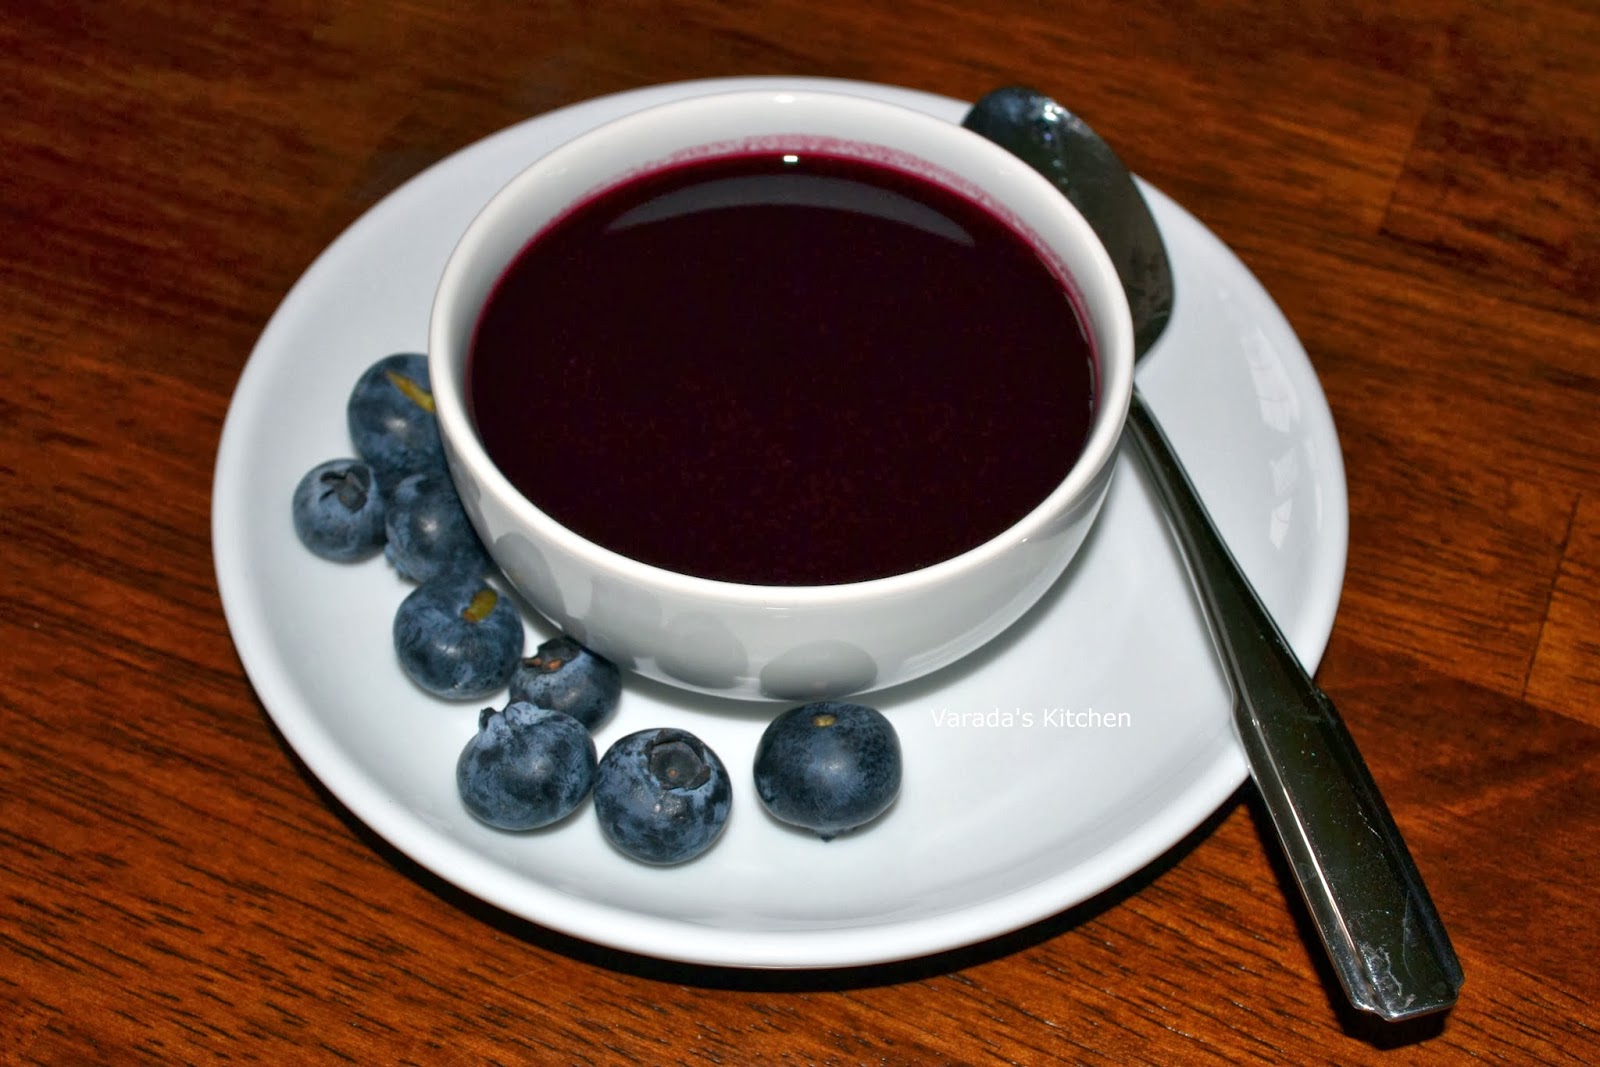
Blueberry sauce is a one of the easiest of fruit sauces used to enhance the flavor and appearance of desserts and pancakes. It is sweet and tart, the taste dependent upon the blueberries used. It is a nice to know basic recipe best made with fresh blueberries.
You will need
6 oz. fresh blueberries
1/2 cup water
1/2 cup sugar
Bring water and sugar to a boil in a pan on the stove top. Add the blueberries and let the liquid simmer for 2-3 minutes until the berries break open. Turn off the heat and let the sauce cool.
Microwave version: Heat the water, sugar and blueberries in a microwavable bowl for 1-2 minutes or until the water boils. The exact time depends upon the microwave. Stir it for 5 seconds and return to the microwave for another 15 seconds. It does boil over so watch it carefully.
You could use the sauce with blueberry chunks on pancakes. Or you could run it through a blender if you plan on using it in a dessert.
Straining the sauce gets rid of the blueberry seeds and gives you a finer sauce. The seeds do not alter the taste so you may choose to leave them in the sauce.
If the blueberries are sweet decrease the amount of sugar. If they are tart increase the sugar. If you like the sauce thick decrease the amount of water.
You will need
6 oz. fresh blueberries
1/2 cup water
1/2 cup sugar
Bring water and sugar to a boil in a pan on the stove top. Add the blueberries and let the liquid simmer for 2-3 minutes until the berries break open. Turn off the heat and let the sauce cool.
Microwave version: Heat the water, sugar and blueberries in a microwavable bowl for 1-2 minutes or until the water boils. The exact time depends upon the microwave. Stir it for 5 seconds and return to the microwave for another 15 seconds. It does boil over so watch it carefully.
You could use the sauce with blueberry chunks on pancakes. Or you could run it through a blender if you plan on using it in a dessert.
Straining the sauce gets rid of the blueberry seeds and gives you a finer sauce. The seeds do not alter the taste so you may choose to leave them in the sauce.
Thursday, February 6, 2014
Coriander Cumin powder (Dania Jeera powder / Dane Jeere pud)
A lot of Indian recipes call for a teaspoon or tablespoon of Coriander and Cumin powder. It is very easy to make this powder and fresh made powder tastes so much better than the store bought version. Besides if you make it in small quantities you can store it at room temperature and it will retain its flavor.
You will need
a handful of coriander seeds
a handful of cumin seeds
Roast the seeds in a dry warm pan on medium heat. Shake the pan around frequently to keep the seeds from burning. It takes about 5-7 minutes. You will know they are done by the fragrance and the seeds will begin to turn color. Turn off heat and let it cool for a few minutes. Dry grind to a fine powder and store in a air tight container to be used as needed.
a handful of coriander seeds
a handful of cumin seeds
Roast the seeds in a dry warm pan on medium heat. Shake the pan around frequently to keep the seeds from burning. It takes about 5-7 minutes. You will know they are done by the fragrance and the seeds will begin to turn color. Turn off heat and let it cool for a few minutes. Dry grind to a fine powder and store in a air tight container to be used as needed.
Subscribe to:
Posts (Atom)