Monday, February 3, 2014

Jamaican Coco Bread and Veggie Patty

I wanted to cook Jamaican food. I did not know any Jamaican dishes and so I looked for something online. Coco bread with a patty appeared to be very popular.


I referred to a lot of recipes but they all used all purpose flour. I wanted to use mostly whole wheat flour so I changed the ingredients and proportions to work with whole wheat.

As for the patty filling I could not find anything vegetarian. I wanted to keep the essence of Jamaican food so I researched the spices and vegetables they use and came up with my own recipe based on what I had on hand. Deep fried patties are common in Indian cooking and in the past I had figured out baked versions of those traditional recipes like this pea dumpling. I used the same principle to create the patty. However, for the patty shell I used cold butter and cold water as used in pie shells to keep it close to authentic.

The end result was fantastic. The patty tasted really good with the bread.

You will need
For the Coco bread
1 cup whole wheat flour
1/2 cup King Arthur bread flour
1/2 tbsp sugar
a pinch of salt
1/8 oz Fleishmann instant yeast
3.5 fl oz. coconut milk
2 fl oz. water
3 tbsp. butter, divided

For the Patty shell
1 1/3 cup all purpose flour
1 tsp. paprika
2 tsp. turmeric powder
salt to taste
1/2 tbsp. butter
1 cup cold water

For the Patty filling
2 tomatoes
1/2 head of cauliflower florets
1 carrot
1 tsp. paprika
1 tsp. turmeric powder
salt to taste
2 tbsp. olive oil

To make the Coco bread


Mix all the dry ingredients together. In a microwavable bowl warm the coconut milk and 1 tbsp. butter for 35 secs or until the butter melts and the liquid is heated through. Pour the liquid in the dough and mix well.


Heat the water in the microwavable bowl and using a as little water as you can form a ball of dough. Knead it well for about 10 minutes.


Cover with a plastic wrap and leave aside for about an hour or until dough doubles in size.


Preheat oven to 375 F. Melt the remaining butter and keep aside. Punch down the dough and cut into lemon size pieces.


Take of the pieces in the palm of your hand form a uniform ball.


Place it on a working surface and roll it out to the desired size. I did not want to make the bread too big so I kept the disc to 5 inches in diameter. Brush the flattened dough with the melted butter.


Fold it over in half.


Arrange on a baking sheet covered with parchment paper. Repeat for all the pieces of dough.


Bake in the oven middle rack for 15-20 minutes. Flip them over and put them back in the oven for 5-7 minutes. They should be browned on both sides.


Cool on a rack. The bread is ready.

For the Patty shell
Mix the dry ingredients in a mixing bowl. Cut the butter into small pieces and rub it into the dough with your fingers until the butter is reduced to the size of gravel. Using the cold water form sticky dough. Wrap it in plastic wrap and refrigerate for at least an hour.


For the Patty filling
Chop the tomatoes. Break the cauliflower in small florets. Peel and chop the carrot. Heat oil in pan and add the tomatoes. Let them cook and lose some of the liquid. Add the rest of the vegetables and spices. Season with salt. Let the vegetables cook completely. Mash gently using a potato masher such that no piece is larger than 1/2 an inch.


To put it together
Preheat oven to 425 F. Take the patty dough out of the refrigerator and divide into lemon sized balls.


Take one of the balls and and with the help of some flour roll it out on a working surface to about 4 inches in diameter.


Dip you finger in water and run it around the edges of the disc. Put a tablespoon of filling in the bottom half.


Fold over the disc to form a semi circle. Using a fork press down the edges to seal them.


Put the patty on a baking dish after applying a few drops of oil on the bottom and over the top. Repeat the process until all the dough is gone.


Place the patties in the oven and bake for 15-17 minutes. Let them cool a little on a cooling rack.


To serve stuff the patty inside the coco bread and enjoy.


I chose Coco bread with a veggie patty for week six of the 52 Week Challenge.

Fondue

Cheese Fondue is the National dish of Switzerland. In the mountain valleys of Switzerland, where very little was available during the harsh winter months, freshly baked rustic bread like Weizenbrot coated with warm cheesy fondue made a hearty and filling meal.

I have fond memories of fondue. Outside my daughter's dance school every Friday night the Moms would set up a tailgate party. Fondue takes me back to the parking lot on the far side of the school. We talked and laughed around the food. When the girls got out they made a beeline for the leftovers. We always had plenty and it would be gone within minutes. That was when I invested in a fondue set. Nancy made the best fondue and I wanted to try it at home.

I have not used the set in a long time and we are having a really cold spell so fondue seemed ideal on a particularly cold night. Warm fresh out of the oven Weizenbrot covered with gooey cheese...dinner was good.


Fondue contains a good amount of wine. I substitute apple cider and it tastes great. Make sure you use good quality cheese as it is the cheese that will determine the taste of the fondue. If you don't have a fondue pot you can use any stove safe pot or pan.

You will need
7 oz Gruyere
7 oz Emmenthaler
3/4 cup apple cider divided
1 pod garlic
1/2 tsp. cornstarch

Dissolve cornstarch in a little cider and keep aside. Place the fondue pot on medium heat with cheese and the remaining cider. Cook until the cheese melts.


Add the cornstarch and cider mixture. Cook until the mixture is homogeneous.


Light the warmer on the fondue server. Transfer the pot of cheese to the fondue server. Serve with fresh made Weizenbrot cut into bite size pieces.


Enjoy on a cold winter night.

Tuesday, January 28, 2014

Gulpoli (Jaggery paratha)

Gulpoli is a special poli (flatbread) made on Makar Sankrant, the harvest festival. In coastal Maharashtra Jaggery based dishes are primary made in winter and gulpoli is one of the more popular dishes. As the jaggery filling begins to cool the gulpoli turns crispy. Gulpoli is one of my favorite sweet breads.


I made these before my daughter headed to college. I made just eight gulpoli as it was part of a full meal. The dough for this recipe is mixed with hot oil and is super soft. That makes it easy to roll with the filling. If the jaggery seeps out little it is okay. Caramelized jaggery tastes pretty good.


When I first posted this recipe I had made a Maharastrian thali. I did not have very good pictures when I first posted this recipe. On the 25th of January I have updated the pictures.

You will need (for 8)
For the dough
2 cups wheat flour
1/2 cup all purpose flour
7 tbsp. olive oil

For the filling
1 cup jaggery
1/4 cup besan
2 tbsp. olive oil
2 tbsp. polished sesame seeds
2-3 pods cardamon

Heat the olive oil. Put the flours in a mixing bowl and work the hot oil in. Knead the dough using water. Keep aside for a couple of hours. Knead again and divide into lemon sized balls. 


Dry roast the sesame seeds until they turn pinkish. Let cool and using a blender dry grind to a coarse powder. Shell the cardamom and pound to a powder. Cook the besan well in the oil. Combine in a mixing bowl with all the other ingredients for the filling. Keep aside.

Flatten one ball of dough in the palm of your hands.


Place filling in the flattened dough. Bring the edges together and and close at the top. 


On a working surface roll out a thin poli taking care to see the filling stays inside. 


Cook on a flat griddle pan. Put a few drops of oil while the poli is cooking. Serve hot.


Enjoy!


Monday, January 27, 2014

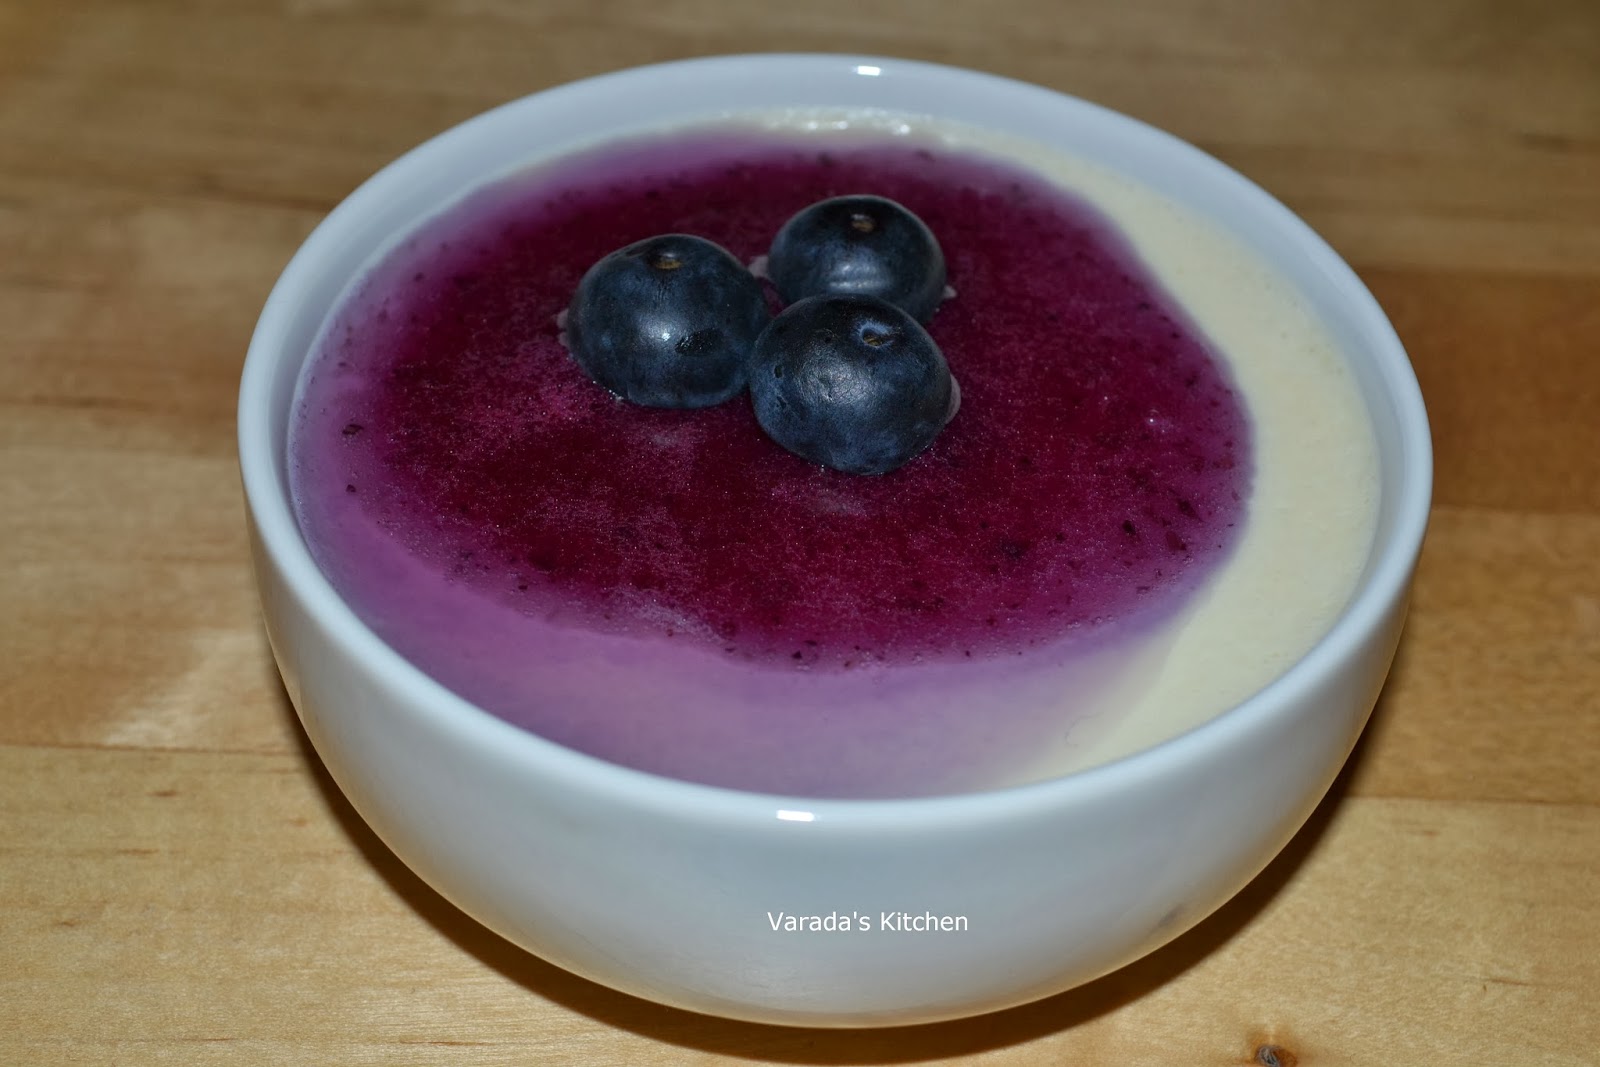
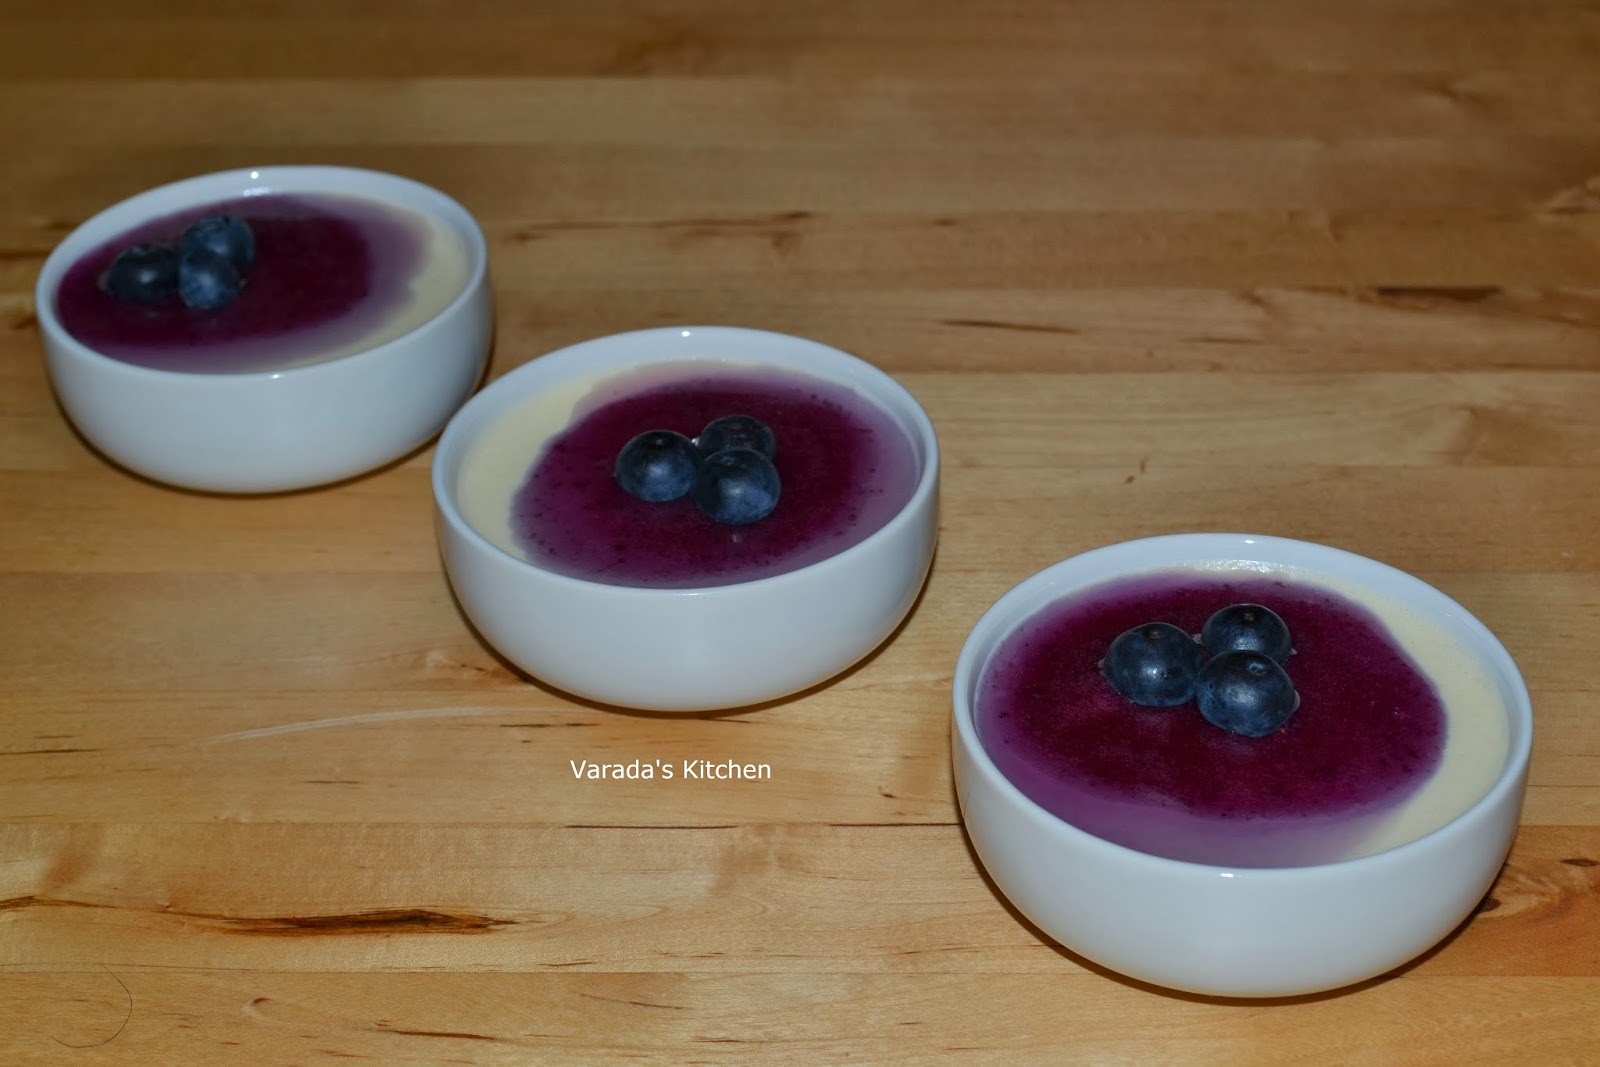
Vanilla Panna Cotta with Fresh Blueberry sauce

Everybody loves Panna Cotta especially this vanilla flavored version served with fresh blueberry sauce. This is for week five of the 2014 52 week challenge for the theme Vanilla.


You will need
For the panna cotta
2 cups half and half
1 cup whipping cream
1/2 cup sugar
1 packet gelatin
3 tbsp. cold water

For the sauce
1 packet fresh blueberries
1/2 cup water
1/2 cup sugar

To make the panna cotta heat the whipping cream and half and half in a pan until just boiling. Turn off heat. Take cold water in a small bowl and add the gelatin to it. Let it stand for 5 minutes and then add it to the heated milk. Stir until the gelatin dissolves completely.


Pour into desired cups, ramekins or glasses and chill for a few hours or overnight.


To make the sauce heat the water and sugar in a saucepan. When the sugar melts and the water is boiling add half the blueberries. Let it simmer for a few minutes and turn off heat. Let it cool then run it through a blender. Chill for at least an hour. Drizzle over the panna cotta to serve.

Baumkuchen (German Tree Cake)

The January 2014 Daring Bakers' challenge was hosted by Francijn of "Koken in de Brouwerij". She challenged us all to bake layered cakes in the tradition of Baumkuchen (tree cake) and Schichttorte (layered cake).

I had seen pictures of Baumkuchen on the web and my impression was that of a very complex cake too difficult to attempt. Then I found the group Daring Bakers. I liked the concept and decided to join in. January was my first month and Baumkuchen my first challenge with the Daring Bakers. If it had not been for this group I would never have attempted to bake this cake.


Baum Kuchen is German for Tree cake. Just like growth rings on a tree the cake has rings. The authentic Baumkuchen is made on an open spit on a log and truly resembles the tree rings. The version I baked is broiled in layers that can be clearly seen when the cake is sliced.


The batter was easy to prepare. It was the baking process that was very time consuming. I got about 10 layers excluding two layers of apricot jam. Each layers had to be broiled for about a minute and a half. A few seconds over and you risked burning the layer which would ruin the entire cake. But for all the effort the end result was awesome. I was thrilled when I cut into the cake and saw the layers.


Usually the Daring Bakers provide the recipe which the challengers are to follow. However, this month we were supposed to bake a layered cake. It was not mandatory to use the provided recipe. Hence I adapted the recipe from Global Adventures.

You will need
For the batter
6 oz. almond paste (I got it at Whole Foods)
3 tbsp. half and half
6 tbsp. unsalted butter, softened
1/2 sugar
5 eggs
3/4 tsp. vanilla extract
1/2 cup cake flour (I used King Arthur unbleached cake flour)
1/4 cup and 2 tbsp. cornstarch

5 oz. apricot preserve


To prepare the batter
Bring all the ingredients to room temperature. Break up the almond paste into pieces and add the half and half to it. Beat it until combined and creamy. Add the butter and beat some more. Add the sugar and beat until frothy. Separate the egg yolks from the egg whites. Keep the egg whites aside. Beat in one egg yolk at a time into the almond mixture. Add the vanilla extract. Sift in the flour and corn starch a little at a time.

In a separate bowl beat the egg whites until they form soft peaks. Fold them into the almond flour batter. Now you are all ready to prepare the cake.

The layering process
Use an 8" springform pan lined on the bottom with parchment paper. Put butter on the pan, place the parchment paper on it and then put some butter on the paper. Once the batter and the pan is ready, set the oven boiler on Low.


Use a 1/4 cup measure to place batter on the parchment paper in the pan. Spread it around evenly with a round pastry brush. Place the pan on the top rack under the broiler. Set the timer for a minute but watch it like a hawk. When the top turns brown take it out of the oven. If needed add another minute under the broiler. I was very surprised to see it done in just over a minute.


Add another layer of batter and spread it around evenly. You have to ensure you are building a level flat cake. Put the pan back in then oven. It took the batter a little over a minute to brown in my oven. You will figure out the time it takes in your oven in a few layers. Continue building the cake one layer at a time until a third of the batter is gone. Put in a layer of apricot jam and broil for about 30 seconds. Add another layer of batter. Continue building the cake adding a layer of apricot jam after every few layers until all the batter is gone. I got two apricot jam layers in this cake.


Take it out of the pan and place on a cooling rack or a parchment sheet. When cool remove the parchment paper and using plastic wrap cover the cake completely. Place a large inverted mixing bowl over it and leave on the counter top overnight.


Cover it with chocolate glaze. I used my own recipe for the chocolate glaze that you will find here. Pour it over the cake and let it dribble over the sides.


Enjoy!

Friday, January 24, 2014

Focaccia Caprese

I had not baked anything worth mentioning for years. I have fondly looked at my cake decorating supplies from time to time but have not used those for several years either. On a whim I decided to try this Foccaccia Caprese.


I planned to make this bread on Saturday, the 11th of January, well before the reveal date of 24th. With the temperatures expected to rise to the upper 50s and lower 60s on the 11th it would be a perfect day for baking. However, as luck would have it, I overslept on the 7th, the first day of school after winter break. My teenager woke me up 15 minutes before leaving for school to ask what she should pack for lunch. Oh! the guilt! I decided to go out in the freezing cold (25 F) and get the ingredients. I baked the bread and delivered it to school in time for lunch. It turned out great! And I thoroughly enjoyed baking it.

You will need
For the dough
2 tsp. Fleischmann rapid rise yeast
1 1/2 tsp. sugar
1/4 cup olive oil
3 1/2 cups bread flour
1 tsp. salt
1 1/2 cup warm water

For the Topping
4 large tomatoes (red or yellow), sliced thin
8 oz. fresh mozzarella, sliced 1/4" thick
8 leaves fresh basil, rolled up and sliced into thin strips

For the herb oil
1/4 cup olive oil
1 tsp. dried oregano
1 tsp. dried basil
1 pod garlic, minced
1/2 tsp. red pepper flakes
salt to taste

olive oil to brush the loaves

In a bowl whisk all the ingredients for the herb oil. Keep aside until needed.


In a mixing bowl add all the ingredients for the dough except the water. Mix well. Add the water a little at a time and knead into a soft and elastic dough. I prefer not to use the electric mixer because I have recently found kneading to be very calming. The rough and tumble dough is tamed under your fingers as you keep working it and is replaced by a glossy, soft dough. Roll this soft dough into a ball. Moisten your palm with olive oil and rub all over the dough. Leave it in the mixing bowl covered with plastic wrap for an hour.


While the dough rests, prepare the baking sheet. I used a regular baking sheet and this recipe yielded two good sized Focaccia. Sprinkle olive oil on the baking sheet and spread it around. After resting for an hour the dough should have grown to twice its size.


Divide it into two and shape the loaves. Working with your hands flatten one of the two loaves on one side of the baking sheet. Flatten it to your desired thickness. Repeat with the other loaf.


Preheat the oven to 400 F. Let the loaves rest for about 20 minutes in the baking sheet. They will rise a little. Moisten you fingertips with olive oil and punch holes all over the loaves. Using a pastry brush spread the prepared herb oil liberally over the top of the loaves.


Bake uncovered in the oven for 18 minutes or until just brown. While the loaves are baking prepare the toppings.


Roll the basil leaves and slice thin resulting in thin strips. Leave a few leaves to garnish. Slice the fresh mozzarella in 1/4" think slices. Slice the tomatoes thin.


Remove the loaves from the oven. At this point the bread smelled and looked so good I had to resist trying it.


Sprinkle more herb oil. Crank the oven up to 450 F. Arrange the mozzarella slices on the bottom followed by tomato slices and basil strips. Sprinkle more herb oil on the top and return to the oven for about 8 minutes. Remove from the oven and let the loaves rest for a few minutes. Serve hot.


Note: If you are unable to finish it all in one meal you can have leftovers. Leftover Focaccia can easily be freshened up. Preheat the oven to 375 F and place the Focaccia directly on the middle rack. Let it heat through for 5 minutes. Take out of the oven and serve hot. Even though it does not taste as good as the first time it is taken out of the oven, it comes close.


Ambti (Lentil soup, Tur Dal)

Ambti is a stable in the Marathi household and is made with tur dal. My mother made delicious ambti. Even though I have made it several times with her standing by my side I have never been able to make it as good as hers.

Ambti literally means a dish to which something sour has been added. The preferred sour ingredient in Maharashtra is the dried kokum fruit peel also called amsul (sol). In its absence tamarind can be used. I did not have fresh amsul so I used tamarind.

As a child I remember my mother used to buy amsul only from some vendors in the interior of Goa. She did not buy it in the town we lived. She had to have fresh amsul and that according to her was not available in town.


You will need
1 cup turdal
1 Serrano pepper, deseeded and minced
1 tsp. powdered roasted coriander and cumin seeds
1 tbsp. tamarind extract
1 tsp. Agave Nectar
1 tsp. mustard seeds
1 tsp. turmeric powder
1/4 tsp. asafoetida
4-5 curry leaves (optional)
1 tbsp. olive oil

Pressure cook the turdal with twice the quantity of water. Heat oil in a pan and add the mustard seeds. When they crackle add the pepper, turmeric powder and asafoetida. Add the curry leaves and the cooked turdal. Bring it to a boil. Add the tamarind extract, Agave nectar. Season with salt. Let it simmer for another 5 minutes. Turn off the heat and serve hot.

Thursday, January 23, 2014

Mugachi Usal (Moogachi usal / Mung usal)

Mung, Matki, Chavli etc. are commonly used in Maharastra to make usal. Usal is the curry made with pulses. Dals are made with split pulses. They are a good source of protein in the vegetarian diet. Its preparation may vary from region to region but an usal is always part of the thali.

Mung is soaked overnight for best results. You may soak it for a couple hours and get away with it. However, mung is a quick cooking pulse and can be forgiving. Even if you do not soak it at all you can make the usal. Dry roast it on a pan until it gets a pinkish hue and pressure cook the roasted mung to use as needed.


You will need
1 cup mung
1 bunch cilantro
1 Serrano pepper
1 tsp. mustard seeds
1 tsp. turmeric powder
1/4 tsp. asafoetida
tbsp. olive oil

Heat oil in a pan and add mustard seeds. When they crackle add turmeric powder and asafoetida. Now add the mung and let cook on medium-high heat for 5-7 minutes or until they are soft but not mushy.
In a blender grind cilantro and the Serrano pepper to a paste with a little water. Add the paste to the cooked mung. Season with salt and bring to a quick boil. Turn off heat and serve hot.