Blogging Marathon is the brainchild of Srivalli who blogs at Spice Your Life. Participants blog three days a week for either 2 or 4 weeks of the month based on a theme. I plan on participating in the Blogging Marathon every month. Mega Marathon is an enhanced version of the Blogging Marathon where participants blog every day of the month except Sundays. There are two versions of this event every year. I plan on participating in both, the April and the September, versions this year.
Thursday, January 1, 2015
Daring Bakers Challenge
I am going to continue with the Daring Bakers challenge this year. Daring Bakers has received a face lift and new energy has been pumped into it. If you have never heard of this challenge, every month a participating baker steps up and hosts a challenge. The other bakers take up the challenge and bake the challenge recipe. It is a fun way to expand your skills and get to know some really nice bloggers. I would never have attempted any of the recipes below if it were not for this challenge as I had never heard of these recipes before the challenge. I am looking forward to participating in the new challenges.
Here are my entries so far -
Sourdough Surprises
Finding Sourdough Surprises was a happy accident. I would love to participate regularly in this event as it allows me to use my favorite sourdough starter. But for one reason or the other I have not been able to participate in 2014. I plan to change that in 2015 and participate every month.
These are the recipes I cooked/baked for this challenge so far -
Bundt Bakers
I don't cook cakes often so I joined the Bundt Bakers. I have a cute bundt pan and have participated in the event a couple times last year. I want to continue to participate in this event in 2015.
2015 52 Week Baking Challenge
This year I have decided to participate in the 52 Week Baking Challenge hosting on the Reddit forums. Every week there is new theme. Every participant is expected to bake as per the theme and post a picture of the finished product. The themes are disclosed a few weeks ahead so there is plenty of time to prepare.
Last year I participated in a similar cooking challenge. While it was fun there were a few difficult weeks when the theme was not suited to a vegetarian lifestyle. I am hope I do not run into similar problems with baking. I am really looking forward to the weekly challenges.
Here are my entries so far -
Wednesday, December 31, 2014
Foodies Read 2015 Challenge
Last year in December I went looking for challenges around the web. I found two I liked - the Reddit 52 week food challenge and a photography challenge. I stuck with the first and not the second. Over the course of the year the food challenge got difficult with weekly themes not always suitable for a vegetarian. But I stuck it out and always found a way around. For 2015 I decided I did not want to do that again and was looking for something new. I found the Foodies Read Challenge.
It is a very interesting challenge for a food blogger. If you are intrigued and want to find out more visit their website here. I have decided to join this challenge as the Cordon-Blue Chef and read more than 19 books this year. I know it is ambitious but I think I can make the time.
These are the books I have reviewed so far -
It is a very interesting challenge for a food blogger. If you are intrigued and want to find out more visit their website here. I have decided to join this challenge as the Cordon-Blue Chef and read more than 19 books this year. I know it is ambitious but I think I can make the time.
These are the books I have reviewed so far -
Best of the year 2014
On this last day of the year all the memories that made this year good and bad come flooding back. The year started on a sad note. We had to put down our beloved 11 year old cat, Blossom. Blogging provided an outlet, something to keep the mind occupied.
Early last year in my first months of blogging I joined several groups of bloggers. One group called the Blogging Marathon opened the door to friendship and camaraderie. I have virtually met a great group of women and they are a great source of motivation. With this group, last September, I posted 132 recipes in one month with a meal a day from 26 different countries.
I participate in other groups like the Sourdough bakers, Bundt Bakers, Kneading Bakers, Daring Bakers etc. Yes, most of them are related to baking. In fact my most popular post this year was baked gulab jamoons. It got 4000 hits in a day. The next on the list were the baked versions of Diwali sweets and savories.
With blogging my photography skills have come a long way and my prop collection has grown too. I have learnt so much about my camera and so much from looking at beautiful pictures clicked by my blogger friends. The tips shared by them are always treasured and tucked away.
I hosted my first ever blog event for food photography on the first anniversary of this blog. I was so thrilled to see eight entries.
If I were to name one new thing I learnt this past year, it would be my homemade yeast starter. I had eaten artisan bread before but had never heard of a starter. A Facebook group Artisan Bread Bakers changed all that. I now have a thriving starter and frequently bake artisan breads with it.
Early last year in my first months of blogging I joined several groups of bloggers. One group called the Blogging Marathon opened the door to friendship and camaraderie. I have virtually met a great group of women and they are a great source of motivation. With this group, last September, I posted 132 recipes in one month with a meal a day from 26 different countries.
I participate in other groups like the Sourdough bakers, Bundt Bakers, Kneading Bakers, Daring Bakers etc. Yes, most of them are related to baking. In fact my most popular post this year was baked gulab jamoons. It got 4000 hits in a day. The next on the list were the baked versions of Diwali sweets and savories.
With blogging my photography skills have come a long way and my prop collection has grown too. I have learnt so much about my camera and so much from looking at beautiful pictures clicked by my blogger friends. The tips shared by them are always treasured and tucked away.
I hosted my first ever blog event for food photography on the first anniversary of this blog. I was so thrilled to see eight entries.
If I were to name one new thing I learnt this past year, it would be my homemade yeast starter. I had eaten artisan bread before but had never heard of a starter. A Facebook group Artisan Bread Bakers changed all that. I now have a thriving starter and frequently bake artisan breads with it.
One year, 428 posts and 132,000 page views later blogging has become a habit. Both for me and for my family. No one in my family is really interested in the blog and I doubt they even remember the URL of the blog but they have never complained about my experiments. In fact, they love to have something new and exciting every few days. It has been an enjoyable experience as we have enthusiastically traveled the world with food.
I end 2014 on a happy note and I wish all my readers a very happy and joyous 2015.
Linking this post to Valli's Best of year 2014 event.
I end 2014 on a happy note and I wish all my readers a very happy and joyous 2015.
Linking this post to Valli's Best of year 2014 event.
Food Photography Event Roundup
I am celebrating the first anniversary of this blog this month with a food photography challenge. This is the first event ever hosted on this blog and it was a learning experience too.
I had asked fellow bloggers to link their best picture of the month to this event. I also asked them to explain why they thought this was their best picture. I got eight beautiful entries and I am grateful to all those who participated.
Let me start with my post and best picture for the month. I chose baked gulab jamoon as the post with the best picture. It was the first time I was able to click a picture of liquid in a bowl without reflections. I was even able to add flatware to the picture without it reflecting the camera. I used manual aperture mode but what I think did the trick was the brightly colored fabric in the background. Here is the picture, you decide.
The following entries were from fellow bloggers. Each had a different explanation for the picture they chose.
I have enjoyed all the entries and reading about what went on behind the camera. Thank you all for participating in this event.
I had asked fellow bloggers to link their best picture of the month to this event. I also asked them to explain why they thought this was their best picture. I got eight beautiful entries and I am grateful to all those who participated.
Let me start with my post and best picture for the month. I chose baked gulab jamoon as the post with the best picture. It was the first time I was able to click a picture of liquid in a bowl without reflections. I was even able to add flatware to the picture without it reflecting the camera. I used manual aperture mode but what I think did the trick was the brightly colored fabric in the background. Here is the picture, you decide.
The following entries were from fellow bloggers. Each had a different explanation for the picture they chose.
- Srivalli and Archana had lovely pictures that was hastily put together
- Tanya sent in a beautiful picture
- Usha was able to tell an elaborate story through her careful thought out picture.
- Harini gave some useful details of camera setting and weather conditions used for her picture
- Ree gave a detailed explanation of props and colors used to create her picture
- Sarita also sent in a beautiful picture
- Suja chose mood lighting to create a lazy afternoon with a snack, tea and a book
I have enjoyed all the entries and reading about what went on behind the camera. Thank you all for participating in this event.
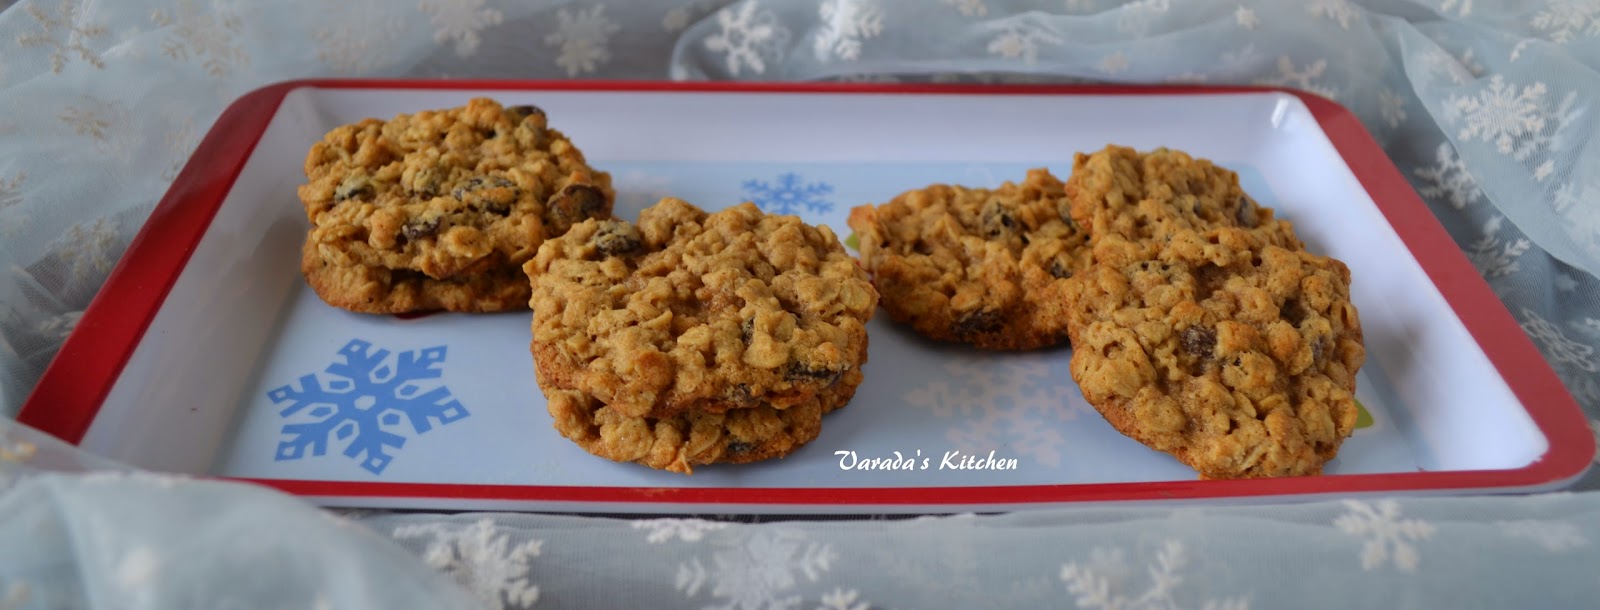
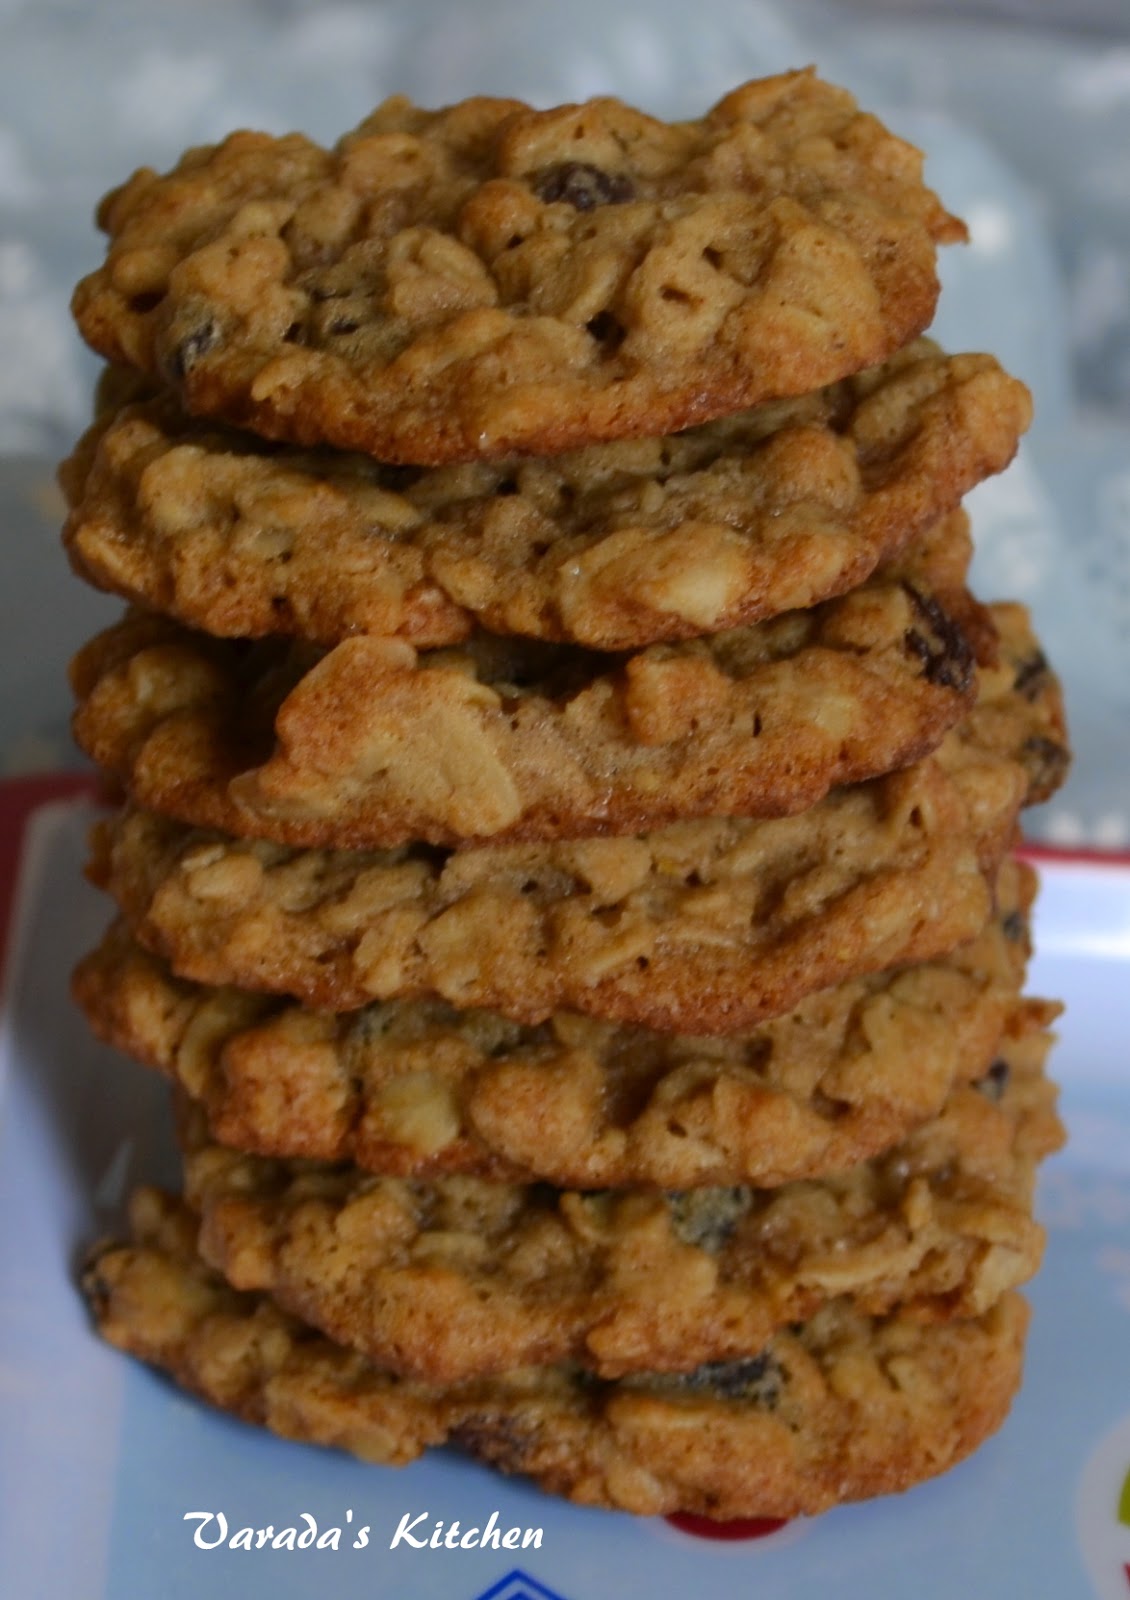
Oatmeal Raisin Cookies
Oatmeal is part of our everyday breakfast. We usually buy the old fashioned Quaker oats from Costco. The other day after transferring the contents of the bags to my cereal bins I flattened the box of oatmeal and placed it on the kitchen table to be taken to the recycling bin in the garage. My daughter happened to see the box while she was setting the table for breakfast and noticed this oatmeal raisin recipe. She asked if we could make the cookies. I told my husband to leave the flattened box indoors so we could use the recipe. Then I forgot all about it.
I was looking for something sweet to end the year and remembered the cookies. I fished out the box and since we had all the ingredients at home I made them right away. The original recipe was for 48 cookies and used two eggs. I wanted to make 12 and could not really use half an egg so I substituted the egg with applesauce. The next time I try them I will make 24 and use an egg.
I see a lot of substitution for butter in cookies. Some amount of saturated fat is needed by the body and I don't make cookies often so I used the amount called for.
You will need
1/4 cup + 2 tbsp. all purpose flour
1/4 tsp. baking soda
1/4 tsp. cinnamon powder
a pinch salt
2 1/5 tbsp butter, softened
1/4 cup + 1 tbsp. brown sugar, packed
2 tbsp. applesauce
a few drops vanilla extract
1 1/4 cup Quaker old fashioned oats
1/4 cup raisins
Preheat 350 F. Sift flour into a bowl and combine with the baking soda, salt and cinnamon. Keep aside. In a separate bowl cream the softened butter. Add the brown sugar and beat until smooth. Add the applesauce and vanilla extract and beat again. Fold in the flour mixture. Now add the oats and raisins and mix until just combined.
Prepare a baking sheet with parchment paper. Drop a tablespoon of batter about 2 inches apart on the baking sheet.
Bake for 8-10 minutes or until the edges start to brown.
Remove from the oven and allow to sit for a couple minutes. Transfer to a cooling rack and cool completely before storing in an airtight container.
Enjoy!
I was looking for something sweet to end the year and remembered the cookies. I fished out the box and since we had all the ingredients at home I made them right away. The original recipe was for 48 cookies and used two eggs. I wanted to make 12 and could not really use half an egg so I substituted the egg with applesauce. The next time I try them I will make 24 and use an egg.
I see a lot of substitution for butter in cookies. Some amount of saturated fat is needed by the body and I don't make cookies often so I used the amount called for.
You will need
1/4 cup + 2 tbsp. all purpose flour
1/4 tsp. baking soda
1/4 tsp. cinnamon powder
a pinch salt
2 1/5 tbsp butter, softened
1/4 cup + 1 tbsp. brown sugar, packed
2 tbsp. applesauce
a few drops vanilla extract
1 1/4 cup Quaker old fashioned oats
1/4 cup raisins
Preheat 350 F. Sift flour into a bowl and combine with the baking soda, salt and cinnamon. Keep aside. In a separate bowl cream the softened butter. Add the brown sugar and beat until smooth. Add the applesauce and vanilla extract and beat again. Fold in the flour mixture. Now add the oats and raisins and mix until just combined.
Prepare a baking sheet with parchment paper. Drop a tablespoon of batter about 2 inches apart on the baking sheet.
Bake for 8-10 minutes or until the edges start to brown.
Remove from the oven and allow to sit for a couple minutes. Transfer to a cooling rack and cool completely before storing in an airtight container.
Enjoy!
Monday, December 29, 2014
Checkerboard Sugar Cookies
This year after a long break the ladies in my neighborhood decided to have a cookie exchange. Everyone was to bring 3 dozen cookies. I wanted to bake a cookie that looked special but I did not want to use frosting. My first thought was swirl sugar cookies rolled in sprinkles. Though the cookies look festive I was not sure I wanted to use food color. My next thought was chocolate dipped squares. But I rarely bake cookies and do not have a square cookie cutter. I had no time to go out to buy one so that was out. Then I thought of making these checkerboard sugar cookies and that worked just right. The checkerboard pattern made with cocoa powder and plain cookie dough was festive enough to not need any frosting or food coloring.
I had made swirl cookies for the fourth of July. I used the same basic recipe for these cookies. I divided the dough into two portions by weight and added a tablespoon of cocoa powder to one half to color it. I left the dough overnight in the refrigerator and baked the cookies early the next morning. The cookies were well appreciated and I had a great time at the cookie exchange.
I had cut out instructions from a magazine for the checkerboard pattern. It is very easy to put together. Do not be intimidated by it.
You will need (for about 36 cookies)
3 cups flour
1/2 tsp. baking powder
1/2 tsp. salt
1 cup unsalted butter, softened
1 1/2 cup sugar
2 large eggs
2 tsp. vanilla extract
1 tbsp. cocoa powder
In a bowl sift the flour, baking powder and salt. Keep aside. In another bowl beat the butter. Add the sugar and beat again to mix well. Add the eggs one at a time and beat until well mixed. Add the vanilla extract and beat until frothy. Fold in the flour mixture and form a dough. Weigh the dough and divide into two. Flatten one half and sprinkle the cocoa powder. Fold in and mix until well distributed. Do not overwork it. Wrap both portions separately in plastic wrap and refrigerate for 20 minutes.
Roll out the dough separately into two rectangles. Slice along the length to form three long rectangles as in the picture below.
Switch the center portion of the plain rectangle with the color one. Sandwich the pieces together. You should have one rectangular block plain-colored-plain and the other colored-plain-colored. Place the plain-colored-plain block such that the plain side is facing up. Slice into three long rectangle. Repeat with the colored-plain-colored block, only this time with the colored side facing up. You will get a pattern as in the picture below.
Now switch the middle portion of one set of three rectangles with the middle portion of the other set. Stack them up and you will have a checkerboard pattern.
Wrap it in plastic wrap (you can reuse the wrap you used earlier) and refrigerate overnight.
When you are ready to bake, preheat oven to 350 F. Prepare two baking sheets with parchment paper lining. Transfer one rectangular roll from the refrigerator to your work surface. Slice every 1/4 inch with a sharp serrated knife. You can adjust the width as per your preference.
Transfer the sliced cookies to the baking sheet.
Bake for 10-12 minutes until the bottom is lightly colored. Repeat with the remaining dough. I baked three batches with 12 cookies in each. Let the cookies cool completely on a cooling rack before storing them in an air tight container.
Enjoy!
I had made swirl cookies for the fourth of July. I used the same basic recipe for these cookies. I divided the dough into two portions by weight and added a tablespoon of cocoa powder to one half to color it. I left the dough overnight in the refrigerator and baked the cookies early the next morning. The cookies were well appreciated and I had a great time at the cookie exchange.
I had cut out instructions from a magazine for the checkerboard pattern. It is very easy to put together. Do not be intimidated by it.
You will need (for about 36 cookies)
3 cups flour
1/2 tsp. baking powder
1/2 tsp. salt
1 cup unsalted butter, softened
1 1/2 cup sugar
2 large eggs
2 tsp. vanilla extract
1 tbsp. cocoa powder
In a bowl sift the flour, baking powder and salt. Keep aside. In another bowl beat the butter. Add the sugar and beat again to mix well. Add the eggs one at a time and beat until well mixed. Add the vanilla extract and beat until frothy. Fold in the flour mixture and form a dough. Weigh the dough and divide into two. Flatten one half and sprinkle the cocoa powder. Fold in and mix until well distributed. Do not overwork it. Wrap both portions separately in plastic wrap and refrigerate for 20 minutes.
Roll out the dough separately into two rectangles. Slice along the length to form three long rectangles as in the picture below.
Switch the center portion of the plain rectangle with the color one. Sandwich the pieces together. You should have one rectangular block plain-colored-plain and the other colored-plain-colored. Place the plain-colored-plain block such that the plain side is facing up. Slice into three long rectangle. Repeat with the colored-plain-colored block, only this time with the colored side facing up. You will get a pattern as in the picture below.
Now switch the middle portion of one set of three rectangles with the middle portion of the other set. Stack them up and you will have a checkerboard pattern.
Wrap it in plastic wrap (you can reuse the wrap you used earlier) and refrigerate overnight.
When you are ready to bake, preheat oven to 350 F. Prepare two baking sheets with parchment paper lining. Transfer one rectangular roll from the refrigerator to your work surface. Slice every 1/4 inch with a sharp serrated knife. You can adjust the width as per your preference.
Transfer the sliced cookies to the baking sheet.
Bake for 10-12 minutes until the bottom is lightly colored. Repeat with the remaining dough. I baked three batches with 12 cookies in each. Let the cookies cool completely on a cooling rack before storing them in an air tight container.
Friday, December 26, 2014
Breakfast Potatoes
Potatoes are served as part of a good, filling well balanced breakfast all over the world whether it is in the form of hash browns, roasted potatoes or potato paratha. I have wanted to make roasted potatoes for a while now. My daughter loves potatoes in any form or shape and I knew she would love this version. She is on winter break so I wanted her to have an elaborate breakfast, something that does not happen often in the rush to make it to school on time. She wolfed everything down very quickly which was a pleasure to watch.
You can add additional spices if you like the potatoes spicy. We liked them with salt, black pepper and a little cayenne pepper.
You will need
1 large Russet potato
1/4 large red onion
1/4 red bell pepper
1 tbsp olive oil
1 tsp. cayenne pepper
salt and pepper to taste
Preheat oven to 425 F. Wash, peel and chop the potatoes into one inch chunks. Chop the onions and the red bell pepper. In a mixing bowl mix the the vegetables with the remaining ingredients.
Transfer to a baking sheet and bake for 20-30 minutes turning over once or twice.
The potatoes should brown but not burn.
You can add additional spices if you like the potatoes spicy. We liked them with salt, black pepper and a little cayenne pepper.
You will need
1 large Russet potato
1/4 large red onion
1/4 red bell pepper
1 tbsp olive oil
1 tsp. cayenne pepper
salt and pepper to taste
Preheat oven to 425 F. Wash, peel and chop the potatoes into one inch chunks. Chop the onions and the red bell pepper. In a mixing bowl mix the the vegetables with the remaining ingredients.
Transfer to a baking sheet and bake for 20-30 minutes turning over once or twice.
The potatoes should brown but not burn.
Thursday, December 25, 2014
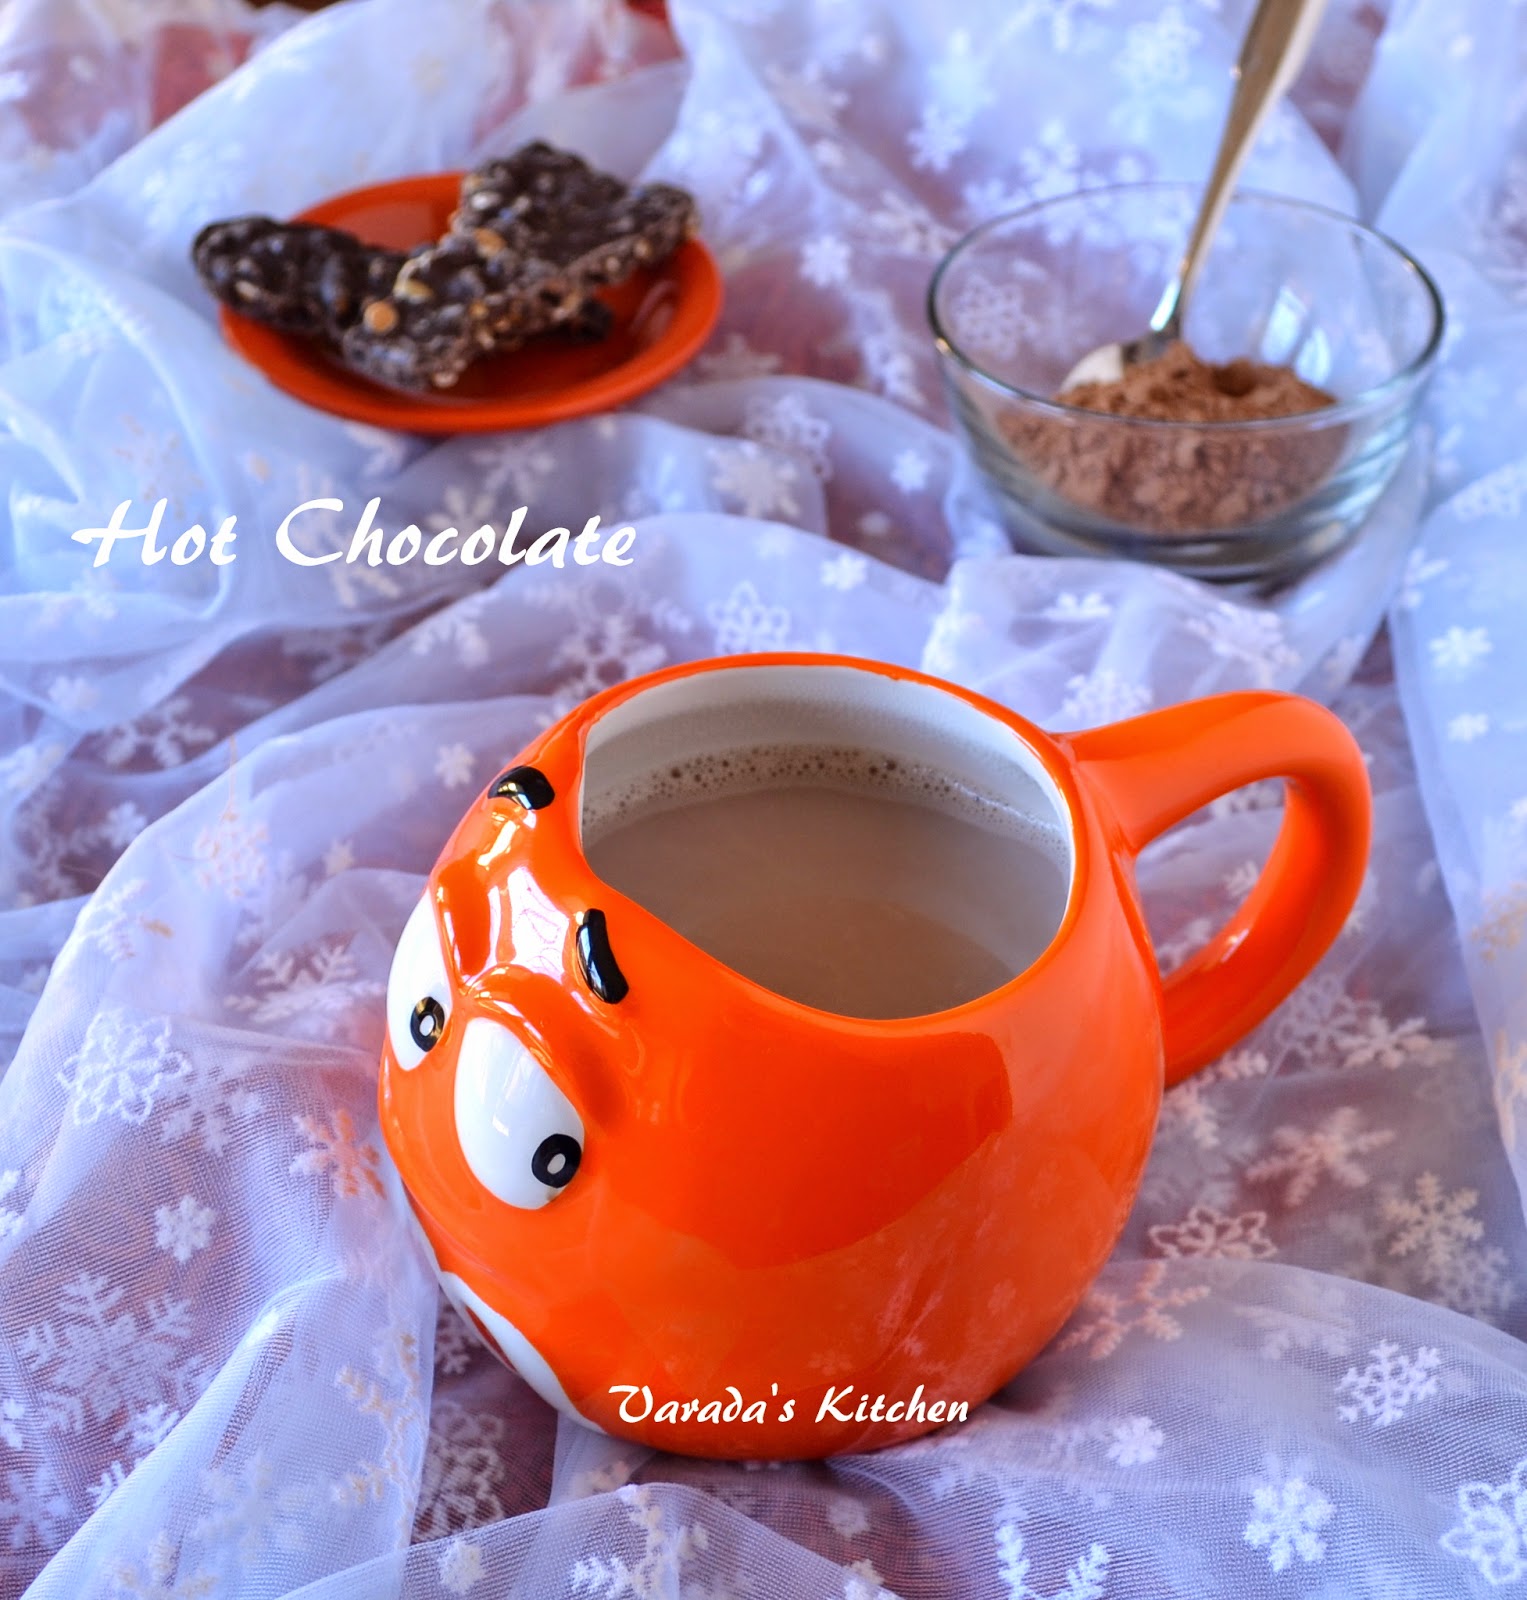
Hot Chocolate
Hot chocolate and winter go hand in hand. If you like chocolate chances are you will like hot chocolate too. I say 'chances are' because I know a few people who love chocolate but are not fans of the beverage. I like chocolate, period. So I enjoy my cup of hot chocolate on a cold winter day.
It was dreary, cold and rainy the day I made the hot chocolate. My normally bright kitchen looked dark and gloomy even at 10 in the morning. It was the kind of day you want to spend snuggled in a blanket with a good book, a cup of hot chocolate and a warm cat curled on the lap. The cat on the lap is wistful thinking on my part. Mine does not spend more than 3 minutes on my lap, even a warm blanket on a cold day does not entice her. She would rather sleep curled up on the rug in the weak beam of sunlight streaming through the window. But I have only myself to blame. At the shelter I picked the almost unadoptable spitfire over the cuties hovering at my feet. As such the three minutes of love she showers on me is a blessing.
Well, even if I cannot get the cat to cooperate I can snuggle with a book and the hot chocolate. Though I make several different types of hot chocolate my favorite recipe comes from the King Arthur website.
You will need (for 1 cup)
1 cup milk
1/2 tbsp. dry milk powder
1/2 tbsp. sugar
1/2 tbsp. 100% cocoa powder
Bring the milk to a boil in pan. Lower heat allow to simmer. Meanwhile combine the dry ingredients in a separate pan.
Add them to the simmering milk and whisk to dissolve. Turn off heat and pour out the hot chocolate.
Enjoy!
It was dreary, cold and rainy the day I made the hot chocolate. My normally bright kitchen looked dark and gloomy even at 10 in the morning. It was the kind of day you want to spend snuggled in a blanket with a good book, a cup of hot chocolate and a warm cat curled on the lap. The cat on the lap is wistful thinking on my part. Mine does not spend more than 3 minutes on my lap, even a warm blanket on a cold day does not entice her. She would rather sleep curled up on the rug in the weak beam of sunlight streaming through the window. But I have only myself to blame. At the shelter I picked the almost unadoptable spitfire over the cuties hovering at my feet. As such the three minutes of love she showers on me is a blessing.
Well, even if I cannot get the cat to cooperate I can snuggle with a book and the hot chocolate. Though I make several different types of hot chocolate my favorite recipe comes from the King Arthur website.
You will need (for 1 cup)
1 cup milk
1/2 tbsp. dry milk powder
1/2 tbsp. sugar
1/2 tbsp. 100% cocoa powder
Bring the milk to a boil in pan. Lower heat allow to simmer. Meanwhile combine the dry ingredients in a separate pan.
Add them to the simmering milk and whisk to dissolve. Turn off heat and pour out the hot chocolate.
Enjoy!
Wednesday, December 24, 2014
Ginger Snaps
When the mercury dips we love spicy cookies. These ginger, cinnamon and cloves flavored cookies are perfect for winter. They also happen to be my childhood favorites. The mercury never really dipped too low where I grew up but I loved the taste of ginger in the cookies. I am not really a tea or coffee person but I think they would be great with a cup of tea. If you have never tried them before but like the taste of ginger spice you will love them.
These are not soft cookies. They have a snap to them. At the same time they are not hard either. They are thin cookies that crumble once you take a bite. Heating the butter is the trick to getting the texture just right. Heating helps take out the moisture from the butter just enough to keep them going soft.
I baked these to make a base for a pumpkin tart. I thought the ginger and pumpkin flavors would be great. My daughter had other plans. She insisted on taking them to school as a snack. And I have been asked to please not use the rest. I am glad she likes them just as much as I do.
A long time ago when I browsed magazines for recipes and noted them down in recipe cards, I had this recipe jotted down.
You will need (makes about 12 thin cookies)
25 gm butter
25 gm brown sugar
25 ml honey
1/8 tsp. ground ginger
1/8 tsp. ground cinnamon
1/8 tsp. ground cloves
1/4 tsp. baking soda
75 gm all purpose flour
In a pan melt the butter on low heat. Add the sugar, honey and the ground spices. Let the mixture heat completely but do not bring to a boil.
Turn off heat and sift in the flour and baking soda. Knead into a soft dough. Wrap it on plastic wrap and refrigerate for about an hour. The dough will firm up.
Preheat oven to 375 F. If the dough is too firm let it sit on the counter top or on the palm of your hand. It should be soft enough to roll. However, it should not be soft. Roll it out on a working surface using a rolling pin, Using a cookie cutter or the rim of a small cup cut the circular cookies. Place them on a cookie sheet.
Bake for about 8 minutes. Watch closely. They do burn quickly. Transfer to a cooling rack and cool completely.
The cookies will darken and harden a little.
Enjoy!
These are not soft cookies. They have a snap to them. At the same time they are not hard either. They are thin cookies that crumble once you take a bite. Heating the butter is the trick to getting the texture just right. Heating helps take out the moisture from the butter just enough to keep them going soft.
I baked these to make a base for a pumpkin tart. I thought the ginger and pumpkin flavors would be great. My daughter had other plans. She insisted on taking them to school as a snack. And I have been asked to please not use the rest. I am glad she likes them just as much as I do.
A long time ago when I browsed magazines for recipes and noted them down in recipe cards, I had this recipe jotted down.
You will need (makes about 12 thin cookies)
25 gm butter
25 gm brown sugar
25 ml honey
1/8 tsp. ground ginger
1/8 tsp. ground cinnamon
1/8 tsp. ground cloves
1/4 tsp. baking soda
75 gm all purpose flour
In a pan melt the butter on low heat. Add the sugar, honey and the ground spices. Let the mixture heat completely but do not bring to a boil.
Turn off heat and sift in the flour and baking soda. Knead into a soft dough. Wrap it on plastic wrap and refrigerate for about an hour. The dough will firm up.
Preheat oven to 375 F. If the dough is too firm let it sit on the counter top or on the palm of your hand. It should be soft enough to roll. However, it should not be soft. Roll it out on a working surface using a rolling pin, Using a cookie cutter or the rim of a small cup cut the circular cookies. Place them on a cookie sheet.
Bake for about 8 minutes. Watch closely. They do burn quickly. Transfer to a cooling rack and cool completely.
The cookies will darken and harden a little.
Enjoy!
Subscribe to:
Posts (Atom)