Saturday, April 25, 2015

Roasted Strawberry Bruschetta

This entire week I have posted different types of hors d'oeuvres. My final post in this series is a roasted fruit appetizer. Originally I wanted to use fruit as the base but none of the fruit that lend themselves to baking is available in the market. It is too early in the season. I will post my planned recipe in summer when the ingredients are available but for this week here is my fruit based appetizer.


Strawberries are generally cooked over the stove top. However, they taste really good when they are roasted in an oven. As they are baked strawberries retain their shape. Leave them alone as they cool and they turn juicy and flavorful. The resulting strawberry in its juice goes great with ice cream or as topping on pie. But it also tastes great as a topping for bruschetta. I used my baguette recipe as the base. You can find that here.


I have made savory bruschetta with tomatoes, basil and mozzarella before. This is a very different recipe but the flavors go together just as nicely as the regular bruschetta. Everyone at home loved it.

You will need
1 baguette, sliced into 1/2 inch rounds
10 strawberries, sliced into 1/2 inch slices
2 tsp. balsamic vinegar or 1 tbsp. sugar
1/4 cup goat cheese
1 tbsp. olive oil

Bake the baguette using this recipe. You could you a store bought baguette. Preheat the oven to 350 F. Slice the strawberries and combine them with either the vinegar or the sugar. Spread them in a single layer on a parchment paper covered baking sheet. Bake for 5-10 minutes. Keep aside to rest.


Brush oil on the baguette slices. Place the slices on a baking sheet and broil for 1-2 minutes on each side. You want them to be crisp and toasty.


Apply a layer of goat cheese to the slices. The rested strawberry should be very juicy by this time. Cut up the strawberries into smaller pieces and combine with the juice in a bowl. Place a few pieces of the strawberry and juice on each of the bread slices.


Enjoy!

Friday, April 24, 2015

Mini Stuffed Puffs

This was a very experimental recipe. I had never made this before but will be making it again. I am posting bite sized appetizers this week. I wanted to make a bite sized stuffed fruit puff. But at the last minute I realized I had some left over vegetable filling I used in another recipe. So I decided to use that filling instead. The flaky homemade pastry and the vegetable stuffing made this hors d'oeuvre a very wholesome bite.


I made this recipe on Prom night. My daughter left late afternoon and was gone for the rest of the day. I made these for our dinner. My husband for some reason chose not to eat it so it was my dinner. I like it a lot but would have to say they are best eaten hot out of the oven.

You will need (for 4 mini puffs)
For the puff shell
50 gm bread flour
1 tbsp. melted butter
1/2 tsp. instant yeast
1/2 tsp. salt
15 gm water

For the filling
1/4 roasted red bell pepper, dice finely
1/4 roasted yellow bell pepper, dice finely
1 roasted carrot, diced finely
3 tbsp. goat cheese
4-5 leaves basil chiffonade
1/4 tsp. cayenne pepper powder
salt and pepper to taste

Combine the melted butter with the flour. Add in the other ingredients and combine to form a very soft dough. Knead for 5 minutes. Cover and keep aside for an hour or two.

Preheat oven to 375 F. Divide the risen dough into four portion. Form one of the portions into a ball and flatten with your palm. Place it on a baking sheet covered with parchment paper. Repeat for the other portions. Let the prepared puffs rest for 15 minutes. Bake for 15-20 minutes or until the pastry looks done and starts to change color. Take it out of the oven and let it cool a little. 

Meanwhile combine all the ingredients for the filling and keep aside until needed. Using a paring knife score a circle on the top layer of the pastry. Carefully cut into the top layer and scoop out the cut circle.


Stuff some of the filling into the puff. 


Replace the lid. Repeat for the other puffs. Put them back into the oven for another 5-10 minutes. Serve hot out of the oven.


Enjoy!

Thursday, April 23, 2015

Cheesy Cherry Tomatoes with Rye Berry

I had once seen an cooking show on TV where they stuffed tomatoes with millet. I am not sure what else was used or if the tomatoes were baked but the idea for the filling staying with me. When I finally decided to try a bite sized recipe with tomatoes I started searching for a suitable filling. I had rye berries in the pantry so I used them. Since then I have used rye berries and millet successfully in this recipe. I used shredded smoked gouda and a little asiago cheese with lots of basil. The rye provides some substance to an otherwise soft fruit. We enjoy the smoky flavor of cheese. If you do not like it you can use regular gouda or even cheddar.


I made this version when my daughter was out on a sleepover with friends. I cooked a special dinner for the two of us and this was our appetizer. My daughter loves tomatoes so we saved some for her. She finished them all but they did not taste as good as the day they were baked. These should be served straight out of the oven.

You will need
20 large cherry tomatoes
1/4 cup rye berries
2 tbsp. shredded smoked gouda
2 tbsp. shredded asiago
5-10 leaves basil chiffonade
salt and pepper to taste

Soak the rye berries overnight or at least 4 hours. Soaking the berries not only makes them easier to cook but most importantly makes them more bioavailable. The body is able to absorb the nutrients better. Make sure you discard the water the berries were soaked in. Place the soaked berries with 1/2 a cup of water and salt. Cook on medium heat for about 20 minutes or until the water is all gone and the berries are cooked. Keep aside.

Preheat the oven 375 F. Cut the tomatoes along the length and scoop out the seeds. Place them on a kitchen towel and let the water drain out. Now place the almost dry tomatoes on a baking sheet covered with parchment paper.


In a separate bowl combine the berries with the other ingredients. Stuff the tomatoes with this mixture.


Bake in the preheated oven for 10-12 minutes. The tomatoes should begin to just begin to crinkle. If you let them bake anymore the tomatoes will fall apart. Take it out of the oven and serve hot.


Enjoy!


Wednesday, April 22, 2015

Roasted Zucchini Bites

Zucchini is one of those vegetables that can reduce to mush when the recipes demands it but can stand up on retain its shape if called upon to do so. It is so versatile and can be used in sweet and savory dishes. A while back I had made zucchini boats a recipe that never made it to the blog. This recipe is a bite size variation of that creation.


Roasted vegetables in all forms are a favorite in my house. Roasted zucchini base topped with roasted bell peppers and goat cheese makes a perfect hors d'oeuvre. I like some char on the vegetables to enhance the taste. A little basil adds to the flavor.

You will need
4 zucchini (slender)
1/4 red bell pepper, dice finely
1/4 yellow bell pepper, dice finely
1 carrot, diced finely
3 tbsp. goat cheese
4-5 leaves basil chiffonade
1/4 tsp. cayenne pepper powder
salt and pepper to taste

Preheat oven to 400 F. Wash and clean the zucchini. Cut off the ends. Slice the zucchini in thick rounds. Place them on a baking sheet covered with parchment paper.

In a bowl mix the remaining ingredients. Carefully place a teaspoon of mixture on top of the sliced zucchini. Repeat for the remaining slices. Bake for 15-20 minutes or until the vegetables are cooked through but still hold their shape. Serve hot.


Enjoy!


Tuesday, April 21, 2015

Mini Brie en Croute

Brie en Croute is a popular appetizer served with either crackers or fruit. A slab of brie is baked inside pastry dough sometimes with fruit. The melted brie in the pastry shell is then served on a heated platter. This a mini version of the popular appetizer. The little balls of pastry have a filling made of a chunk of brie along with some apricot preserve. The pastry is baked with the filling inside. When served hot but not piping hot, it makes a great appetizer. The brie is molten and the fruit preserve adds a mild sweet flavor. The outer shell remains crunchy but is not hard.


I brought fresh French made Brie from Whole Foods just for this recipe. Imported Brie can be expensive but Whole Foods will willingly cut you a sliver the size you want. I got just enough for this recipe and to use as a snack with fresh sourdough bread. I made my own pastry dough. I have my own shortcut method for when I want a soft but not necessarily very flaky dough. It is called go easy on the butter.


Brie is a soft cheese that melts completely when heated. It is covered with a rind made of mold that I usually throw away. However, for this recipe it is better to keep the rind on the bottom to give it some added support and keep the cheese from oozing out of the pastry shell.

You will need (for 4 mini en croute)
For the pastry shell
50 gm bread flour
1 tbsp. melted butter
1/2 tsp. instant yeast
1/2 tsp. salt
15 gm water

For the filling
4 1/2in by 1 in cubes of brie
2 tsp. of apricot preserve

Whipping cream for brushing the top

In a mixing bowl combine the the butter, flour, salt and yeast. Rub the butter into the flour until it is soft. Add the water and combine to forma  really soft dough. Knead until the dough is smooth and elastic. Cover and keep aside for an hour or two.

Preheat the oven to 425 F. Divide the dough into four portions. Roll out the portions to small thick disc.


Place a chunk of brie with a 1/2 tsp of fruit preserve over the top.


Fold the pastry shell around the brie and seal it closed. Repeat for the other portions. Keep aside for 15 minutes.


Bake on a baking sheet covered in parchment paper for 15-20 minutes. Lower the heat to 375 F. Remove the baking sheet and working quickly brush the top with whipping cream. Return the baking sheet to the oven. Bake for another 15-20 minutes or until the top begins to brown. Place on a cooling rack for a few minutes before serving.


Enjoy!

Monday, April 20, 2015

Baby Red Potato with Caramelized Onions and Cheddar Cheese

Hors d'oeuvres or appetizers have a unique place in a meal. Unlike other courses that are meant to fill you up, appetizers are supposed to stimulate the taste buds and get your appetite going before the main course of the meal. They are very flavorful but typically are served in small portion sizes. This week I am presenting baked party hors d'oeuvres. Not the kind you serve yourself on a plate and eat with a fork. The kind that pass by on a tray waiting for you to reach out and pop one in your mouth while holding on to your drink and carrying on your conversation.


Bite sized, packed with flavor and served straight out of the oven these baked potatoes in some ways are a mini-version of the popular baked spud eaten with sour cream, cheese and chives. But unlike their bigger counterparts, these are baked with the filling. Using organic potatoes lets you can keep the skin on. Baking the potatoes whole before adding the filling makes them tender without overcooking the filling.


In my house potato dishes are very well received because my daughter loves potatoes. This one is no exception. She loves how you can pop these in your mouth on the go without getting your hands dirty. Next time you throw a party consider making these potatoes as an appetizer. You can use any color potatoes just make sure they are really small in size.

You will need
10-15 baby red potatoes
1/4 red onion
1 tsp. oil
1 few twigs of thyme or any fresh herb of choice
1/4 cup cheddar cheese
salt and black pepper to taste

Preheat the oven at 375 F. Wash and clean the potatoes. Dry them and place them on a baking sheet. You can place a parchment paper on the sheet before placing the potatoes. Bake for 30-40 minutes.


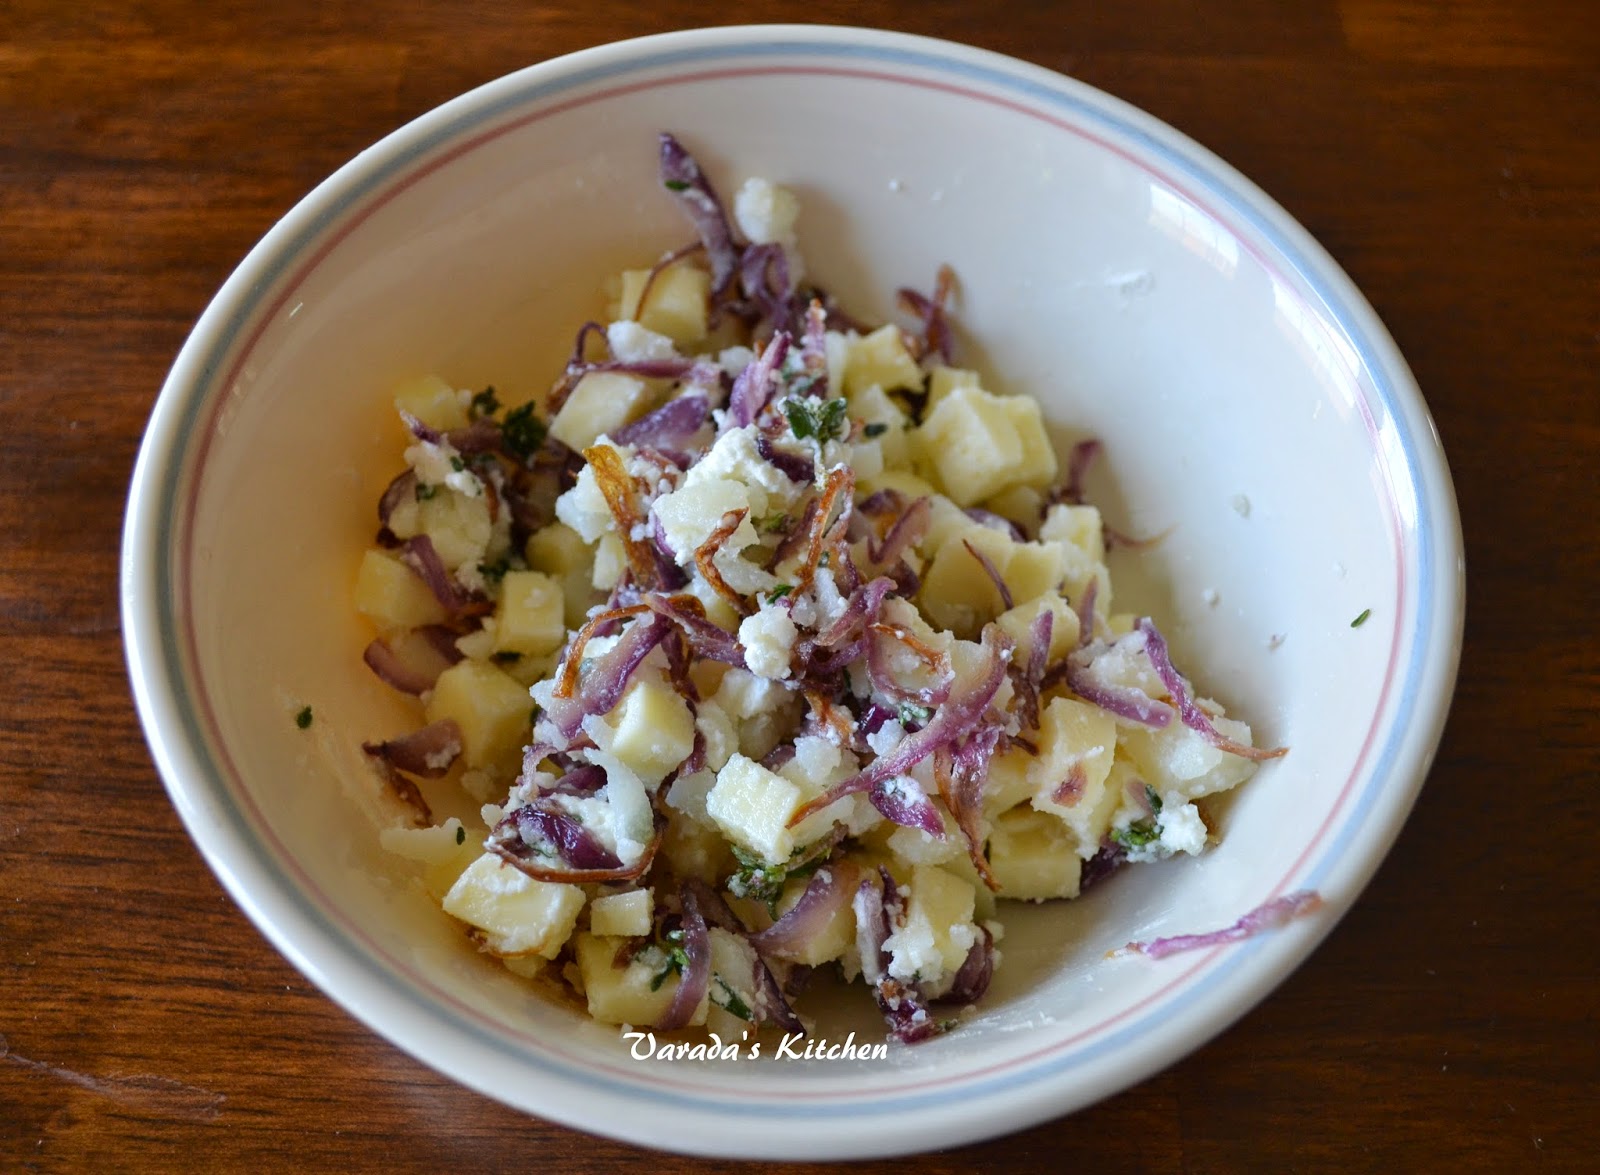
Meanwhile, slice the onions. Heat oil in a pan and saute the onions until caramelized. Dice the cheese into small cubes and combine with the remaining ingredients. Keep aside until needed.


Let the potatoes cool on the tray. The skin will crinkle and crisp up a little but it will soften as the potato cools. While the potato is still warm cut it in half along the widest diameter.


Using a melon baller or a small spoon scoop out the center of the potatoes.


Add a little of the scooped out potato to the prepared filling. Reserve the rest for another dish. Using a spoon fill the potatoes with the filling. Do not overfill.


Bake the stuffed potatoes for 10-12 minutes or until the cheese has melted. Serve hot!


Enjoy!

Saturday, April 18, 2015

Onion Bread / Korean YangPaBbang

I loved the bread as soon as I saw it. I got it from Aeri's blog where she has a lot of Korean recipes. The appearance of this bread made me want to try it. I can never follow a recipe, even when it is my own, so I made a few variations. But the base concept and technique come from Aeri.


My daughter is in high school and has a huge workload. Some weeks she is so tired by Friday evening, she skips dinner, she falls asleep at 6 pm and wakes up the next morning. I can usually see it coming during the week. I try to have something appetizing ready for her on Friday afternoon so she does not go to bed hungry. This stuffed bread was one such meal. It was filling and tasty. She devoured it before going off to bed.


The original filling is not vegetarian. I substituted red bell pepper to give the filling some body. Add a little salt to the red pepper and allow it to sweat so the filling does not get soggy.

You will need
For the dough
2 tbsp. butter at room temperature
2 cups bread flour or whole wheat flour
1 scant tsp. instant yeast
1/2 tsp. salt
1 cup lukewarm milk

For the filling
1/4 cup low fat mozzarella cheese
1 red bell pepper
1/2 red onion
1/2 tsp. caynenne pepper powder
salt and black pepper to taste
10-15 leaves cilantro

Sift flour in a mixing bowl. Rub in the butter and add the remaining ingredients. Form a soft dough. Knead until it is smooth and elastic, about 5 minutes. Keep aside covered to let it double in volume. It could take an hour to 3 hours depending upon the temperature in your kitchen.


Meanwhile prepare the filling. Slice the red pepper in to 1 inch pieces. Sprinkle some salt and keep aside. Chop the onions and crumble or shred the mozzarella. Drain the sweating red bell peppers and combine all the ingredients for the filling.


Preheat oven to 375 F. Prepare a loaf pan by rubbing a half teaspoon of oil along the bottom. Sprinkle some flour on your work surface and transfer the risen dough to it. Roll out the dough using a rolling pin to a thick rectangle.


Place about 3/4th of the filling in the center of the rolled out dough.


Fold in both sides and seal the edges. Flip over and place in the prepared loaf pan. Keep aside covered for 20 minutes.


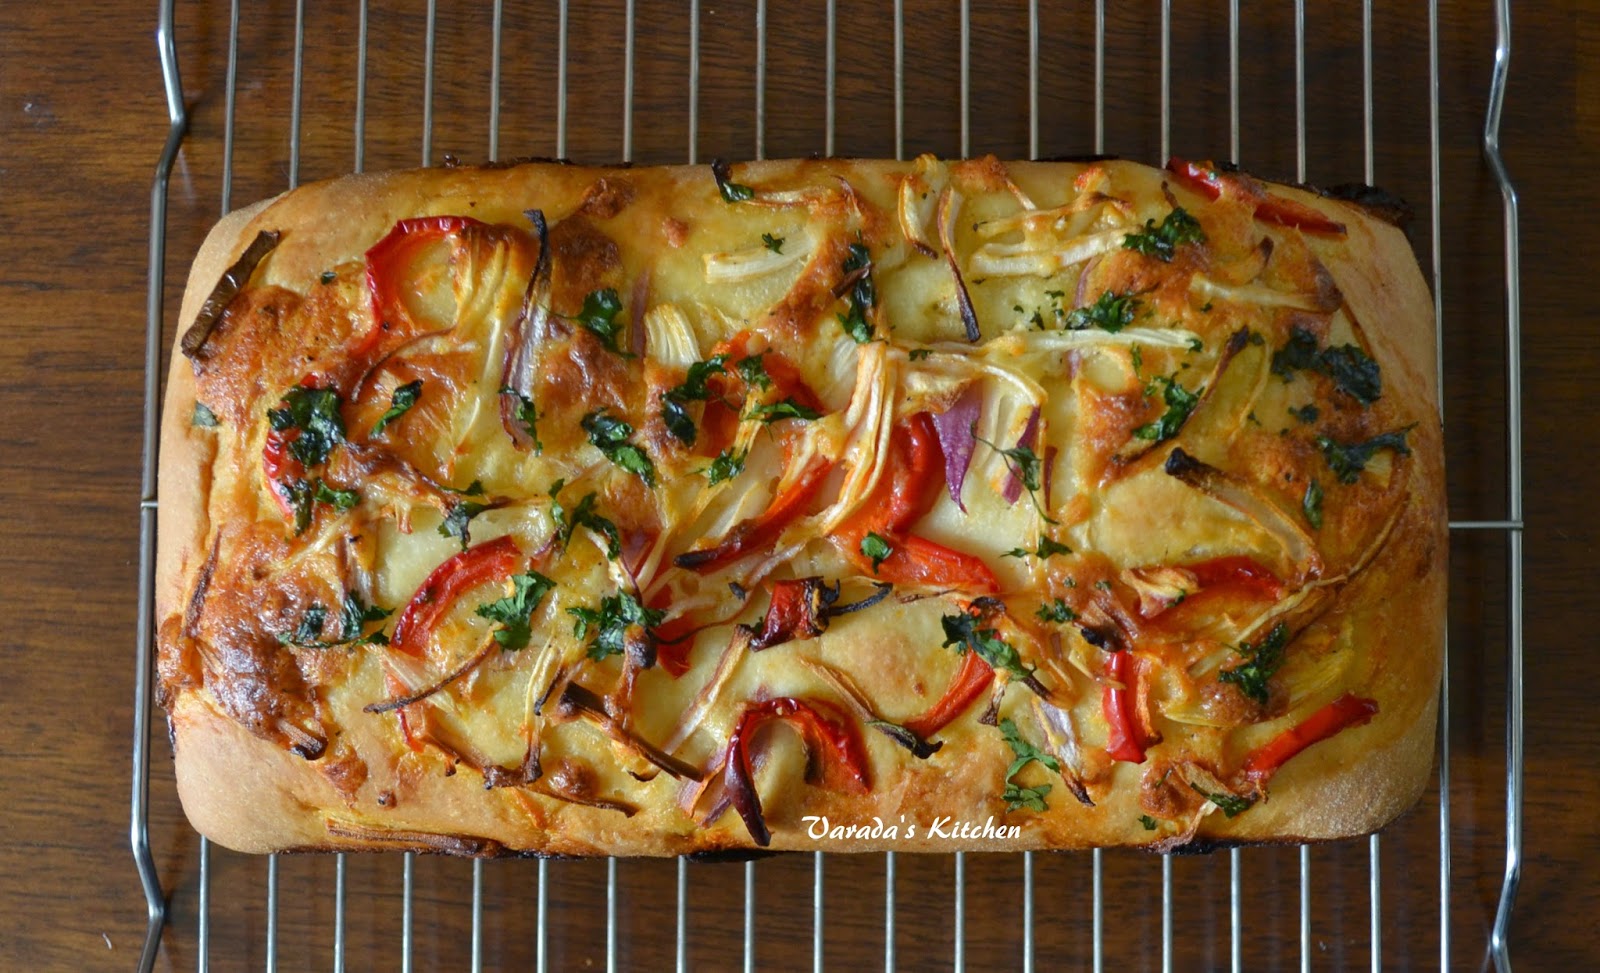
Add the remaining filling over the top of the loaf. Dice the cilantro leaves and sprinkle over the top. Bake for 45 minutes in the preheated oven. Switch off the oven and let the loaf stay inside for another 15 minutes.


Transfer to a cooling rack and allow to cool before slicing.


Enjoy!

Friday, April 17, 2015

Sourdough Tomato Basil Bread

I wanted to try something different with the sourdough loaf this weekend. I had a lot of cherry tomatoes and some basil that needed to be used up. This tomato basil bread was an experiment that turned out great. I baked this bread the weekend spring break started. My daughter left for a sleep over and I wanted a simple lunch. Flavored bread seemed perfect. Besides I had not used the sourdough starter for a few weeks and it needed to be fed. I used a third of the fed starter for this recipe and the rest to make buns for lunch the next day.


With sourdough I prefer to go by feel rather than a recipe. I used to go with exact weight measurements for all the ingredients when I first started with sourdough bread. I now rely more on feel than measurements.


I mixed the whole wheat flour with the sourdough starter and added the salt. I then mixed in the diced basil along with the sliced cherry tomatoes with the juice. I started with 40% water and felt I needed to go up to 60%. That along with the juice from the tomatoes brought up the hydration to 80%. That is just about where I like it. I followed the process for any other boule except that I did not bake it in a dutch oven. I baked it on an sheet in a 500 F oven. I then spread about a fourth of a teaspoon of ghee over the top and put it back in the oven for about 6 minutes. I lowered the oven temperature to 425 F. Perfect loaf with nice crumb and great taste. I call that a successful experiment.

You will need
12 cherry tomatoes
5-6 leaves basil
100 gm freshly fed starter
100 gm whole wheat flour
60 gm water
4 gm salt
1 tsp. cayenne pepper powder (adjust to taste)

1/4 tsp ghee or butter

Feed the starter and keep aside for 20-30 minutes. I usually keep 50 gm of starter in the refrigerator. I add equal parts flour and water to feed it. I add as much as I need to make the bread and have 50 gm left over to return to the refrigerator. Since I had not used the starter for a while, I first fed it 50 gm of water and 50 gm of flour. I kept that on the counter top for about an hour until it got bubbly. I then added 100 gm of water and 100 gm of flour to it. After another 20-30 minutes it was ready to use. 50 gm went back to the refrigerator, 100 gm went into this recipe, the rest went into making rolls.

Slice the cherry tomatoes and dice the basil. Keep aside. In a bowl combine the starter, the flour and salt. Let it sit for half an hour. Add the tomatoes and basil and fold them into the dough. Keep aside covered.


Over the next hour stretch and fold the dough to strengthen it. Cover and keep aside for about 5 hours. Transfer the dough to a floured work surface and gently fold the sides in. Flip and form a round ball with the seam underneath.


Place in a floured bowl, cover and keep overnight in the refrigerator. The next day preheat the oven to 500 F. Place a sheet in the oven when the temperature is 400 F. Alternately, place a baking stone in the oven. Remove the dough from the refrigerator and transfer to a floured work surface. Score the top with a sharp razor blade. I scored it like a pie making 6 portions.

Transfer the scored loaf to the sheet in the oven. Bake for 12-15 minutes. Turn down the heat to 475 F and bake for another 10 minutes or until the bread is cooked through. Remove from oven and spread a little ghee or butter over the top. Lower the heat to 425 F and return the bread to the oven for another 5-6 minutes. The top should brown. Remove from heat.


Allow it to cool completely before slicing.


Enjoy!


Thursday, April 16, 2015

Savory Pesto Rose Kringle

I love the shape of the Kringle, one that resembles a ring with multiple layers peeking through. Usually made with a sweet filling I have already tried one version of a savory Kringle. But then I saw the rose Kringle and I knew I had to come up with another savory filling to try this lovely shape.


I decided on a pesto filling as it is thick and savory. In the last couple weeks I have had a problem sourcing basil, one of the main ingredients in pesto. The plant in the garden has dried up and I could not find any basil in the grocery store. So I had to find alternatives. I used roasted almonds, cherry tomatoes, mixed salad leaves and some garlic. The aroma was amazing and the taste awesome.


I made the pesto the night before and kept it refrigerated until I needed it. I had a little left over dough after I had made some bread. I used it to make this kringle.

You will need (for 1 large)
1 1/4 cups whole white wheat flour
3/4 cups all purpose flour
3/4 tsp. salt
1 tsp. Instant yeast
2 tbsp. olive oil
2 tbsp. water
1/2 cup milk

For the pesto
a large handful of mixed salad leaves
8-10 cherry tomatoes
1/4 cup almond slivers
1 tsp. cayenne pepper
2 pods garlic
salt and black pepper to taste
3 tbsp. olive oil

Sift the flours in a mixing bowl. Add the salt and yeast. Now add the wet ingredients and combine to form a soft dough. Knead well until it is elastic and smooth. Cover and keep aside until doubles in volume, about an hour and a half.

Meanwhile, heat the almond slivers in a pan until well roasted. Keep aside to cool. Add the cooled almonds and the other ingredients except the oil to a food processor and pulse until you have the fine desired consistency. I do not like it pureed so I leave very small chunks. Drizzle the oil over the pesto and pulse a few times. The pesto is ready. Keep aside until needed.

Preheat oven to 400 F. When the dough has risen transfer it to a flat, floured working surface. Using a rolling pin roll it into a long narrow rectangle. Spread the pesto all over the surface leaving an inch edge on all sides.


Fold in the edge on one of the long sides and continue rolling into a long roll. Using a sharp knife cut through the center along the length leaving the two sides attached at one end.


Now place one side over the other repeatedly to form a two strand braid.


Starting at one end roll the braid to form a rose. Elevate the center a little to give it more dimension. Transfer to a baking sheet covered with parchment paper. Bake for 20-22 minutes or until it is cooked through and brown.


Enjoy as a snack or a side with a meal.

Wednesday, April 15, 2015

Margherita Pizza

Pizza with tomatoes, mozzarella and basil is a simple and delicious dinner. When the pizza crust is made with sourdough it adds a lot of flavor to the pizza. I do not make pizza often but when I do it is truly loved. I did have a little crisis with the basil leaves. There is no basil in the garden yet so I have to rely on store bought basil. The week I made this pizza I checked 2-3 grocery stores and they were all out of basil. I used dried basil on the pizza.


You will need
Pizza dough made as per this recipe
Pizza sauce 
Mozzarella cheese sliced (I get lowfat cheese made with vegetarian rennet)
Fresh basil leaves

Prepare the pizza dough and keep it refrigerated at least 24 hours for the flavor to develop. Preheat oven to 500 F. If you have a pizza stone heat it with the oven. If you use a baking sheet like me put it in the oven when the temperature reaches 400 F. Ensure you place the sheet / stone in the top rack. When the oven is preheated and the baking sheet / stone is heated through take the dough out of the refrigerator and shape it. Follow instructions in my original sourdough pizza recipe. Make sure you shape the crust as thin as you can for a thin crust pizza.


When done shaping the dough remove the heated baking sheet. If working with a stone assemble the pizza on a floured pizza peel. Place the pizza carefully on the sheet / peel. The dough is sticky and will stick together if it folds on itself. Spread a ladle of pizza sauce. Place the sliced cheese and sprinkle the dried basil over the top.


Place the baking sheet in the oven. Alternately if using a baking stone slide the pizza from the peel to the stone. Bake for 5-8 minutes. Switch to oven from bake to broil. Let the top brown for 1-2 minutes. If using fresh basil add it before you broil. Do not let the cheese solid separate from the liquid. Remove from the oven and serve it hot.


Enjoy!