Thursday, August 7, 2014

Shewgyacha Shenga Amti / Drumstick Ambti

Drumstick or shewgyacha shenga are pods from the drumstick tree. The skin is not edible but the inner pulp and seeds are delicious. I saw fresh slender drumsticks in the Indian store a couple days ago and had to buy them.


My mother made this ambti. Ambti is dal to which a amsul or sol has been added. Ambti has a lovely tangy, sweet and spicy flavor. The drumstick enhances it.

You will need
1 1/2 cup dal
3 drumstick pods
1 tbsp. olive oil
1 tsp. mustard seeds
1/2 tsp. asafoetida
4-5 curry leaves
1 tsp. turmeric powder
3-4 amsul/sol
1 tbsp. goda masala
1 tsp. paprika
salt to taste

Wash and cut the drumstick pods to 3-4 inch pieces. Pressure cook the drumstick and dal (with 2 cups water) separately. Keep aside.


Heat oil in a pan and add the mustard seeds. When they crackle add the curry leaves and asafeotida followed by the turmeric powder. Add the cooked dal and bring it to a boil. Add the amsul or sol. Let the dal continue to simmer for about 3-5 minutes.


Add the goda masala and paprika. Add salt to taste. Let it simmer for another 2-3 minutes then add the drumsticks.


Bring it to a boil and turn off the heat.


Enjoy with rice or poli.

Wednesday, August 6, 2014

Onion Rings

Onion rings are the classic side to burgers. They are crispy and usually deep fried. I made 'fried' these in the oven. They are crispy and crunchy without the oil bath.


These are approximate quantities as the level of heat and the amount of coating on the onions is a matter of personal taste

You will need
1/2 Yellow onion sliced in rings
1/4 cup all purpose flour
1/4 cup buttermilk
1/4 cup breadcrumbs (I made mine with day old homemade bread)
paprika to taste
salt to taste
olive oil

Preheat oven to 425 F. Prepare a baking sheet with parchment paper.

Start with the ingredients to dredge and bread the onion rings. Prepare three plates. In a bowl mix the flour with paprika and salt. Spread half the flour on the first plate and keep aside. To the remaining flour add the buttermilk and whisk until no lumps remain. Add the mixture to the second plate. You may choose to add an egg to the buttermilk if you like. In a separate bowl combine breadcrumbs with a little olive oil and salt. Mix well to get a crumby mixture and transfer to the third plate. You prep work is ready.


Pick up each onion ring and dredge through the flour. Coat with the buttermilk mixture and dredge in the breadcrumb mixture. Place it on the prepared baking sheet. Repeat for all the rings.


Bake in the preheated oven for 15-18 minutes or until brown. Flip over once half way through the baking process.


Enjoy!

This is my entry for week 31 of the 2014 52 week challenge for the theme breading/dredging.

Tuesday, August 5, 2014

Mumbai Masala Sandwich

Fresh sandwich bread stuffed with potato filling, tomato, onions, chutney and a special spice powder. These ingredients make up the Mumbai Masala sandwich.


I worked in Mumbai for a year but never summoned the courage to try these from the large number of roadside eateries. The best I could do was wada pav from a cart outside our residence and that was because my roommate bought it for me. Recently I ate this sandwich at a friend's house and finally understood why everyone loves it so. I had to try it at home.


I  got my chance when I made this sandwich bread. My daughter loves potatoes and bread separately but did not care for the potato bread combination. My husband loved it even if he had never heard of the sandwich before. I really liked it and can see how it fits into the Mumbai street food scene.

You will need (for 4 servings as a meal)
A loaf of Sandwich bread
1 tomato, thinly sliced
1/2 onion, cut into rings
1 tbsp butter

For the potato filling
3 large potatoes
1 tbsp oil
1 tsp. cumin seeds
1 tsp. mustard seeds
1 onion, chopped
1 Serrano pepper (or other green chili pepper), minced
1 tsp. turmeric powder
1 inch ginger, shredded
1 tbsp. sandwich masala (recipe below)
1/3 cup frozen peas
4-5 sprigs cilantro
5-7 curry leaves
salt to taste

For the chutney see this recipe

For the spice blend powder
2 tbsp. cumin seeds
6-8 cloves
1 in cinnamon stick
1 tsp. black pepper corns
1 tsp. fennel seeds
1 tsp. black salt
1/2 tbsp. aamchur

Make the chutney and keep aside. To make the spice blend powder, roast all the spices, except black salt and aamchur, and grind to a fine powder. Mix in the black salt and aamchur. Cool completely and store in an airtight container.

Boil and peel the potatoes. Mash roughly and keep aside, do not knead. Chop the onion and green chili pepper. In a pan heat the oil and add the mustard seeds. When they crackle add the cumin seeds and curry leaves. Next add onion and Serrano pepper. Saute till tender then add the turmeric powder, sandwich masala, ginger and frozen peas.


Saute for a few minutes until peas are cooked.


Add the potatoes and salt to taste. Add a few tablespoons water to soften the mixture if needed. Turn off heat and allow it to cool.


To prepare the sandwich cut slices of bread and apply a layer of butter followed by chutney on one side of both slices. Spread potato filling over the top of one of the slices. Add a slice or two of tomatoes and onions. Sprinkle the sandwich masala liberally, adjust according to taste. Place the second slice chutney side down over the first.


Apply a little butter to the bottom of a sandwich toaster and place the sandwich inside. Add a dab of butter to the top.


Close the contraption and brown both sides. If you do not have one of these sandwich toasters then you can toast it on a pan.


Enjoy!

With this post I have reached a mini milestone. This is my 300th post.

Monday, August 4, 2014

Sandwich Milk Bread

This is the second bread suggested for this month for the new baking event 'tame the yeast'. This bread was recommended by Mirelle. It is a simple sandwich milk bread. It has a lovely flavor and the sandwiches tasted great and were filling.


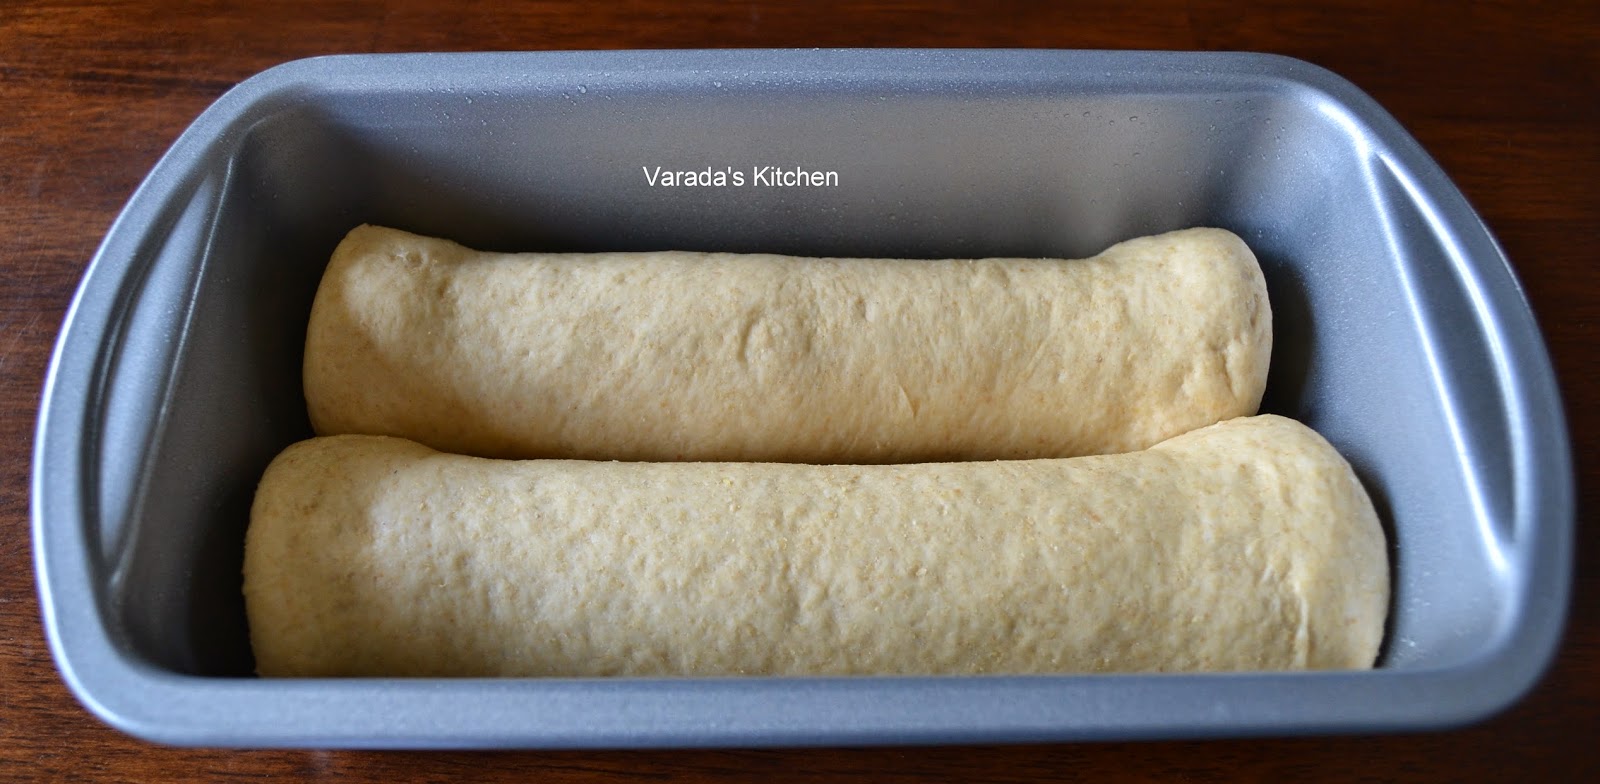
The bread has a unique shape as it is shaped by placing two rolls next to each other in the loaf pan. The bread baked to a beautiful golden brown without a wash. This is a great milk bread recipe that I will be baking again.


I switched all purpose flour for bread flour and used King Arthur white whole wheat flour. I had to add another 1/4 cup water than the original recipe called for to get a soft dough.

You will need
1 cup bread flour
1 3/4 cup white whole wheat flour
1/2 tsp. salt
1 1/2 tsp. instant dry yeast
1 tbsp. honey (I used sugar)
3/4 cup milk
1/4 cup water
1/4 cup butter

In a large mixing bowl sift the flours and add salt, yeast and sugar. In a bowl heat the milk, water and butter until the butter melts. Add the liquid to the flour and form into a soft dough. Knead until the dough is smooth and elastic.


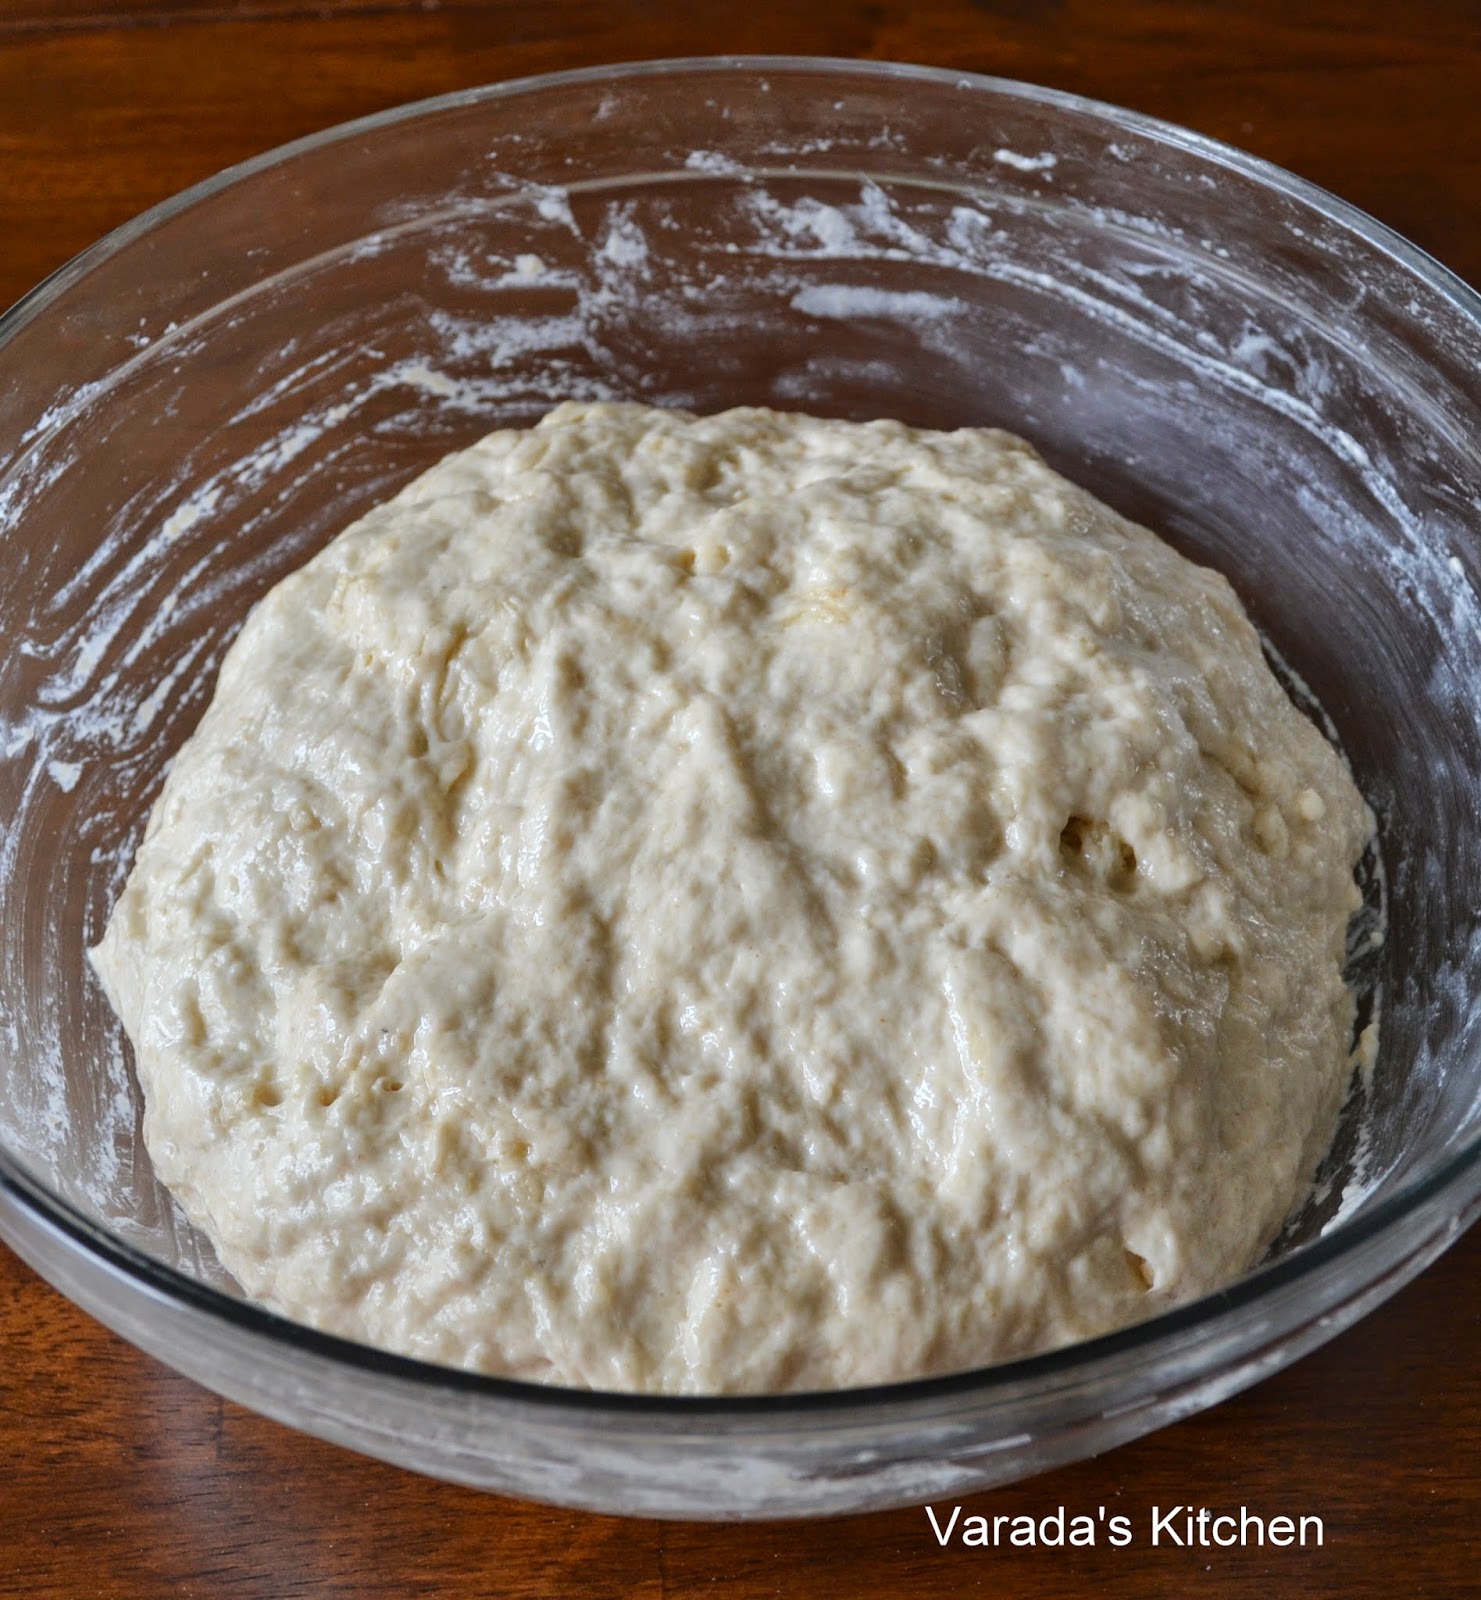
Cover and keep aside until it doubles in volume, about an hour.


Grease a loaf pan and keep it ready. Transfer the dough to a floured surface and divide into two equal portions. Roll in a ball with a smooth top.


Roll one of the portion into a large rectangle. Start at the short side. Fold in the long sides such that the rectangle is the width of the loaf pan.


Roll in a tight roll and place on one side of the loaf pan. Repeat with the other portion and place it next to the first roll.


Cover and let it rise for another 30-40 minutes until it doubles in volume. In the last 15 minutes preheat the oven to 375 F.


Bake the loaf for 30-40 minutes until the top is golden brown and the loaf sounds hollow.


Cool on a cooling rack before cutting it into slices.


Enjoy!

Sunday, August 3, 2014

No Knead Light Wheat Loaf

A group of friends decided to start a new baking challenge, 'tame the yeast'. I was tasked with providing a simple sandwich bread as the first challenge for the new group. Most of the sandwich bread I bake is in the form of boules using my sourdough starter. I decided to try this no knead light wheat loaf. It was the easiest bread I have ever made. It is a perfect bread to start with as no kneading is required. The long rise times ensure excellent flavor.


I made the bread with 50% all purpose flour and 50% whole wheat flour. I made the bread twice once using King Arthur whole wheat flour and a second time using the low protein/gluten chapati flour. I got denser crumb with the chapati flour as a result of using low protein flour. The crumb was more open with the stronger wheat flour. However, the end result in both cases was soft bread flavorful bread.


We loved the results and the bread was gone in a couple hours after I made these sandwiches. I think this will be my go to sandwich bread recipe. I found this recipe in an artisan baking group where Karen shared this recipe from her blog.


You will need
2 cups all purpose flour
2 cups whole wheat flour
3 tablespoons sugar
1 3/4 tsp. salt
3/4 tsp. instant yeast
2 cups + 1 tbsp. ice cold water
3 tbsp. oil

You can mix the flour at night and keep it overnight if your kitchen is cool or you are baking in winter. On hot humid days it would be best to mix the dough in the morning and watch the dough every few hours. Mine was done in 6 hours on a very hot and very humid day.

Sift the flour in a large mixing bowl. Add all the other dry ingredients. Pour the water and oil.


Whisk until all the ingredients are mixed together. Do not knead. Pour a few drops of oil on your palm and spread over the top. Cover with plastic wrap and keep aside.


Lightly spread oil on a 10 x 5 loaf pan. When the dough has risen to twice its original volume you are ready for the next step.


Stir the dough together gently.


Fold it over itself a few times. You start on one side, push your hand under the dough and pull up the dough all the way to fold over the top.


Now fold the dough in half, lift it out of the mixing bowl and place it in the loaf pan seam side down.


Smooth out and even out the top with oiled hands. Using a sharp knife cut the top of the dough three times to score. Sprinkle half a tablespoon of whole wheat flour over the top. Cover with oiled plastic wrap and let it sit for a couple hours until the dough rises a quarter of an inch over the side of the pan. Preheat oven to 375 F during the last 15 minutes of the rise.


Bake the loaf in the center of the oven for about 50-60 minutes. If the top browns too fast tent it with foil. Let the loaf sit in the pan on the counter for 10 minutes.


Take it out of the pan and place it out on a cooling rack.


Do not slice until it has cooled.


Enjoy!

Note:
* This is a wet dough and will be hard to handle. Moisten you hand with water to make it easier to handle.
* If you are baking on a hot day or your kitchen temperature is high, consider putting the dough in the refrigerator after an hour. Cold temperature retards yeast growth so you will be able to get the flavors from the long rise without over-proofing.
* If you are baking on a wet rainy day, reserve a couple tablespoons of water. Mix the dough and add the remaining water only if it is not too wet. Dough absorbs moisture from the air.

Friday, July 25, 2014

Braided Bread

I have always been fascinated with fancy braids. In my college dorm I used to braid my roommates long hair. My daughter has waist length hair but she would not let me play with it. Then I found braided bread. I really like the bread with 8 or 9 strands. Today I present braided bread with 6, 8 and 9 strands along with a 4 strand round bread.


The turtle was made by my daughter. She said the round braid looked so much like a turtle she had to give it a head, hands and feet. It was a lot of fun making these as my daughter was a very willing participant. Guess she loves braiding as much as I do.


You will need
Dough prepared using my basic dough recipe

To make the braided bread you need rolled strands. I find it it easiest to roll the dough in a flat rectangle, cut out strips and roll each one into shape.


This gives me ropes of the same size and diameter that are evenly finished. To start place all the ropes parallel to one another. Bring one edge together and squeeze together. Now you are ready to begin.

To make the 9 strand braid
Start on the right. Place the right most strand to the left over the next two adjacent strands and under the following two strands. Do the same with the left most strand.


Repeat this process and the braid will start to appear.


Continue to the end as far as you can go. Tuck all the strands together under the dough to finish. Cut off about a half inch at the end from which you started and tuck the strands under.

For the 8 strand braid
Before you begin arrange the 8 strands the same way you would for the 9 strand bread. Pick up the rightmost strand and place it over the top of all the other strands to the left. Repeat with the leftmost strand.


Now place the right strand in the middle of the remaining strands. Place the new rightmost strand over to the left. Place the leftmost strand in the middle of the remaining strands and place the new leftmost strand to the right.


Continue to the end. Finish similar to the 9 strand braid. The finished 8 and 9 strand braids look like this.


For the 6 strand braid
This is very similar to the 8 strand braid except you have 2 fewer strands to work with.


For the 4 strand round braid and turtle
The 4 strand round braided bread is a little different from the above. To start place the 4 strands as shown in the picture below.


Now twist the adjoining strands such that the one that went under goes over and vise versa as shown in picture below.


Continue this process until you reach the end. Pick up the braid in your hand, turn it over and tuck the end on the underside. For the turtle attach head, hands and feet. Add cloves for eyes if you like. Wash everything with a milk to egg white and milk wash.


Bake at 400 F for 15-20 minutes. I used leftover pizza dough to bake these breads.


Enjoy!