Monday, November 17, 2014

Fruit Dessert Pizza and First Blog Anniversary

I started this blog seven years ago but had to abandon it when life got really busy. I started blogging in earnest last year. One year and 500 odd recipes later here I am celebrating my blog's first 'real' anniversary. I decided I had to post something sweet to mark such a sweet milestone. So today I am posting the recipe for dessert pizza. I also thought it would be very appropriate to set myself a new challenge. A food photography challenge. This is a challenge for anyone who likes to click pictures of food and is working to get better at it. More about that here. Moving to the recipe for the day.


When my daughter was in 1st grade Pizza Hut was running a reading initiative and awarded pizza hut child buffet coupons. My daughter won a few and we used a couple of them. The pizza she loved the most was the dessert pizza. Today I have recreated that pizza using cinnamon apples.

You will need
For the base
2 cups whole wheat flour
1 cup water
1 1/2 tbsp. vegetable oil
1 tsp. salt
1/4 tsp. instant yeast

For the topping
1 apple, peeled, cored and diced
1/4 cup brown sugar
1 tbsp. all purpose flour
a pinch cinnamon powder
a pinch nutmeg
a pinch salt

For the crumb topping
2 tbsp. all purpose flour
2 tbsp. rolled oats
1 tbsp. brown sugar
1 tbsp. butter
a pinch cinnamon

For the glaze
1/4 cup powdered sugar
1 tbsp. milk
1 tsp. butter
1 couple drops vanilla extract

To make the base mix all the ingredients in a bowl except the water. Heat the water so it is lukewarm. Add the water to the flour and form a soft dough. Knead well and keep aside overnight.

To make the topping add all the ingredients for the topping to a pan and heat it until the apples are soft and the sugar has melted, about 3-5 minutes.


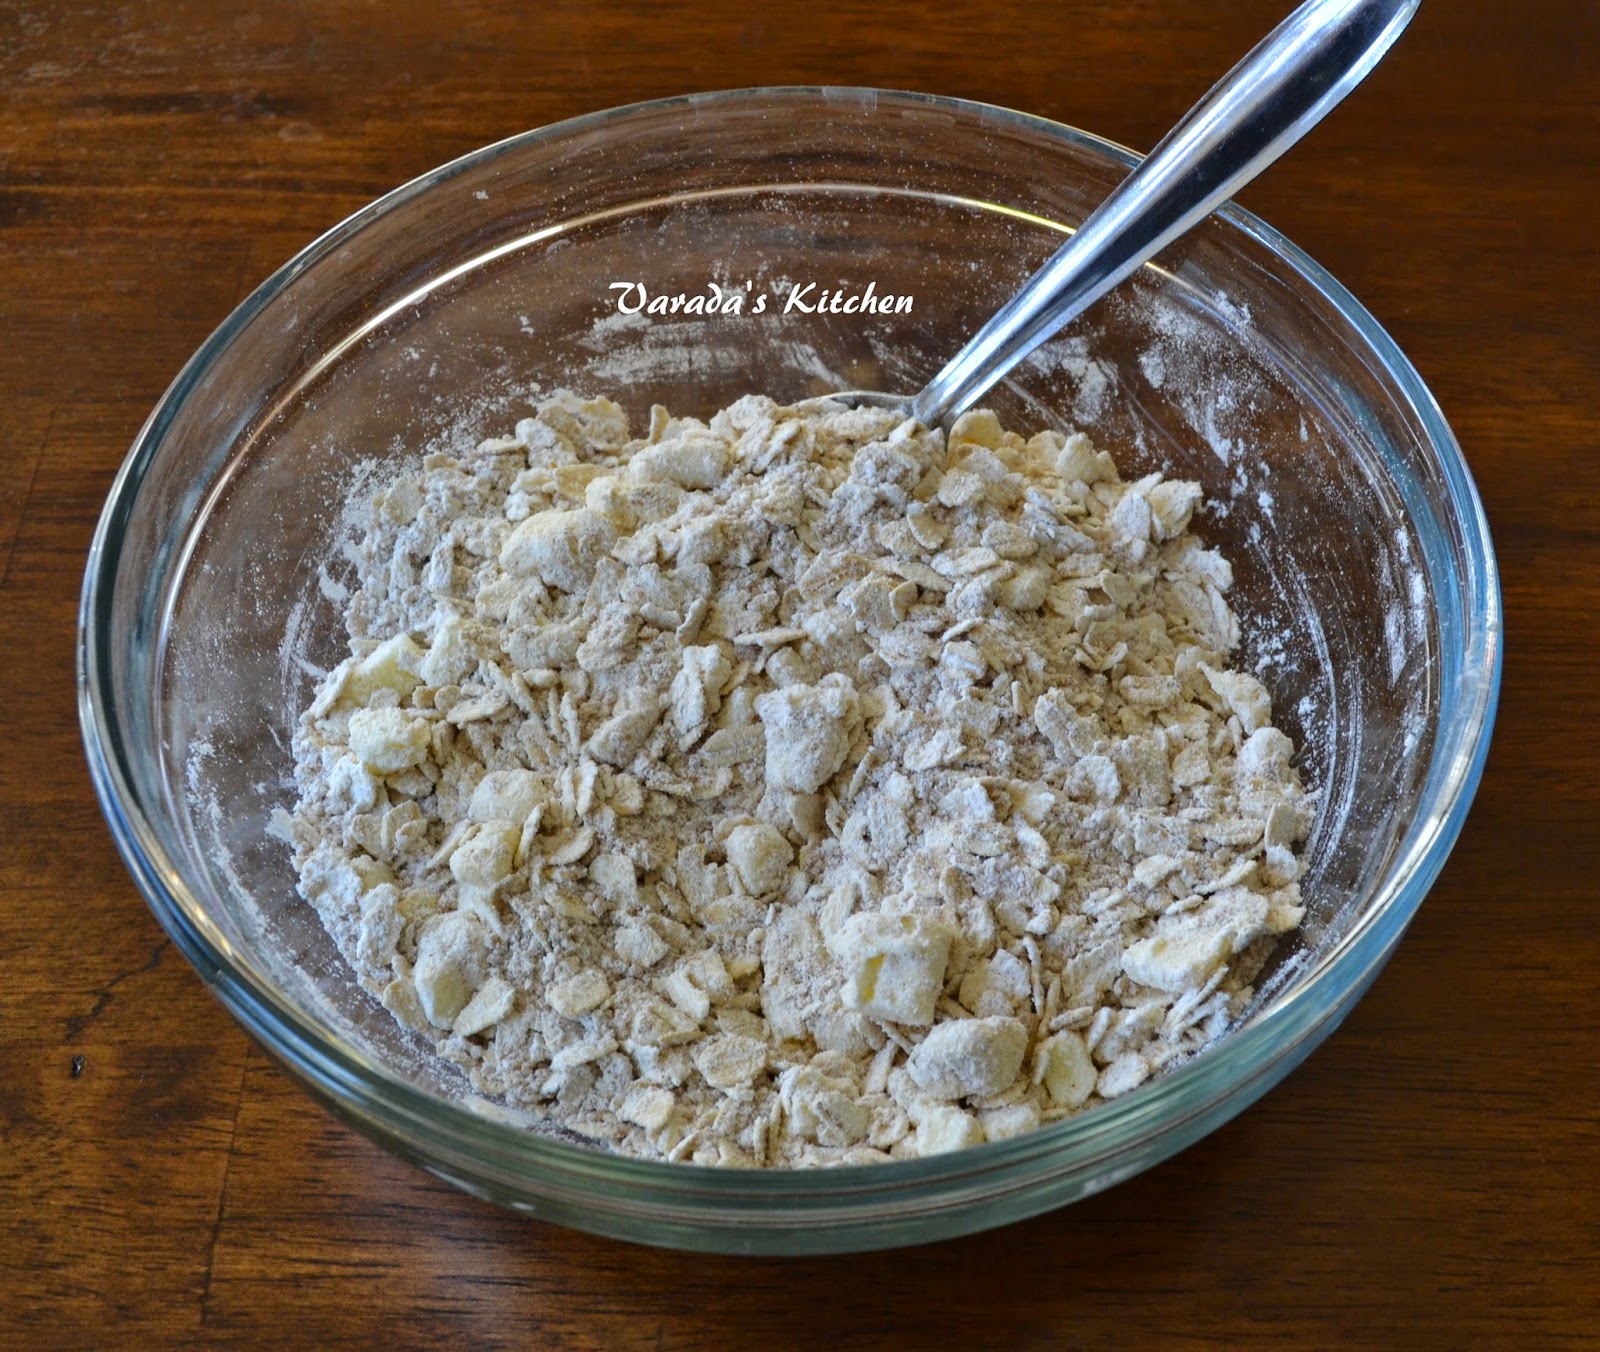
Combine all the ingredients for the crumb topping in a separate bowl. Keep aside.


Preheat oven to 400 F. Flatten the pizza dough with your knuckles. Form a wide disc by running the edges through your fingers. Work till the disc is the size of your pizza pan. Place it on the pan and prick with the tines of a fork. Bake it for 4-5 minutes. Take it out of the oven and spread the apple mixture over the top. Next spread the crumb mixture over the apples.


Bake for 10-15 minutes or until.


Combine all the ingredients for the glaze and drizzle it over the top. You could use less milk and make the glaze thicker if you want.


Leftover pizza can be refrigerated and eaten over two or three days.


Enjoy!


Sunday, November 16, 2014

First Blog Anniversary Food Photography Event

I am celebrating the first anniversary of my blog with a food photography challenge. Food photography is a big part of food blogging so I decided to celebrate this event with a food photography challenge.

Most of us are learning to use our camera and all the settings it provides. Some of us are experts and take awesome pictures. Sometimes we make elaborate plans for a pictures and it turns out just perfect. Some other times we click in a hurry and end up with a perfect shot. I am asking you to share this perfect shot with all of us.

It would be nice to see a gallery of great food pictures and read about why the photographer considers the picture to be their best for this month.

The rules of the challenge are simple.
  1. Select your best food picture (just one) from a post dated between November 17th and December 17th 2014. If you like you can have a separate post just for the picture.
  2. Place this picture as the first picture on the blog post.
  3. Write a little about the picture, your props, lighting, camera setting or anything else that makes you feel this is your best for the month.
  4. Link back to this page in your post.
  5. Submit this picture using the linky tool below by the 17th of December.
At the end of the month I will post a round up of all the pictures submitted.


Wednesday, November 12, 2014

Upasachi Batatyachi Bhaji / Potato Peanuts Side

This bhaji is called upasachi or fasting but it is not necessarily made for fasting. In fact I do not remember fasting a lot while growing up. This simple potato and peanut side is one of my favorite and I make it often. The roasted peanut powder adds a lovely flavor that makes this dish special.


This is another of my mother's recipes and it is a very simple one. She used to give it to me as part of my packed lunch. Back then we used to share a part of our lunch with our friends. And the tastier your lunch was the better the bargaining power. My mother's chapati's were always sought after. And this was one bhaji that my friends loved. When I had this in my lunchbox I could exchange it for anything from anybody in my class.


I cooked the potato in a microwave. If you do not want to use the microwave you could cook it in a pressure cooker with the peel and a little bit of water. Once cooked peel while it is still warm and dice.

You will need
1 large russet potato
1/4 cup roasted peanuts
1 tbsp. olive oil or vegetable oil
1 tsp. cumin seeds
1 green chili pepper (I used Serrano)
1/2 tsp. sugar
salt to taste

Wash and scrub the potato to remove all the dirt from the surface. Prick all over with the tines of a fork. Place it in the microwave with a cup 3/4 full of water and cook for 2 minutes. Turn the potato upside down and cook again for 2 minutes. Repeat one more time. Cover in aluminium foil with the peel intact and leave it on the kitchen counter for at least 15 minutes or until needed.

In a grinder grind the roasted peanuts to a coarse powder. Keep aside. Take the potato out of the aluminium foil. Peel and dice it. Heat oil in a pan and add the cumin seeds. When they sizzle break up the chili pepper into pieces and add them to the oil. Next add the diced potato. Cook covered for a minute.


Add the peanut powder, sugar and salt to taste. Mix everything together, cover and cook for a couple minutes.


You cannot miss the aroma of the roasting peanuts. When they change color turn off the heat.


Enjoy!

Tuesday, November 11, 2014

Authentic Palakachi Patal Bhaji / Spinach Buttermilk Side

Palakachi patal bhaji is a traditional delicacy. The gravy is made of buttermilk and besan (bengal gram flour). For it to be called perfect there are a bunch of rules. The consistency should be thick and viscous such that it can be scooped up like a liquid but it should not be liquid enough to pour. When a spoon is dipped in the gravy and held up spinach should not hang from the sides. The spinach though cut into pieces should become one with the gravy. It should however, retain its green color. When served on a plate it should not be runny or water should not separate and run from the sold mass. Whole peanuts and channa dal (split bengal gram) are added to the gravy. The peanuts and dal should retain its shape but should be very soft, not crunchy.


Maharastrian food has to have a balance of all the flavors - tangy, sweet, hot (as in pepper heat) and savory. Based on personal preference one or the other flavor may be stronger than others. Tamarind juice and jaggery is usually added to gravies. Lemon juice and sugar are alternatives. Tamarind juice is not added to this spinach bhaji as the buttermilk provides the tangy flavor. Jaggery is never used with buttermilk so sugar is added to provide the sweet flavor. This may sound like a lot of rules but if they are followed the food tastes delicious. Besides if you cook this food often it becomes a matter of habbit.


Patal bhaji literally means a sides with a liquid gravy. Most greens can be cooked this way. In fact the most delicious of them all is aluchi (patra/arabi/colocassia) bhaji. I did not get fresh alu today so that will be another post. Alu bhaji is not cooked in buttermilk. Neither is methi. Spinach is one of the exceptions as buttermilk is supposed to bring out the flavor in spinach. Patal bhaji taste best with bhajri (millet) or jwari (sorghum) bhakri. We had it with chapati. Once I get my dry grinder I will have fresh flour to make the bhakri.


It takes a lot of time to get this dish right. It took me a better part of the hour. My husband said I should have just run the blanched spinach thorough a blender, consistency issue solved. That is usually my quick and easy way out but the appearance is altered. And today I wanted to post the authentic traditional recipe. After all that I was not happy when the weather refused to co-operate. It was a cloudy day that got dark and gloomy by the time I was done. Weather service called for rain the next day. So the pictures were taken under my kitchen lights.

You will need
1/2 cup peanuts
1/2 cups channa dal (split bengal gram)
1 tsp. cumin seeds
1 tbsp. dry coconut flakes
2 large bunches spinach (I used baby spinach)
3 tbsp. besan (channa dal flour)
2 cups buttermilk
3-5 cups water
1 tsp. cayenne pepper powder (red chili pepper powder)
1 tsp. sugar
1 tsp. garam masala

For the tempering
1 tbsp. olive oil (vegetable oil)
1 tsp. mustard seeds
1 tsp. fenugreek seeds
1 green chili pepper (you can use more to increase the heat)
1 tsp. turmeric powder
1/4 tsp. asafoetida

Soak the peanuts and channa dal in water for 3-4 hours. Pressure cook for 10 minutes (3 whistles) until soft. Roast the cumin and coconut flakes in a pan. Cool, grind to a powder and keep aside until needed.


Heat the water in a large pan. Wash and clean the spinach. Drain out all the water. Let it dry enough to be handled and cut without bruising. Align a bunch of leaves together and cut as fine as you can. Repeat for all the leaves. Soft and tender stem can be used if diced finely. Blanch the diced spinach in the hot water for a couple of minutes using a fine mesh sieve. Reserve the water.

In a large pan add the cooked peanuts and channa dal. Add the blanched spinach and put it on low heat. Whisk the channa dal flour in the buttermilk such that there are no lumps and add it to the spinach. Add another 3 cups of reserved blanched spinach water. The spinach should be completely submerged and the liquid should be runny. Add more water if needed. Bring it to a boil stirring frequently. When it is at a full boil increase the heat to high.


Let the spinach mixture cook until the liquid reduces and thickens. Add the salt, sugar and cayenne pepper powder. Add the garam masala and the cumin and coconut flake powder. Continue to cook until the consistency is that of a very viscous liquid.

In a separate pan heat the olive oil. Add the mustard seeds. When they crackle turn off the heat. Add the fenugreek seeds and green chilis. You can break up the chilis or slit them so that they flavor the oil. When the seeds and chilis sizzle add the turmeric powder and asafoetida.


Add the tempering to the gravy. Bring it to a boil.


Turn of the heat. Tastes best with bhajri (millet) or jwari (sorghum) bhakri. We had it with chapati.


Enjoy!


This is my entry for week one, day two of BM #46 for the theme No onion no garlic. Check out the Blogging Marathon page for the other Blogging Marathoners doing BM#46.

Monday, November 10, 2014

Chavlichi Usal / Black Eyed Peas No-onion No-garlic Curry

A gravy based Maharashtrian side made with fresh or dried peas or beans is called usal. Dried peas or beans are soaked overnight and pressure cooked before being used. Fresh peas or beans do not need to be precooked. Though this dish can be added as a side to a fancy meal or thali it is basically a simple weeknight recipe.


This is my mother's recipe. She used to cook black eyed peas or chavli with a fresh coconut and cilantro gravy. This gravy can be used for mung or matar (green peas). I remember every Sunday morning when my Dad was not travelling he would go grocery shopping for vegetables. Sometimes I used to accompany him. We did not eat a lot of coconut but when this dish was on the weekly menu we bought fresh coconut. I remember cutting it open with a sharp sickle. I used to pull out the dry coconut fibers to give me a smooth brown coat. My mother insisted I should not pull the fibers on the edges. I would use water to paint a ring around the middle of the coconut. I truly believe that helped me cut the coconut exactly in half. I then used the sickle to break the coconut. I would collect the water in a cup and hand the coconut halves to my mother. The cup of coconut water was the reward for my efforts.


Back to the recipe

You wull need
1 cup dry black eyed peas
1/2 cup fresh shredded coconut (I used frozen)
1/2 cup cilantro leaves
1 green chili pepper (adjust to taste)
1/2 tsp. cumin seeds (optional)
1 tbsp. olive oil or vegetable oil
1 tsp. mustard seeds
1/4 tsp. asafoetida
1 tsp. turmeric powder
1/4 tsp. cayenne pepper powder
1 tsp. garam masala
1 tsp. sugar
salt to taste

Soak the peas overnight in water such that they are completely submerged. Drain the water the next morning to get rid of the phytic acid. Pressure cook for 5 minutes. Keep aside to let the pressure subside.

Meanwhile grind to a paste the shredded coconut, cilantro, cumin seeds and green chili pepper in a grinder with a little water.


Heat oil in a pan and add the mustard seeds. when they crackle turn down the heat to low and add the asafoetida and turmeric powder. Now add the ground masala paste and let it heat completely. Do not let it boil, cilantro paste does not do well when boiled.


Reserve the water the peas were cooked in and add the peas to the pan. Add just enough of the cooking water to form a thick gravy.


Let it simmer until the water evaporates and the gravy thickens some more.


Add the salt, sugar, garam masala and cayenne pepper. After a couple more minutes turn off the heat.


Enjoy!

Wednesday, November 5, 2014

Frequently Used Bread Baking Terms

The ability to understand bread baking books or recipes depends a lot upon your ability to understand frequently used bread baking terms. Here is a glossary of a small subset of terms. I will add to it as I run into more. If you have any you would like me to add please let me know.

Hydration
Hydration refers to the liquid in the dough. Hydration is expressed as a percentage of the flour in the dough. If hydration is 75% and you used 1000 gm of flour then you can deduce that 750 gm of water/liquid was used.

Levain or starter or sourdough starter or wild yeast
Flour and water and mixed together to encourage the yeast in the flour to grow. The yeast is fed with more flour and water as needed. Bacteria, the same as is found in yogurt, also grows in the culture. This mature culture can be used to levean bread. Apart from helping the bread rise the culture is very good for you. It ferments the flour helping to break down the protein and complex carbohydrates into animo acids, starches and organic acids helping more of the grain to be absorbed by the human body. It also neutralizes anti-nutrients like phytic acids. These acids attach themselves to iron, zinc and manganese preventing their absorption. When mature the culture is used to leaven the dough to make delicious bread the old fashioned way. The trick is to learn to control the ratio of yeast:bacteria thereby controlling the acidity of the dough. Higher bacteria gives you sour loaves, higher yeast gives you sweeter loaves.

Commercial yeast
A little over a 100 years ago fresh bakers yeast was discovered that made life easy for bakers. For a couple of decades bakers used both, their starters and the bakers yeast, to leaven the dough. With the popularity of bakers yeast the use of starters declined. Eventually most new bakers stopped using the starters altogether. Today you can get fresh bakers yeast or dry granules to leaven the bread.

Real Bread
Real bread is a campaign started in many countries to go back to the roots of bread baking and away from industrialized baking techniques. Typically real bread uses small quantity of yeast with long bulk fermentation and proofing times. Most bread recipes use only flour, water, salt and yeast.

Bakers percentage
A simple rule followed by bakers using weight measurements. This formula does not work for volume measurements. All ingredients like water, salt, yeast or levain (starter) are expressed in terms of the flour used. Flour is 100%. A recipe that calls for 500 gm flour, 400 gm water, 10 gm salt and 100 gm starter can be written as 100% flour, 80% water, 2% salt and 20% starter. Now you could use any quantity of flour and figure out the remaining quantities. Expressing any recipe in these terms allows you to predict how wet the dough will be or whether there is enough salt in a given recipe. Bakers percentage can also be used when using commercial yeast.

Bulk fermentation
Also called the first rise, bulk fermentation is the process of breaking down the wheat in simpler sugars that are them fermented by the yeast and bacteria. Long bulk fermentation results in greater break down and unlocking of nutrients in whole grain flours. Bakers baking a lot of bread called this 'bulk' fermentation because the dough was in one big undivided mass.

Proofing
Also called the second rise. After the first rise the dough is divided and then shaped into individual loaves or rolls. Proofing is the process of priming the dough for the oven. Pressing a finger in the dough will give you one of three results. If it springs back to the original shape immediately the dough is under proofed. If it does not spring back to the original shape the dough is over proofed. The dough is ready for the oven if it springs back to shape slowly. For best results the dough should be proofed just right.

Oven spring
When bread is placed in a hot oven it rises as it bakes. This rise is called oven spring and is different from when the bread rises during fermentation or proofing.

Score
Deliberately slashing the dough to control the vents through which the steam escapes is called scoring. Scoring prevents the bread from tearing. It is done with a sharp blade called a lame. Results similar to the lame can be achieved with the use of a sharp razor blade. Scoring is an art and adds to the beauty of a well baked loaf.

Ears
A scoring technique that results in one side rising above the other giving the appearance of a ear.

Crumb
The crumb is how the inside of the bread looks. An even crumb is desirable whether is is open or closed. An open crumb is one with large holes of varying sizes and a closed crumb is small evenly shaped holes. 

DO or Dutch Oven
Dutch ovens are usually made of cast iron, sometimes with an enamel coating. They have become very popular among home bakers. Steam is essential to develop the thin crust that you find on most well made old world breads. However, most home ovens are not equipped with a steaming option. The dutch oven when covered is a perfect isolated environment that creates its own steam. Dutch ovens have made it possible for enthusiastic home bakers to bake bread of professional quality.

Couche
The cloth used to separate the individual shaped loaves while they are proofing.

Banneton
Cane baskets used to proof bread. They give the bread the classic ring design.


This is my entry for week one, day one of BM #46 for the theme Taming the yeast. Check out the Blogging Marathon page for the other Blogging Marathoners doing BM#46.

Tuesday, November 4, 2014

Tomato, Basil, Mozzarella Bruschetta

I wanted to make something special with the baguette I had baked. I had thought of using it for sandwiches for school. But I shaped it thin so sandwiches were out. Slender French bread works best to make bruschetta. Bruschetta is a favorite snack in my house. I used to make it with store bought bread before I started baking bread. I also realized I did not have a recipe in this space for bruschetta. So I made tomato, basil, mozzarella bruschetta and I am so glad I did. It was all gone very quickly.


The mozzarella I used is from Whole Foods, notice the veg rennet label on the very bottom. It goes sour very quickly but is pretty good when eaten fresh. If you hesitated because of the rennet source this is the mozzarella for you.


Ensure the crust of the bread you use is very thin. The crust of my baguette was perfect - crunchy but so thin it crumbled in your mouth. I had planned to try artichoke bruschetta as well but my daughter was not too keen so I decided to stick to the tried and tested.

You will need
1 baguette
3 tomatoes
7-9 basil leaves (I got mine from the garden)
 mozzarella cheese, sliced
1 tsp. olive oil + a little to drizzle over the bread
salt and black pepper to taste

Preheat oven to 400 F. Cut the tomatoes in half and remove the seeds and juice. Dice the tomatoes. Place the basil leaves one over the other and roll them. Cut the roll to form thin strips or chiffonade. In a bowl combine the tomatoes, basil, olive oil, salt and pepper. Keep aside.

Slice the baguette into 1/2 inch slices. Drizzle with a little olive oil and arrange on a baking tray. Place mozzarella cheese over the top.


Bake for 5 minutes or until the cheese just starts to melt. Do not allow the cheese to melt and separate.


Transfer to a plate and top with the tomato mixture.


Enjoy!

Monday, November 3, 2014

Sourdough Baguette Take two

As the title states this is my second attempt at baking the perfect baguette. When I made my first attempt I had a new wild yeast starter and the baguette was my first bread fully leavened with the starter. That the dough rose was a big thing and so I was very happy with the results. A short eight months later my expectation is higher. An open crumb, thin crust, nice color and good scoring all in one baguette is the new dream. This baguette may not pass the stringent French rules with its length and weight specifications but I am sure no one would call it anything other than a baguette. Baking bread that crackles and speaks to me as it cools makes me happy. That is the bread that my family likes to snack on because it is tasty. Though I would have liked an evenly open crumb I am happy to have achieved my current goal.


The impetus behind this attempt came from Pradnya who blogs at The Pumpkin Farm. She set us this challenge as part of the tame the yeast event. I have to thank her for getting me to try the baguette again. I used my starter for this bread but I have given the recipe to use commercial yeast as well. The end result should be very similar as it is the technique as much as the ingredients that determine the end result.


I had watched videos on how the baguette is shaped without letting the gas escape. But I had never really looked into scoring techniques. I learnt that from my friends at Artisan Bakers. I bought a razor blade, the kind I remember my Dad shaving with when I was really little. I used it to score the bread. I have always loved the darker colored bread peeking though the score marks and could not believe how easy it was to make it happen. If you use this technique make sure you get an odd number of score lines, they are supposed to look better than an even number. I could have overlapped the score marks a little more and that would have given me a straighter edge but for now I am happy with this loaf.


I baked my first artisan boule using the recipe from the book Flour Water Salt Yeast by Ken Forkish. Now I find myself using that technique for most breads I bake. I even used it very successfully for the sourdough buns I baked a few months back. I use a shorter (~5 hour) bulk fermentation following by overnight proofing. I put the cold shaped dough directly in the hot preheated oven without allowing it to come to room temperature. I followed the same technique on this loaf too. Except I put a cast iron pan in the oven in addition to my baking sheet. When I transferred the loaf to the oven I filled the pan with ice cubes. This created the much needed steam to form a thin, crunchy crust.

For one baguette
If you are using a sourdough starter
You will need
105 gm white whole wheat flour (I used King Arthur)
90 gm all purpose flour
130 gm water
100 gm fed sourdough starter
6 gm salt

Alternately, if you are using commercial yeast
You will need
150 gm white whole wheat flour
100 gm all purpose flour
175 g water
6 gm salt
2 gm or 1/2 tsp. instant yeast

If using starter
Feed your starter. I keep 50 gm starter in the refrigerator. I feed it with 50-75 gm each of flour and water first thing in the morning and let it sit on the kitchen counter for a few hours. At around 2-3 pm I am ready to mix the dough. 50 gm of the starter goes back in the refrigerator for next time and the rest is used as needed in recipes. For this bread I needed 100 gm of starter so I refreshed the mother with 50 gm each of water and flour.

In a large mixing bowl add all the flour after running it through a sieve. Now mix in all of the water so that no lumps of dry flour are visible. Cover and keep aside for 20-30 minutes. This is called autolyse a process which gets the enzymes in the flour going by mixing it with water and letting it rest.

After half an hour sprinkle the salt over the dough. Add the sourdough starter or commercial yeast whichever you choose to use. Mix it in with the dough. You should break up the dough with your fingers and reform it at least twice to get all the ingredients to mix up well. Cover and keep aside.


Over the next two hours stretch and fold the dough to strengthen it. The dough will be wet and not very stiff. Moisten your hands with water before handling the dough. You reach for the dough on the far side, stretch it up and fold it over towards you. Turn the bowl 90 degrees and repeat. When you go all around once you have completed one turn. You will gradually notice a difference in the appearance of the dough. It will get smoother and easier to work with. Cover and keep aside for another 3 hours for a total of 5 hours of bulk fermentation.


Prepare a baking sheet that fits in your refrigerator by spreading a couche over it. I don't have a couche so I used a dry tea towel. Flour the tea towel and keep aside until needed. Flour your working surface and your hands. Transfer the dough to the working surface. Without letting the trapped gas escape form the dough into a floppy rectangle. Do not take too much time to get the shape right. Fold the top third over the dough and press down with the heel of your palm to create tension over the fold.


Now fold the bottom over the top and do the same with your palm. Now bring the top and bottom together and press down gently again. This exercise is meant to create tension in the outer surface of the dough. Seal the edge along the length. Cup your hands over the roll of dough and gently roll back and forth to make it longer to the desired length. For sandwiches you may want it slightly thicker. I made it thin and long.


When you are satisfied with the length transfer it to the waiting floured tea towel. Pull up the edges of the towel next to the shaped baguette to help it retain its shape. Professional bakers place baguettes next to each other separated by the pulled up couche. However, I baked just the one so I placed wooden spoons on either side of the folded up towel to help the baguette hold its shape.


Cover the baguette with the rest of the towel and place it in the refrigerator overnight. You can bake the baguette any time the next morning.


Preheat the oven to 500 F. Ideally place your baking stone and the cast iron pan in the oven when it is heating. Since I do not have a baking stone I put my baking sheet in when the temperature reached 450 F. I placed the empty cast iron pan in at the same time.

Let the oven heat for 5 minutes after it reaches 500 F. Keep a bowl of ice cubes or boiling water ready. Take the shaped baguette out of the refrigerator and put it on the kitchen counter. The cold dough will be firm and easy to handle. Handle it gently.


Take it out of the towel and ideally put it on a well floured peel. I do not have a peel so I floured the back of a baking sheet and used it to transfer the baguette to the sheet in the oven. Just before putting the loaf in the oven score it using a very sharp razor blade. The cuts should be almost vertical and a third of each cut should overlap. The overlap prevents the dough from looking lumpy.


Put the loaf on the hot baking stone, or in my case hot baking sheet, in the oven. Being very careful to protect the oven glass transfer the boiling water or ice cubes to the hot cast iron pan. Close the oven door and let the bread bake for 10 minutes. Remove the cast iron pan and allow the baguette to bake for another 15 minutes. I removed the baguette after 10 but next time I will keep it in for the additional 5 minutes for a darker color.


Remove the baguette from the oven and put it on a cooling rack. Allow it to cool completely before cutting into it.


Enjoy!

Sunday, November 2, 2014

Honey Roasted Peanuts

Yesterday my daughter asked me to buy her some honey roasted peanuts. I thought I could do better, I could make her some. This was my first attempt at making candied nuts. My goal was to get them to taste sweet with a hint of spice. I think I managed that and more. The nuts are crunchy and sweet. The spice is evenly distributed.


Next time I will skip the nutmeg and add cardamom instead.

You will need
1 cup peanuts
1/2 tsp. cinnamon powder
1/4 tsp. cardamom powder
3 tbsp. maple syrup
3 tbsp. sugar
a pinch of salt

Preheat oven to 325 F. In a bowl mix all the ingredients except the sugar.


Transfer to a baking sheet covered in parchment paper. Roast for 15 minutes or until the nuts are brown.


Cool and mix together. They will have a honey glaze.


You could stop at this step but I did not want them to be sticky. So I sprinkled sugar over the top. That gave the nuts a matt finish and dried them up some.


Enjoy!