Monday, September 1, 2014

Erdäpfelknödel (Potato Dumpling)

The vast array of Austrian dumplings is astounding. As a quick and easy side dish Austrian potato dumplings are hard to beat. They are tasty without overpowering the meal.


Recipe adapted from here
You will need for 8 dumplings
2 medium potatoes
100 gm flour
35 gm semolina
20 gm butter
1/2 an egg (I used the other half for spinach dumplings)
nutmeg
salt

Boil the potatoes. Peel and run them through a shredder. Combine with all the other ingredients. Make 8 bite size dumplings.


Boil water in a pan and add some salt. Add the dumplings to the boiling and cook for about 10 minutes.

Spinatknödel (Spinach Dumpling)

Spinach dumplings caught my eye because they are rich in protein and are filling. They are a great way to use up day old bread.  I used fresh baby spinach with my delicious day old home made bread rolls. The dumplings were very tasty. They are usually eaten hot with a cheese sauce. The recipe for the cheese sauce is here.


We found they tasted great even after they were reheated.

Recipe adapted from here
You will need (for about 10 dumplings)
80 gm day old bread rolls
1/4 cup milk
100 gm spinach
1/2 an egg (I used the other half for potato dumplings)
40 gm breadcrumbs
15 gm flour
30 gm parmesan cheese
a little fresh grated nutmeg
salt and pepper

Cut the break rolls into pieces and soak them in the milk. Keep aside. Blanch the spinach in a boiling water for a minute. Drain and keep aside until cooled. Squeeze out the liquid from the spinach. Drain the milk from the soaking bread. Add the bread and spinach to the food processor and pulse until combined. Add the breadcrumbs and flour and pulse a few more times. Transfer to a bowl and add the other ingredients. The mixture should hold together like dough. Divide the mixture into bite size dumplings. Bring water to a boil and add the dumplings.


I cooked them in two batches to prevent them sticking. Cook the dumplings in the water for about 10 minutes or wait for them to float to the top and cook a couple minutes longer.

Apfelstrudel / Apple Strudel

Apfelstrudel is a very delicate dessert made with thin flaky pastry dough. The dough is rolled on a cloth which makes it easier to handle. The thinly rolled out dough is made thinner by running it over the knuckles of your hand. When done it is possible to read a newspaper or see the pattern on the tea cloth on which it is laid.


Crisp apfel (apple) strudel is a well known Austrian dessert. For those of us not living in Europe it was made popular by the song 'Raindrops on roses and whiskers on kittens...' from the Sound of Music.


The thin pastry is really easy to make at home. The process of rolling and stretching the dough is very calming and enjoyable. Simple pleasures in our otherwise busy lives. When you plan on making this pastry block out a half hour to take your time with it and experience the joy of being able to make see-through pastry.

You will need
For the dough
125 gm flour
60 ml water
2 tsp oil
salt pinch

For the filling
600 gm apples
70 gm sugar
50 gm breadcrumbs
40 gm butter
40 gm raisins
2 tsp cinnamon

40 gm butter
powdered sugar for topping

Ideally peel the apples before slicing. I had invested in organic apples so I decided not to peel them. Next time I will. Prepare the breadcrumbs by browning them in a little butter. Soak the raisins in water so they plump up. Melt the butter.


Prepare the dough by mixing all the ingredients except water. Add water a little at a time until you have a soft non-sticky dough. Let it rest for an hour. Preheat the oven to 425 F. Flatten the dough and using a rolling pin roll it into a flat pastry. Transfer it to a tea towel. Use flour to prevent the dough from sticking to the towel.


Apply a thin layer of butter on the top and let it rest for a 10 minutes.


Now roll it as thin as you can go. Lift it up with the knuckles of your hands and roll the dough over the knuckles to spread it thin. When you are done you should be able to clearly see the towel through the pastry.


Spread the remaining butter, breadcrumbs and drained raisins.


Now add the apples slices.


Turn in the long sides of the dough. Start rolling from one of the shorter sides to make a thick tight roll. Take care to not stretch the dough too thin so it does not tear.


Seal the edge with a little butter.


Transfer the roll to a baking sheet covered with parchment paper. Brush on some butter.


Bake for 40 minutes until the strudel is brown and crisp. Sprinkle some powdered sugar over the top. You can eat it either hot or cold.

Sunday, August 31, 2014

Eis und Heiss (Ice cream With Strawberry And Raspberry Sauce)

Eis und Heiss literally translates to 'cold and hot'. This hot and cold dessert is super simple to make and very delicious. When I found the recipe here I simply had to make it. It was perfect for a hot summer day. Ice cream with fresh berry sauce poured over the top - hot and cold


I found some really fresh raspberries and strawberries in Whole Foods. There is no real recipe here. Heat the fruit in a pan until the juices begin to flow.

Let the fruit cook in their own juice on low heat for about 5-10 minutes. If the fruit is very juicy and the sauce looks runny add a little cornflour to the juice to thicken it. Turn off heat. Let it cool a little. While it is warm pour over ice cream and enjoy!

This is my entry for week 36 of the 2014 52 week challenge for the theme hot and cold.

Thursday, August 28, 2014

Kale Paratha

Kale is one of the most abundantly available green in the US. It is nutritious, a great source of protein. These parathas are a great way to include kale in your diet.


I am not at all fond of greens that are cooked with spices in water giving you a sodden mess. There is no way I am making that ever in my kitchen. You know what I am talking about. The one that kids have the most problem with during dinner time. I would never torture my kid with that. Instead these parathas are eaten happily.


Kale can be bitter and needs to be boiled to remove the bitterness.

You will need for 5 parathas
10 leaves kale
1 1/2 cups whole wheat flour
1 tsp. paprika
1 tsp. cumin powder
1 tsp. carom seeds (ajwain or ova)
salt to taste
1 tsp. olive oil

oil to cook the parathas

Wash the leaves and cut off the stem. I even take off the center vein on the leaves. Boil in water or steam for about 4-5 minutes. Drain and wash in cold water. Puree in a blender to a fine paste using little or no water. Transfer to a bowl and add all the ingredients except the oil.


Form a dough with the water in the kale paste. If needed add additional water as needed. Using the teaspoon of oil knead the dough until soft. Keep aside for 10-15 minutes and then divide into 5 portions.


Heat a griddle pan and keep oil handy. Roll out a portion of the dough using flour as needed to prevent it from sticking to the rolling surface.


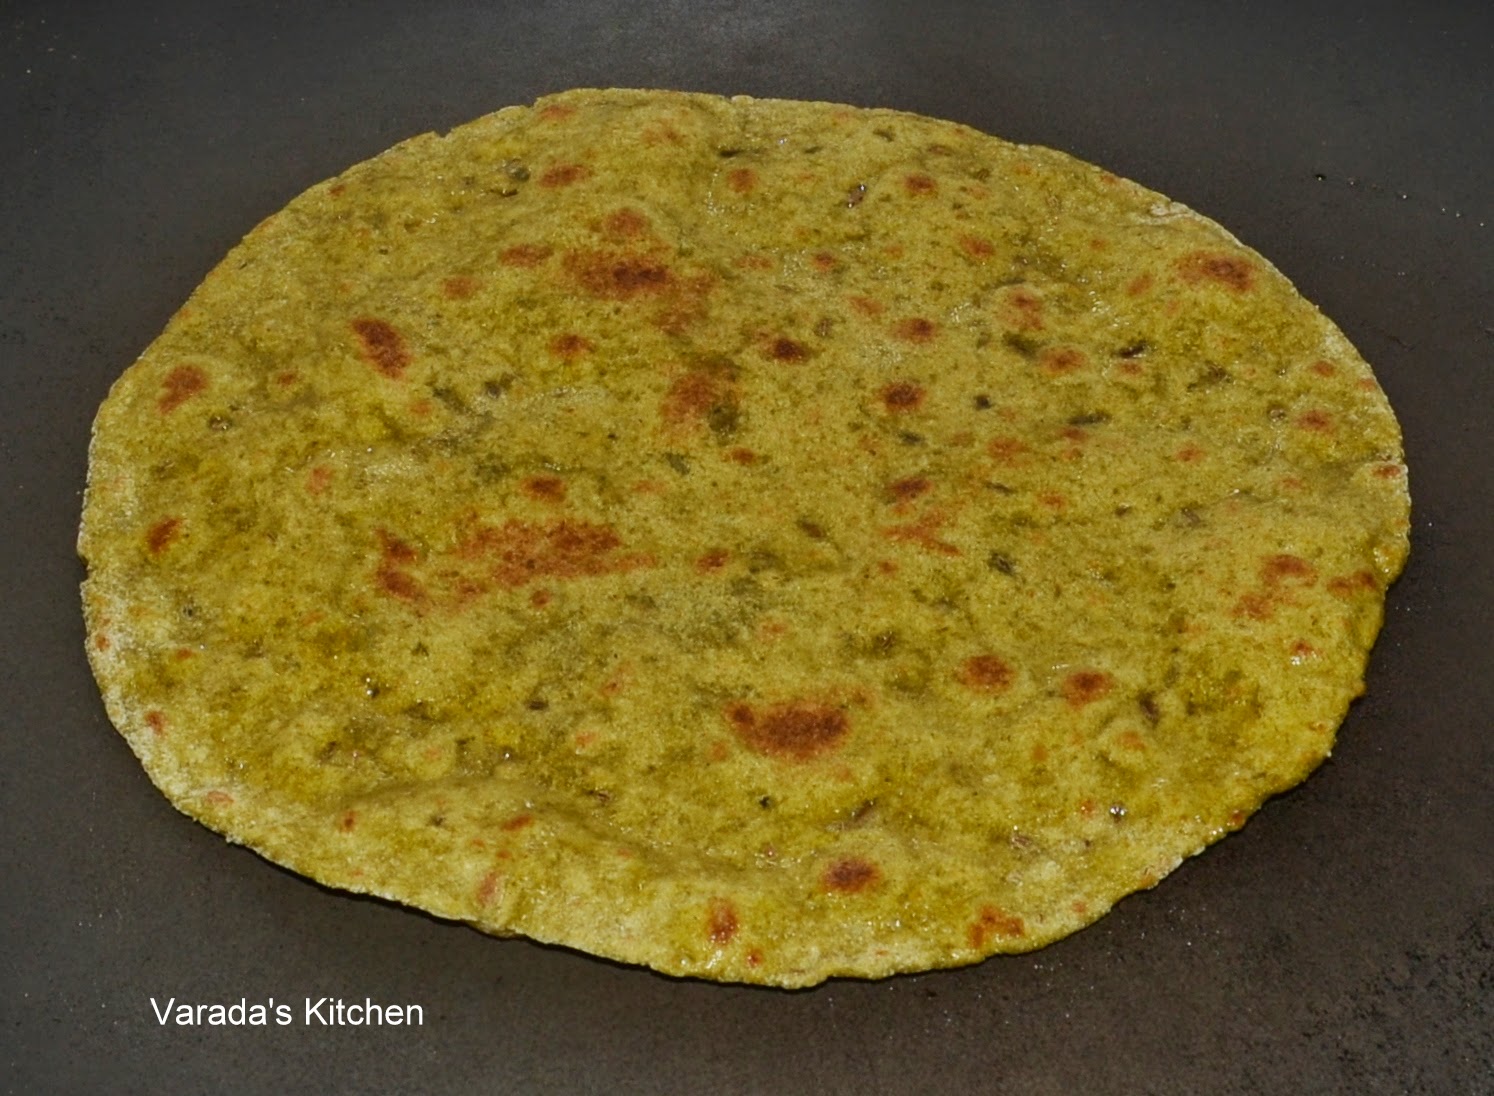
Place the rolled out paratha on the hot griddle. Let it cook for a couple minutes. Flip it over. As the paratha is green in color the brown spots may not be as visible. Do not overcook. Drizzle a few drops of oil on the top.


When the underside is cooked flip the paratha over again so that the oiled side touches the pan. Roast until done. Flip once more to roast the second side. Take the paratha off the heat.


Repeat for all the portions.


Enjoy with a vegetable side or pickle.


Wednesday, August 27, 2014

Churmure Chivda

I few days ago my sister was visiting and I decided to make bhel. For some reason I believed the small bag of churmure would not suffice so decided to get the big one. The big one was really big but I went ahead and got it. Well, needless to say it was too big and I had a lot of churmure left over. When my sister was ready to leave I put half of what was left into a large ziploc bag for her. Even with that gone there was so much left. I have started making every snack I know using churmure.


This chiva is one of the simplest you will ever make. It takes no more than 15 minutes but is so tasty it will gone before you know it. My father was staying with us for a few days and he loves chivda. That was reason enough to make a big batch.


Unfortunately, I have enough churmure to make another 5 such batches of chivda. You will see a lot more posts from me with churmure in the near future. This recipe is very similar to what my mother made. I got it from a Marathi cookbook my father bought for me.

You will need
2 tbsp olive oil
1/2 cup peanuts (I used Planters roasted unsalted peanuts)
a handful cashews
5-6 curry leaves
a handful raisins
1 tsp. paprika
1 tsp. turmeric powder
3 cups churmure
salt to taste

It is best to collect all the ingredients before you start as this recipe moves very quickly.

Heat oil in a pan and add the peanuts. Roast them on low to medium heat until they are beginning to change color.


Add the curry leaves and cashews. Careful, fresh the curry leaves tend to splatter oil. When cashews look done add the raisins, paprika and turmeric powder. Add salt to taste talking into account the churmure you are going to add. Combine everything that is in the pan.


Add the churmure and mix well.


Turn off heat. The chivda is ready!


The chivda makes a great afternoon snack.


To store, let the chivda cool completely then store in an airtight container. Should last a couple of weeks.

Tuesday, August 26, 2014

Dahi Vada in Appe Pan (Not deep Fried)

We love dahi vada but not the oil absorbed during deep frying. So what is the solution? Do not deep fry the vadas, use you aebleskiver or appe pan instead. With a few drops of oil you get the same deep fried taste and flavor.


Instead of using urad dal for this recipe I used moong dal. I was in a hurry. I decided to make dahi vada at 2 in the afternoon. There was no time to soak the dal so I switched dals and used moong dal instead. Worked out well.


After I had run the soaked dal through the food processor I ran a hand blender through the dal to make it light and fluffy. That and the use of some baking soda helped make the dahi vada soft and light.


I recently invested in an appe or aebleskiver pan. Since then I have tried a few deep fried treats using the pan. So far I have been very happy with the results. You will see many more recipes from me using this pan.

You will need
1 cup moong dal
1 Serrano pepper
1 tsp. baking soda or 1/4 tsp. Eno Fruit salt
1 tsp. paprika
salt to taste

For the dahi
2 cups yogurt
1 tbsp. sugar
1 tsp. paprika
1 tsp. cumin powder

For the garnish
Tamarind dates sweet chutney
cumin powder
paprika

Prepare the dahi and refrigerate. Prepare the sweet tamarind date chutney following the recipe here. If you do not have cumin powder roast cumin seeds until fragrant and grind to a powder.

Soak the dal for at least two hours in warm water. Drain the water and discard. Using as little water as possible grind to a coarse paste in the food processor. Add the other ingredients for the batter and keep it ready. If you are using Eno add it after the pan is heated.


Heat your aebleskiver or appe pan and add a few drops of oil in each of the wells.


Add a tablespoon of the batter in each well of the hot pan.


Let it cook until just browning before flipping it over. Cook the other side.


Remove from heat and soak in cold water for a minute. Pull the vada out of the water and give it a little squeeze to get all the water out.


Add the vada to the prepared dahi. Repeat for all the vadas. To plate this dish put 2-3 vadas with dahi on the plate. Sprinkle paprika and cumin powder over the top. Drizzle the sweet tamarind date chutney. Adjust the flavoring to taste.


Enjoy!

Monday, August 25, 2014

Sweet Tamarind Date Chutney

This chutney is used as a garnish for a lot of snacks and chaat. It is a simple basic recipe that is good to know. You have to remember to soak the tamarind but the recipe itself is very simple.

1 orange size ball tamarind
12 dates
1 tsp. paprika
1 tsp. cumin powder
1/2 tsp. rock salt (kala namak)
salt to taste

In a microwavable mixing bowl bring 2 cups of water to a boil. Break up and add the tamarind to the water. Keep aside for 30 minutes. In another microwavable bowl bring a cup of water to a boil. Add the dates and let them soak for 5-10 minutes. Blend the dates to a puree in a blender. Keep aside.

After 30 minutes rub the tamarind in the water to squeeze out all the pulp. Pour the liquid through a strainer and discard the pulp. In a pan bring the tamarind juice to a boil. Add the date puree, paprika, cumin powder, rock salt and salt. Add half a cup of water. Let the chutney cook until it thickens and the flavors blend together. Adjust seasoning. If the chutney is too tart you may add a little sugar. Turn off heat and cool completely.

Sunday, August 24, 2014

Vegetarian Paneer Tomato Stromboli

Stromboli is a stuffed turnover. I had bookmarked this recipe a long time back but never got a chance to make it. My daughter loves stuffed bread a lot. I had made stuffed buns before and decided to use the same paneer and tomato filling for the stromboli.

My daughter helped me fold it and really did justice to the end result as well. The dough was crispy but not chewy and the filling was delicious. It was gone very quickly. Next time you are looking for a quick crowd pleaser try this recipe.


I made the dough as given in this link. It is the same as the recipe for Italian bread.

You will need
For the dough
3 cups flour (I used 50% whole white wheat and 50% all purpose flour)
1/4 oz. instant yeast
1 1/2 tsp. salt
1 pinch of sugar
1 cup warm water

1 tbsp. olive oil
1 tsp. dried oregano

For the filling
14 oz. paneer (directions for homemade paneer here)
2 medium tomatoes
1 tbsp. olive oil
1 tbsp. cumin seeds
1 tsp. turmeric powder
1 tbsp. dried basil
1 tsp. paprika (adjust quantity to taste)
salt


In a mixing bowl sift in the flour. Add all the dry ingredients. Pour in the water. Using hands moistened with water combine all the ingredients to form a soft dough. Using a half tablespoon oil on your hand knead the dough for 5 minutes until it is smooth and elastic. Cover and keep aside until it doubles in volume. 

In the meantime prepare the paneer tomato filling. Follow the instructions here. The filling should be dry and cooled completely before use.

Flour a board and transfer the risen dough on to it. Using a rolling pin roll out a large rectangle. Transfer the prepared rectangle to a baking sheet covered with parchment paper.


Preheat oven to 400 F. Arrange the paneer filling along the center of the rectangle lengthwise as shown. Using a sharp knife or pizza cutter cut the dough around the filling as in the picture below.


Fold in the top end. Now starting on one side fold the alternating sides over to the middle at an angle.


Continue to the end. Before folding the last few pieces fold in the end to give it a neat finish. Continue folding in the sides over the end piece. 


Drizzle a half tablespoon of oil over the top. Sprinkle dried oregano. Bake in the preheated oven for 18-20 minutes. You may use an egg wash if you want to get the golden brown color. I skipped that.


Cool on a rack for a few minutes. Slice and serve. 


Enjoy!

Tuesday, August 19, 2014

Shira / Sheera / Suji Halwa

The other day after a heavy lunch nobody was in the mood for a full meal for dinner. I offered to make upama when my daughter asked if I could make sheera instead. That was when I realized that I did not have the simple sheera recipe on this space. I have banana sheera and mango sheera but not the plain version. So I decided to set that straight and post this recipe right away.


If you choose to heat the milk and water in a microwavable cup use a mitten when pouring it over the rava. I learnt this the hard way when the steam burnt the fingers of my hand.

You will need
2 tbsp. ghee
1 cup semolina or rava
1 cup water
1 cup milk
1/2 cup + 2 tbsp. sugar

To garnish
Cashews
Raisins
1 pod cardamom
1 tsp. ghee

Heat the ghee in a pan and add the rava. Roast the rava stirring occasionally on low to medium heat taking care it does not burn. Do not let it turn brown.

Combine the water and milk in a microwavable cup and bring to a boil, anywhere from 1 and half to 3 minutes depending upon your microwave. Alternately heat the milk and water in a separate pan on the stove top.

Pour the hot liquid over the roasted rava. Stir to combine and cover. After a minute remove the lid and mix the rava with the now absorbed liquid. Cover and repeat another two times.

In a separate small pan heat the ghee for garnishing and add the cashews. When browned slightly add the raisins. When they puff up turn off heat. Add the cashews and raisins to the sheera. Shell the cardamom and pound the seeds. Add the powder to the sheera. Mix one last time and turn off heat.


Sheera taste great when it is warm.


This is my entry for week three, day three of BM #43 for the theme Healthy Desserts. Check out the Blogging Marathon page for the other Blogging Marathoners doing BM#43.

This is also my entry for week 33 for the 2014 52 week challenge for the them Opposite side of the world.