Saturday, September 13, 2014

Lebanese Paneer Potato Stew

"This is the best stew you have ever made" was the comment I got from my daughter when I made this dish. Lebanese stews are not vegetarian but as with a lot of non-vegetarian dishes with gravies it is fairly easy to replace the non-vegetarian ingredients with vegetarian ones and get a flavorful dish. I did just that with this stew. I used paneer and made it vegetarian. I also adjusted the cooking times for the paneer that cooks a lot faster than any non-vegetarian ingredient.


The spice blend makes this dish. I made a scant tablespoon of the spice mixture called Lebanese 7-spice. A little goes a long way. I had some of the spices in powder form and the other whole. I put them all together and pounded them to a powder with my mortal/pestle. I got the ingredients for this spice blend here. The aroma of these spices together was amazing. I used equal quantities of black pepper, coriander seeds, allspice, dried ginger, nutmeg and cinnamon. Try it, you will have your family gliding into the kitchen following the aroma. 

You will need
1 tbsp. oil
7 oz. paneer, cut into cubes
1/4 cup onion, diced
1 clove garlic, minced
a handful cilantro, diced
1 1/2 tsp. Lebanese 7-spice (recipe in text above)
1 tsp. paprika or cayenne powder (optional)
1 large potato, boiled and cubed
1/2 to 1 cup warm water
2 tsp. tomato paste
salt to taste

Heat oil in a pan and brown paneer cubes in it. Flip the cubes over when brown until well done. The oil will get sticky with residue that will be collected later. Add the onion and the cilantro.


Saute until the onion is translucent. Add the spice and paprika if you are using it. Mix well until the aroma of the spices fills the kitchen, about a minute.


Add the potatoes and the warm water. Bring it to a boil and then lower the heat and allow it to simmer and thicken.


Add the tomato paste and salt to taste. Let it cook until you are happy with the gravy consistency.


Turn off the heat.


Enjoy!

This is my entry for week 39 of the 2014 52 week challenge for the theme stew.

Lebanese Potato Salad

This Lebanese potato salad was the mildest of the potato salads I have tried so far. It works well when you have it with a very strong flavored stew. As with most potato salads it is simple and easy to put together.


Recipe adapted from here

You will need
1 large russet potato
1/2 lime, juice
1 tbsp. olive oil
salt to taste
1 sprig scallion
5-10 leave mint leaves

Boil the potato with a little salt. Ensure the water in the pan covers the potato completely. Test with the tines of a fork to check if done. If the fork cut the potato easily it is done. Drain and let it cool enough to handle. Peel the potato and cut into bite size cubes. Add the lime juice, olive oil and salt. Cover and keep aside until completely cooled. Meanwhile place the mint leaves one over another and roll them up. Cut as fine as you can to create ribbons. Dice the scallion both green and white. Add the mint leaves and scallion to the cooled potato salad.

Khobz Marquq

I love to try out bread recipes from different parts of the world whether the bread is leavened or unleavened. Khobz is bread in Arabic and there are a lot of varieties of bread in the Middle East. This Lebanese bread is called the khobz marquq and it is roasted on a convex pan. The texture I got is similar to what I have seen in pictures but I got a darker colored khobz due tot he darker whole wheat flour that I used. This is a leavened bread and we were happy for the change from our regular poli.


I did not have a convex pan so I inverted my old, now unused, chapati tawa. It is a half inch thick aluminium pan that I brought with me when I got married. My mother had bought me a cast iron pan but it was too heavy to carry. The tawa is concave when set upright. Inverted it made the perfect convex pan.


The bread is placed on the pan using a cushion but I used my hands. The khubz is patted flat with the hands and then thrown from palm to palm to thin it out. I used a rolling pin.

Recipe adapted from here

You will need for 6 khobz
180 g whole wheat flour.
75 g bread flour
1/2 tsp of salt
1/2 tsp. yeast
125 ml lukewarm water
a few drops orange blossom water

Mix all the dry ingredients and the extract together. Add the water. Depending upon your flour you may need additional water. Form a soft dough and knead it well. Place it in a covered bowl and let it rise for an hour or two.

Transfer the dough to a work surface and divide it into 6 portions. Let the portions rest for 20 minutes.

Heat a khobz convex pan or inverted tawa. Take one portion of dough and flatten it with your knuckles. Pick it up and throw it from palm to palm to make it bigger. When it reaches the desired size place it on the heated pan. Turn it over once when the first side browns a little, When cooked through take it off the heat. Repeat for the other portions.


Enjoy!

Mouwarka

Mouwarka is a yeast leavened sweet bread stuffed with almonds and walnuts. It is the shaping of this bread that caught my attention. The dough is rolled out really thin and the filling spread over it. Next a hole is made in the center and the dough rolled outward from the center to the edges. The result is a beautiful ring which is folded almost like a serpent and baked in a cast iron pan.


I accidentally bought red berry whole wheat flour instead of the white whole wheat flour so used that in this recipe. It added a brownish tinge to the dough.

Recipe adapted from here
You will need
40 gm strong flour (I used whole wheat)
1 gm instant yeast
1 gm salt
6 tbsp. water

For the filling
20 gm almonds
20 gm walnuts
20 gm sugar
1 tsp. cinnamon
1 tsp. orange blossom water or rose water (I used mint extract)

1 tbsp oil, divided

Mix all the dry ingredients in a mixing bowl. Add the wet ingredients and form dough. Knead well and keep aside covered for a couple of hours. Meanwhile prepare the filling. Grind the walnuts and almonds to a coarse powder and mix in the powdered sugar. Keep aside until needed.

Preheat oven to 375 F. Take the risen dough on a work surface and with the help of some flour roll it out into a large disc.


Transfer to a tea towel and continue to thin it out. Spread half the oil over the top.


Now place the filling in the center of the rolled dough.


Spread the filling out evenly leaving 3/4 of an inch all around.


Make a hole in the center and pull the dough up over the filling.


Continue rolling the dough outwards on all sides making the center wider as you go.


Continue until you reach the end and form a ring.


Seal the edges by pinching them in. Then shape the rings as shown below and place it in a cast iron pan. Apply the remaining oil over the top.


Bake for 10 minutes until the top is brown and mouwarka is crispy.


Transfer to a cooling rack until cool.


The crispy and not overtly sweet dessert is ready.

Friday, September 12, 2014

Kenyan Meal

Kenyan food is influenced by immigrants who brought their native cuisine with them. It is also influenced by the cuisine brought by the invaders from the north. This Kenyan meal has dishes influenced by cuisine from India, Persia and the Ottoman Empire.


Githeri is a stew prepared with mixed vegetables. Fresh corn was flooding the grocery stores when I made this dish. Fresh corn with bean, carrots and tomatoes made for a very colorful dish that was really tasty. It took a while to cook but the it was worth the wait.


It made an excellent base around which I planned the rest of the meal. The preparation of the Kenyan chapati is very similar to the Indian kulcha. The difference being the chapati is unleavened whereas the kulcha is leavened with baking soda. The pulao is a simple rice dish made with basmati rice roasted in whole spices. It goes well with Tzatziki which is a cucumber salad popular in every country that the Ottoman Empire had an influence on. Kachumbari is a simple tomato onion salad flavored with a touch of lime juice and olive oil. For dessert I made Kashata Za Nazi, a delicious coconut barfi (cake).


I did not use any new ingredients in this meal. In fact, it was the familiarity of the dishes that was surprising to me.

As they say in Kenya in Swahili, Ufurahie chakula chako!

Here are the recipes for the dishes on the menu
And for dessert


Githeri (Corn and Bean Stew)

A Kenyan style side dish made with corn and beans perfect for when fresh corn is available in the market. The contrasting colors of the dark red kidney beans, the corn and the carrots are a treat for the visual eater.


As with any stew the dish takes a while to cook but it does not need constant attention. This is perfect for a day when you have the time but do not want to spend it hovering in the kitchen.

You will need
1 cup dark red kidney beans
2 corn on the cob (or 2 cups frozen corn)
1 onion
1 large tomato
1 carrot
1 potato
1 tbsp. paprika
2 tbsp. garam masala (curry powder)
salt to taste (optional)
cilantro to garnish

Note: If you would like this soup style, increase the amount of water.

Soak the beans overnight. Take the husks off the corn and rinse. Using a sharp knife cut the corn kernels off the cob. Cook the corn and beans in a pressure cooker until just done, about 5 minutes once it is pressurized. 

Alternately, you can cook the beans and corn in boiling water on the stove top. This is the traditional way of cooking the beans and corn. If using frozen corn you can microwave the kernels for 1 minute before use.

Drain the cooking water and reserve. Keep the beans and corn aside. Dice the onion. Saute in a couple tablespoons of water until it is translucent. Add more water a tablespoon at a time if needed. 

In the meantime, dice the tomatoes. Separately peel and chop the potatoes. Peel and slice the carrots. Keep aside. When the onions are done add the tomatoes along with the reserved cooking liquid and cook until the tomatoes are mushy.


Add the potatoes, carrots, paprika and garam masala. Combine and cook on medium heat until the potatoes are cooked, about 15-20 minutes. Make sure there is enough cooking liquid, add either the reserved cooking water or plain water as needed.


Add the cooked beans and corn. Add another cup and a half of the cooking water and bring to a boil. Add salt to taste (optional).


Simmer for 15 minutes.


Enjoy!

Tzatziki (Kenyan Cucumber salad)

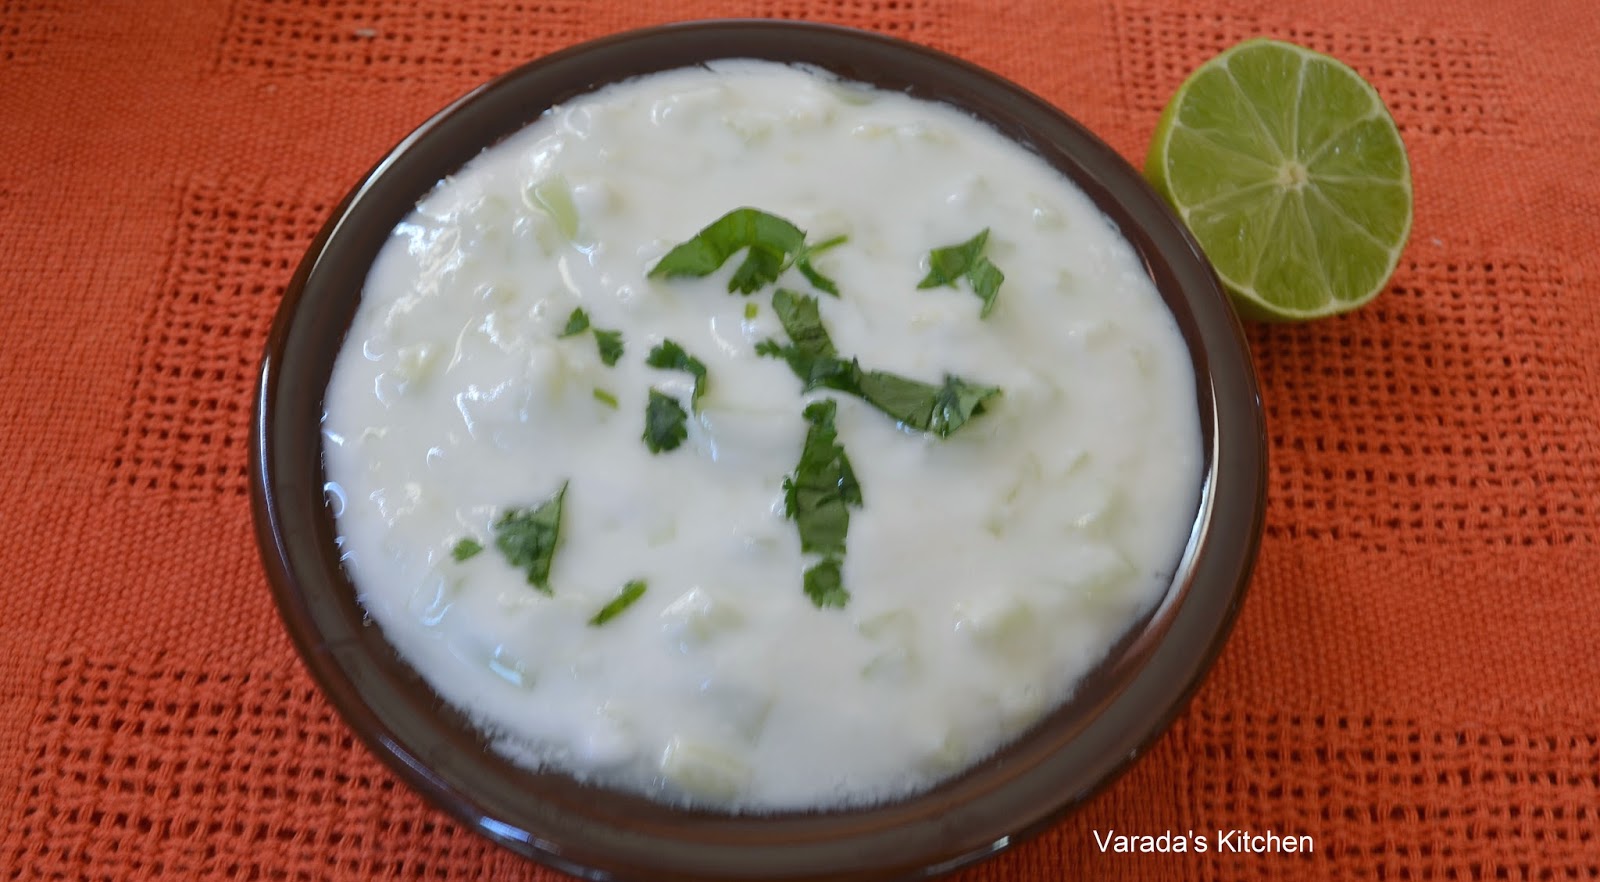
There is a version of the cucumber salad in a lot of countries and Tzatziki is the Kenyan variation of this salad. It goes well with rice.


Finely dice half a cucumber. Combine with 1/2 cup of yogurt. Season with salt and a minced garlic. I never use garlic in my everyday cooking. It is one thing to add it to dishes that are cooked, it is something else to eat it raw. I left the garlic out.

Kachumbari (Kenyan Tomato Salad)

I was not surprised to find this salad but I was surprised by the name. So I read up on it from multiple sources until I was sure I was on the right track.


A simple salad made with two thinly sliced tomatoes and half thinly sliced onion. Flavor the salad with a teaspoon of lime juice. Season with salt and black pepper. Garnish with cilantro.

Kenyan Pulao

A simple rice dish made with basmati rice. Whole spices are roasted in oil until the oil is fragrant. The rice is then cooked in this spice infused oil. The resulting rice has a lovely aroma of the spices.


As always I used brown basmati rice. We have eliminated white rice from our house years ago. My daughter the only member of the family who loves rice prefers rice to be super soft rather than fluffy. So I tend to make it the way she likes it.

Recipe adapted from here

You will need
1 cup basmati rice
1 tbsp. olive oil
4-5 cloves
1 inch cinnamon
2-3 cardamom pods
4-5 peppercorns
1/4 cup onion, diced
2 cups water (I used some of the water in which the beans and corn had been cooked for Githeri)

Rinse the rice thoroughly and soak it in water for 20-30 minutes. Drain the water and keep aside.
Heat oil in a pan and add the spices. Let them sit in the hot oil for a minute or two. Add the onion and saute until the onion is translucent. Add the drained rice and roast for a couple minutes until the rice starts changing color. Add the water and bring it to a boil.


Cover, lower heat and let the rice cook for 15-17 minutes. Turn off heat and let it rest for another 5-10 minutes. The rice is ready to eat.

Kenyan Chapati

Kenyan chapati is super soft and tasty. It is a layered chapati made entirely with all purpose flour. A lot of oil is used to make the layers flaky. I compromise. I use the all purpose flour but go easy on the oil/ghee. The layers in my chapati are clearly visible but are not as flaky as they could be.


Recipe adapted from here

You will need
4 cups all purpose flour
1 tbsp. olive oil
1 1/2 tsp. salt
1 tsp sugar
1 1/2 cups warm water
oil when roasting

Sift the flour, sugar and salt into a mixing bowl. Add oil and rub it into the flour. Use warm water to mix the dough adding a little water at a time until you have a soft ball. Knead the dough for 20-25 minutes. Take a couple drops of oil in the palm of your hand and rub it all over the dough. Wrap in plastic wrap and keep aside for half an hour.


The dough will be soft but will dry out quickly. Divide the dough into 6 equal portions. Each portion will give you a chapati that is 8-9 inch in diameter. If you prefer smaller chapatis divide the dough into 8 or 10 portions. Use one portion keeping the others wrapped in the plastic wrap. On a floured surface roll the portion of dough into a large disc of 8 inch in diameter.


Brush the surface with oil. Sprinkle with dough and spread it all over the surface. Now fold the chapati accordion style starting from the center.


Press together.


Hold on to one end and twirl the other end around until you have a disc. Tuck the loose end into the center.


Press flat and keep aside. Repeat with the other portions of dough. Let it sit for another half hour.


Heat a griddle pan on high. Roll out one of the portions of dough into a disc about 8-9 inches in diameter.


Place it on the hot griddle pan. After about 5 seconds flip  it over.


Brush oil on the surface and flip it over after another 5 seconds. Brush oil on the surface now on the top. When the underside has brown spots all over flip it over. When both sides have brown spots take it off heat and keep it covered so it remains soft.


Repeat for all the portions of dough. Serve hot.


Enjoy!

Kashata Za Nazi (Coconut Cake)

Very similar to coconut barfi that I make frequently. One big (and nice) difference is that this dessert uses water instead of whole milk called for in the coconut barfi. The end result if flakier than the recipe that uses milk. We really liked this lighter version.


In fact I think this is the way I will make coconut barfi in the future. If you like coconut barfi you should try this one.

Recipe adapted from here

You will need
2 cups desiccated sweetened coconut flakes
1 1/2 cups sugar
1 cup water
green food coloring
1 pod cardamom, shelled, and seeds crushed to a powder
ghee to grease the pan

Grease a pan with some ghee and keep aside. Soak the coconut flakes in 1/2 cup water and keep aside. Meanwhile heat sugar, water in a thick bottomed pan. Bring it to a boil and let it simmer until the syrup is thickened. Add a drop of food coloring and the powdered cardamom. Swirl the pan to combine. Add the coconut flakes along with the soaking water, almost all the water should have been absorbed.


Let the mixture cook on medium low heat until the syrup is almost gone. At this time the mixture should leave the sides of the pan easily and try to stick together to form a ball. Transfer to the greased pan and pat down to form a uniform top.


Let it cool for 5 minutes. Using a blunt knife cut into squares. Let it cool completely before storing.


Should last for a couple days outside in summer longer in winter. Should last for a couple weeks in the refrigerator.

Thursday, September 11, 2014

Japanese Meal

This meal comes from Japan. It is a simple meal that is suitable for a Bento box. The flavors in this meal are very different from what we are normally used to. I did not know much about Japanese cuisine and needed help with all the basics of this cuisine. I was happy to find Just one cook book, a blog with a lot of information about Japanese cuisine. I was fascinated with how dishes are selected for bento boxes. I found additional information at Just Bento and I decided I wanted to cook a meal fit for a bento box.


My Japanese bento box menu has a big bowl of Japanese sticky rice topped with Furrikake that is a kelp topping made with kelp leftover from preparing dashi. The rice was served with several side dishes. Negimiso yaki tofu or grilled tofu, flavored with a strong miso paste, provides intense flavor in every bite. Nori tomagoyaki or seaweed rolled into omelette rolls is a unique omelette preparation where multiple layers of thin egg crepes rolled together. Together the tofu and eggs meet the protein requirement of a bento box meal. Spinach gomaae or spinach with sesame seeds is a surprisingly crunchy dish with the roasted sesame seeds. The blanched spinach adds a mild flavor. For dessert I made Matcha white chocolate chip cookies or green tea cookies. Matcha has a strong green tea flavor and an equally strong aroma that reminded me of henna.


The new ingredients I used were kombu (kelp), nori (seaweed) and macha powder (special green tea powder). When I cooked this meal I was in a mood to experiment. All the meals I had cooked from the different countries up until this time were full of dishes known to us. So I went out on a limb and picked dishes whose flavors would be very new. I went shopping for groceries at the local Japanese store, a delightful mom and pop store with a lot more than just groceries. My husband was travelling so it was just me and my daughter. Nori or seaweed is not completely new to me. I remember my father had brought home some nori from Japan when I was about 10 years old. I had bravely attempted to eat it in a rice roll as my Dad showed me. But I had not been able to eat it. Finally I cut little pieces of the nori and placed a couple in a ball of rice and was able to eat it. Let us just say that neither my taste buds nor my enthusiasm to try new foods has changed much over the years. My daughter didn't do much better than me. We did enjoy the rest of the meal.

As they say in Japan, Itadakimasu!

Here are the recipes for the dishes on the menu
And for dessert