Friday, October 10, 2014

Baked Shankarpale

Shankarpale are the diamond shaped sweet cookies that are a part of every Marathi family's Diwali faral. They go very well with the other Diwali staples like chakli, karanji and chivda. They are also a great snack on their own. However, shankarpale along with most other faral recipes made for Diwali are deep fried! In my kitchen, I have put a moratorium on deep fried foods.


I knew I could not bring myself to deep fry the Diwali faral. I had to find an alternate solution for my dilemma. A few months ago I had made baked matar karanji, another Maharastrian deep fried favorite. We liked it a lot. So it was natural I try a baked version of the shankarpale.


I had to experiment to fine tune this recipe and run a few tests before I was able to find the right baking temperature. I first tried 350 F for 9-12 minutes on each side. But the shankarpale had an aftertaste of flour. The color was fine but they were not cooked through. Next I reduced the temperature to 300 F and increased the time to 12-15 minutes on the first side and 9 minutes on the second side. These were better but not the best. The last test was to keep the temperature at 300 F and bake on the first side for 22-28 minutes. The second side was baked for 9 minutes. Perfection!

The ingredients and process of shaping are identical to the traditional recipe. The difference is in how they are cooked.

You will need (for 5 cups of shankarpale)
1/2 cup water
1/2 cup oil (or melted ghee / clarified butter)
1/2 cup + 2 tbsp. sugar
2.5 cups + 2 tbsp. all purpose flour
a pinch salt

pastry cutter or sharp serrated knife

In a pan combine the water, oil and sugar. Put it on medium heat.


The sugar will dissolve and you will begin to see tiny bubbles on the bottom. Just before the mixture comes to a boil turn of the heat. DO NOT LET IT BOIL.


Pour the mixture in a wide bowl. You want to let it cool to a temperature that comfortable to touch but is still warm. Sift and mix the flour into the mixture a little at a time. When all the flour has been incorporated knead the dough well. I put it in my food processor and pulse, you could use an electric mixture with a dough hook. Transfer the soft dough to the bowl and cover with a wet tea cloth.

Preheat the oven to 300 F. Divide the dough into tangerine sized portions. I got five. Work with one portion at a time keeping the rest covered with the towel.
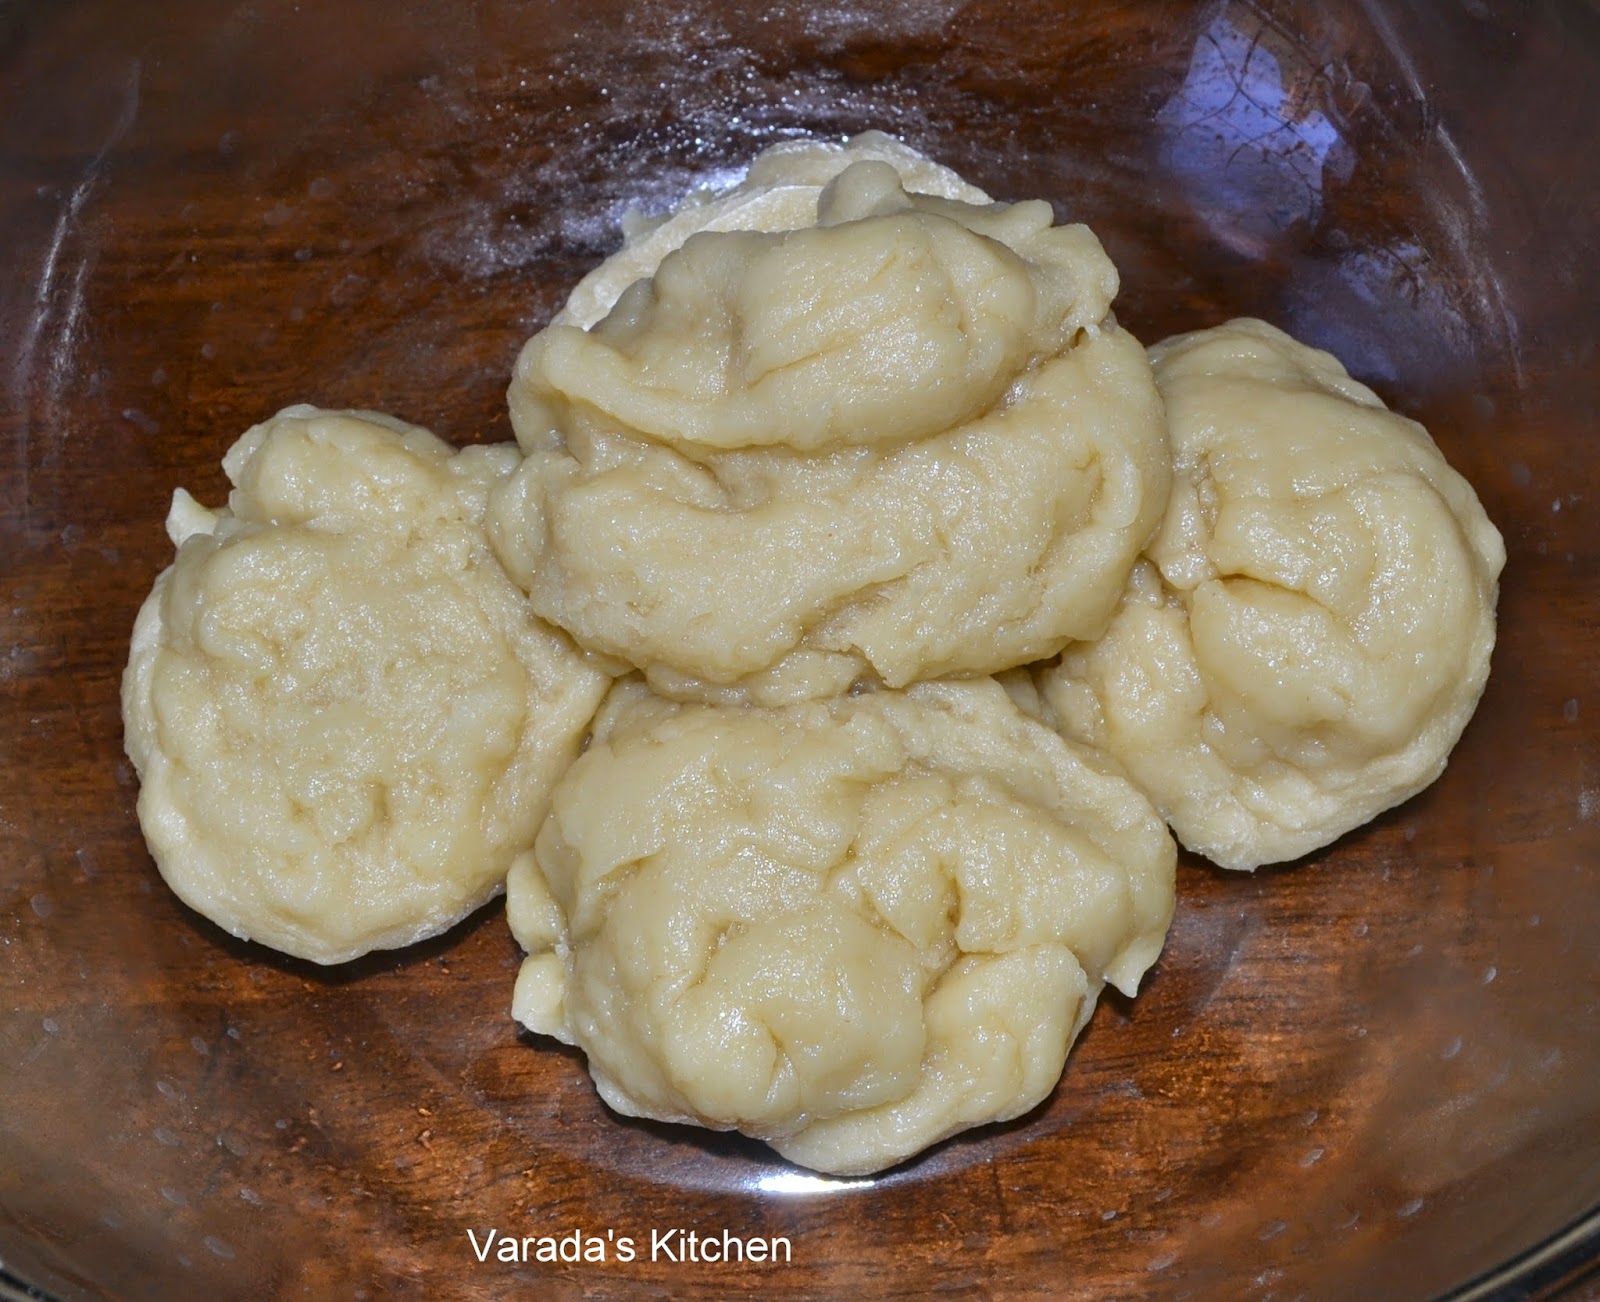
Roll out the dough into a 1/4 inch thick disc. If sticky use a drop of oil. Do not use flour.

Using the pastry cutter cut the disc in a criss cross pattern to form diamonds. Collect the pieces and place them under the tea towel. Repeat with the remaining discs.


Place a parchment paper on a cookie sheet. Place the shaped shankaerpale in a single layer on the sheet. Bake for 22-28 minutes until the bottom is browned evenly. Quickly flip the shankarpale over and put them back in the oven for another 6-9 minutes or until the underside is browned.

Take the shankarpale out of the oven and leave them on the sheet for a minute or two. Transfer to a paper towel lined bowl and allow them to cool. Store them in an airtight container once they are completely cooled. They should last 2-3 weeks.


Enjoy!

This is my entry for week two, day one of BM #45 for the theme Festival Special. Check out the Blogging Marathon page for the other Blogging Marathoners doing BM#45.

Saturday, October 4, 2014

Beetroot cake

In my attempt to bake more cakes I baked this moist beetroot cake. When my daughter saw the batter she was sure she was not going to like it. She likes beetroot but had reservations about this cake. But when it came out of the oven she was all for having a slice.


If you have cake flour this would be the cake to use it in.

You will need
150 ml oil
2 eggs
250 gm soft flour
2 tsp. baking powder
150 gm brown sugar
200 gm beetroot
100 gm raisins

Preheat oven to 325 F. Grease a cake pan and keep aside. I used a small 7" springform pan.

Peel, wash and shred the beetroot. Keep aside. In a bowl beat the oil and eggs. Sift in the flour. Add the baking powder and brown sugar. Now add the shredded beetroot and mix using an electric mixture or a wooden spoon. Mix in the raisins and transfer the batter to the prepared pan.


Bake for an hour and a half or until a tester inserted in the center comes out clean. Let the cake cool in the pan for 5 minutes before transferring it to a cooling rack. Cool completely before storing.


The cake should be soft and moist inside. Enjoy!

Friday, October 3, 2014

Applesauce Cake

We all have a sweet tooth in my family and enjoy a bite of something sweet after lunch and dinner. I have made a lot of different desserts but I recently realized I do not make cake as often. I am determined to correct that so today I have an applesauce cake.


Unlike typical fruit cakes where diced fruit is added to the cake or upside down cakes where slices are placed under the cake, this cake has applesauce. You can make applesauce at home. Peel, core and dice the apples. Place them in a pan with a little sugar allow them to cook on low heat until mushy. Mash down the cooked apples and your applesauce is ready. You could use store bought applesauce if you wish.

You will need
55 gm butter
100 gm sugar
125 gm applesauce
125 gm flour
1/2 tsp. baking powder
1/2 tsp. cinnamon powder
2 cloves, ground to powder
handful of raisins

Before you begin ensure the butter is at room temperature and the applesauce is chilled. Prepare a loaf pan by running a little oil to the bottom and sides. Keep aside. Preheat the oven to 400 F. Cream together the sugar and butter. Mix in the applesauce and beat well. Sift the flour and add it to the applesauce mixture along with the baking powder and powdered cinnamon and cloves. Add the raisins and mix well. Pour it into the prepared pan.


Bake for 20 minutes. Lower heat to 375 F and bake for another 20 minutes. If the top gets brown too quickly tent it with foil. When done take the cake out of the oven and let it sit in the pan for about 5 minutes. Then transfer to a cooling rack and allow it to cool completely.


Enjoy a slice as dessert or at tea time!

Wednesday, October 1, 2014

Meals Around the World

26 meals from around the world! That is the goal I set myself this summer. Today I present all the meals in one post. My country of origin is India so I could not help but include a 27th meal from the state of Maharashtra in India.


Growing up food at home was typically Maharastrian in origin. It always showcased the flavors of the ingredients with marginal use of spices. However, my parents ensured we learnt to appreciate foods from different parts of the world. As an adult I try to find the freshest produce and use spices sparingly. I also routinely cook food from different parts of the world. This is a formal effort to blog those meals.

During this journey I found that our need for comfort through food has always been strong. Migrant populations over the centuries have taken with them recipes from their place of origin. They then modified these recipes using the new local ingredients, when necessary, but always tried to retain the flavors of the old. Rulers have done the same to enforce new regimes and wipe out traces of the old. Today we see the amazing similarities in food between nations separated by vast oceans. Our ability to make our food as flavorful as possible given the natural resources available is indeed a testament to human ingenuity.


During this entire journey I had the support of my family who willingly ate all my experiments. Experiments that were mostly good, sometimes not so good and on rare occasions just plain bad. Then there was a hardest part of all - waiting patiently while the pictures were clicked. But I would have to say a big chunk of the support was from a wonderful group of bloggers who blog under the umbrella, blogging marathon. The motivation to cook and blog meals from different countries while working through the letters of the alphabet came from this group. The event was aptly named 'Around the world in 30 days' and there were 20 participants, including me. On each of the posts above you will find a link to the posts by the other members of this group. To each of them I say 'thank you'.


Tuesday, September 30, 2014

Zambian Meal

What I really liked about Zambian cuisine is the use of corn, the staple, to create a very unique bread n'shima. It is neither rolled nor baked but cooked as a thick porridge in water. It is used as the spoon to scoop up the sides that flavor it.


The beans are the most popular side to the n'shima. They are not made with an elaborate gravy loaded with spices but cooked along with tomatoes and onions with sparingly used spices. I made tomato gravy in case we felt the need for something with liquid in it. Golabjamoun for dessert was my biggest surprise. Though it looks like the Indian gulab jamoon it is nothing like it. This golabjamoun is made with sweet potato. It is normally deep fried but I cooked it in my aebleskiver pan to avoid the fat and keep the flavor.


I did not use any new ingredients for this meal. I used known ingredients in a different way. The corn meal used in Zambia is not available locally so I used Mexican masa, it is coarse but it gives the n'shima a yellowish hue which you would not see if you were eating n'shima in Zambia.


Here are the recipes for the dishes on the menu
And for dessert

Golabjamoun (Zambian Sweet Potato Dessert)

Golabjamoun is known to me as a delicious dessert made with milk, flour and sugar. I was very surprised to find a very different recipe called by the same name. These golabjamoun are similar in appearance to the ones I know in that they are round, sweet and deep fried. The similarity ends there.


I found these when I made a Zambian meal. They are made with sweet potato boiled in milk with sugar, formed into a dough and then deep fried. If you have read my blog then you probably know I don't deep fry anything. Instead I used my trusty aebleskiver or appe pan to cook them. They were crispy on the outside and soft on the side.


If you are fond of dessert that is not too sweet then you will like this recipe.

You will need
2 sweet potatoes
1 cup milk
2 tbsp. sugar (adjust according to the sweetness of the sweet potato)
1/4 cup flour
1/2 tsp. cinnamon
oil for the pan

Wash and peel the sweet potato. Cut it into 1 inch cubes. Put it in a pan with the milk and sugar and bring it to a boil.


Lower the heat and simmer until the sweet potatoes are cooked and the milk is incorporated. Mash the sweet potato as it cooks. You will have a thick paste.


Mix the flour in the paste to form dough. Heat the aebleskiver or appe pan and add a couple drops of oil into each of the holes. Turn down heat to medium and drop a spoonful of batter in each of the holes.


Give it a few minutes to cook then turn it over. Once it is brown on all sides it is done.


Golabjamoun is ready.


They taste best when hot but can be reheated.

Zambian Tomato Gravy

Tomato gravy works great to add a little liquid to the n'shima or corn porridge. I made this dish as part of a Zambian meal.


The most interesting part of the recipe was grating a tomato instead of chopping or running it through the blender. The gravy is thick and adds flavor to the dishes it is paired with.

You will need
2 large tomato
1 tbsp. onion, diced
1 clove garlic, minced
1 tsp. paprika
1 tsp. cumin powder
1 tsp. flour
1/2 cup water

Grate one tomato into a pan and set the pan on medium heat along with a little water. When it starts to boil add the onion, garlic, paprika and cumin powder.


Allow it to thicken. Dice the second tomato and add it to the pan. Let the mixture cook until the diced tomato is mushy. Dissolve the flour in the water and add it to the pan. Mix well and allow the gravy to thicken. Turn off heat.


The tomato gravy is ready.


Zambian Beans

Unlike their spicy Asian cousins beans in Zambia are not cooked in spices. They are very mildly spiced and the onions, tomatoes and bean cooked together in a pot. I made these beans as part of a Zambian meal. We ate them with n'shima or corn porridge. It was a very different mild flavored meal.


If you are fond of spicy food then this version of beans is not for you.

Recipe adapted from here
You will need
1 cup beans (I used red kidney beans)
1 onion, diced
1 large tomato, diced
1 tbsp. green pepper, minced
salt to taste
1 tbsp. oil

Soak the beans overnight. Next day discard the water. Add 1 cup of fresh water and pressure cook the beans until tender. In my pressure cooker that is 10 minutes with the pressure on or 3 whistles in pressure cookers that whistle.

Place the beans in a pan and heat through. Add the onion, tomato and salt. Let it cook for about 5-10 minutes. Add a tablespoon of vegetable oil. Cook another few minutes. Turn off heat.


N'shima (Zambian Corn Porridge)

N'shima is a thick corn porridge that can be used as a scoop to eat the other dishes on the plate. N'shima does not have much taste to it. It is the base on which the flavors from the side dishes are built up. I found a very well written write up on n'shima and food culture here. It has a lot of additional information that makes it a very interesting read.


N'shima is made with Zambian corn meal called mealy meal. This finely ground corn is made from a variety of maiza that is different from that used in the US. I used masa, corn meal from the Mexican cuisine, to make n'shima. That gave the n'shima is yellowish hue.

You will need
1 cup mealy meal (I used masa)
2 cups water

Heat the water in a pan but do not let it boil. Add the cornmeal a little at a time stirring vigorously with each addition to prevent lumps. When all the cornmeal has been added continue to cook it, stirring with a wooden spoon.


As it cooks the mixture will thicken and the smell of raw cornmeal will go away. When it is lumpy, almost dry and well cooked n'shima is ready.


N'shima is eaten with sides like Zambian beans or tomato gravy.

Monday, September 29, 2014

Yemeni Meal

Yemeni meals are not really vegetarian but like other recipes from the Middle East, Yemeni recipes can be converted fairly easily given the large number of ingredients. I made a one dish meal with dessert. The two dishes made a scrumptious meal. I usually make 4-6 dishes when planning a full meal but my husband was travelling when I cooked this meal so I had to keep the quantity down. :)


Boreck is a one dish meal. It is very filling with 10 layers of thinly rolled dough placed one on top of the other with the stuffing in between. When in a hurry it may seem like a lot of work. You should plan this dish when you have time. Then the rolling out of the dough to a paper thin disc will seem calming. For dessert I made halawat gajur. It is a delicious baked version of the gajar halwa as we know it.


I started cooking this meal right after lunch. I made the dessert and planned on starting the Boreck at 3 pm. Then I got carried away chatting with my father and before I knew it it was 5 pm. I debated over whether I would be able to finish but not having planned any back up I had to keep going. I finished well after 7 pm. Luckily it was a very sunny and clear day so the light did not fade allowing me to get good pictures.


Here are the recipes for the dishes on the menu
And for dessert

Yemeni Boreck or Borek

Boreck or Borek literally means layers and is a recipe of Turkish origins that spread to other regions during the reign of the Ottoman Empire. This version is from Yemen and I found it here in my attempt to find a one dish meal. I used paneer to make this dish vegetarian.


I made 10 layers of dough rolled thin enough to read through. Five layers are above the filling and five are below it. The surprise ingredient is cinnamon powder. I added it with a huge dose of skepticism but I was pleasantly surprised. The pastry was flaky and crispy. The filling was delicious. Everyone loved it and we all agreed this was a keeper, something I would make again.


I used a spring-foam pan to bake the borek to make it easy on myself to take the pie out. My spring-foam pans are over 15 years old of a quality you don't see anywhere anymore. The pie was perfectly baked.

You will need
For the filling
7 oz. paneer
1 small onion, minced
1 tsp. coriander cumin powder
1 tsp. paprika
salt to taste
1 tbsp. olive oil

Other filling ingredients
1 tsp. cinnamon powder
4-5 springs cilantro, minced
1/4 cup feta cheese, crumbled
1 tsp. nigella seeds
oil or butter as needed between layers

For the dough
3 cups whole wheat flour (I used chapati flour)
1 tsp. salt
1 tbsp. sugar
1 egg
2 tbsp. oil, divided
~ 1/2 cup water

Make the filling first. Heat oil in a pan and add the onions. Saute on medium heat until tender and slightly browned. Add the coriander cumin powder, paprika and mix well. Add crumbled paneer and salt to taste. Let it cook until paneer starts to brown a little. Keep aside to cool.


To make the dough sift the flour in mixing bowl. Add the sugar and salt. Beat the egg in a separate bowl and add it along with one tablespoon of oil to the flour. Combine to form a crumbly mixture. Add the water a little at a time to form a soft dough. You may not need all the water. The dough should not be sticky. Using the remaining oil knead the dough well until it soft and smooth. Cover and keep aside for 10-15 minutes. In the meantime prepare a pan by applying butter or oil to the bottom and sides. Keep aside.

Divide the dough into 10 portions. Adjust the size of the dough portions according to the size of your pan. If your pan is wide you want bigger portions. I made small lime size portions for my 7" pan. Take one portion on a floured work surface and roll it out as far as you can go. It should be as thin as possible. Place it on the bottom of the pan. Brush a liitle oil around the layer. Sprinkle some nigella seeds over the top.


Repeat the process of rolling with 4 more layers and place them on top of the first layer with a sprinkling of oil in between layers. You do not need nigella seeds in between each layers. Save the remaining seeds for the top. Now you are ready to add the filling. Sprinkle the cinnamon powder over the layer.


Next add the paneer filling and spread it evenly. As you can see I started adding the cilantro before I realized I should take a picture.


Next add the cilantro over the top.


Last of all add the feta cheese.


Continue working the remaining layers as before with a hint of oil in between. When the last layer is done sprinkle the remaining nigella seeds. You could add some melted butter over the last layer if you wish.


Preheat oven to 400 F. Let the borek rest on the kitchen counter until the oven heats up. Before placing the pan in the oven cut the borek into wedges. Do not score. Make sure you cut through all layers. This allows steam to escape and makes the layers flaky.


Bake for 15 minutes or until the top is brown.


Take it out of the pan and let it rest a couple minutes.


Borek is best eaten hot out of the oven.


Enjoy!

Halawat Gajur

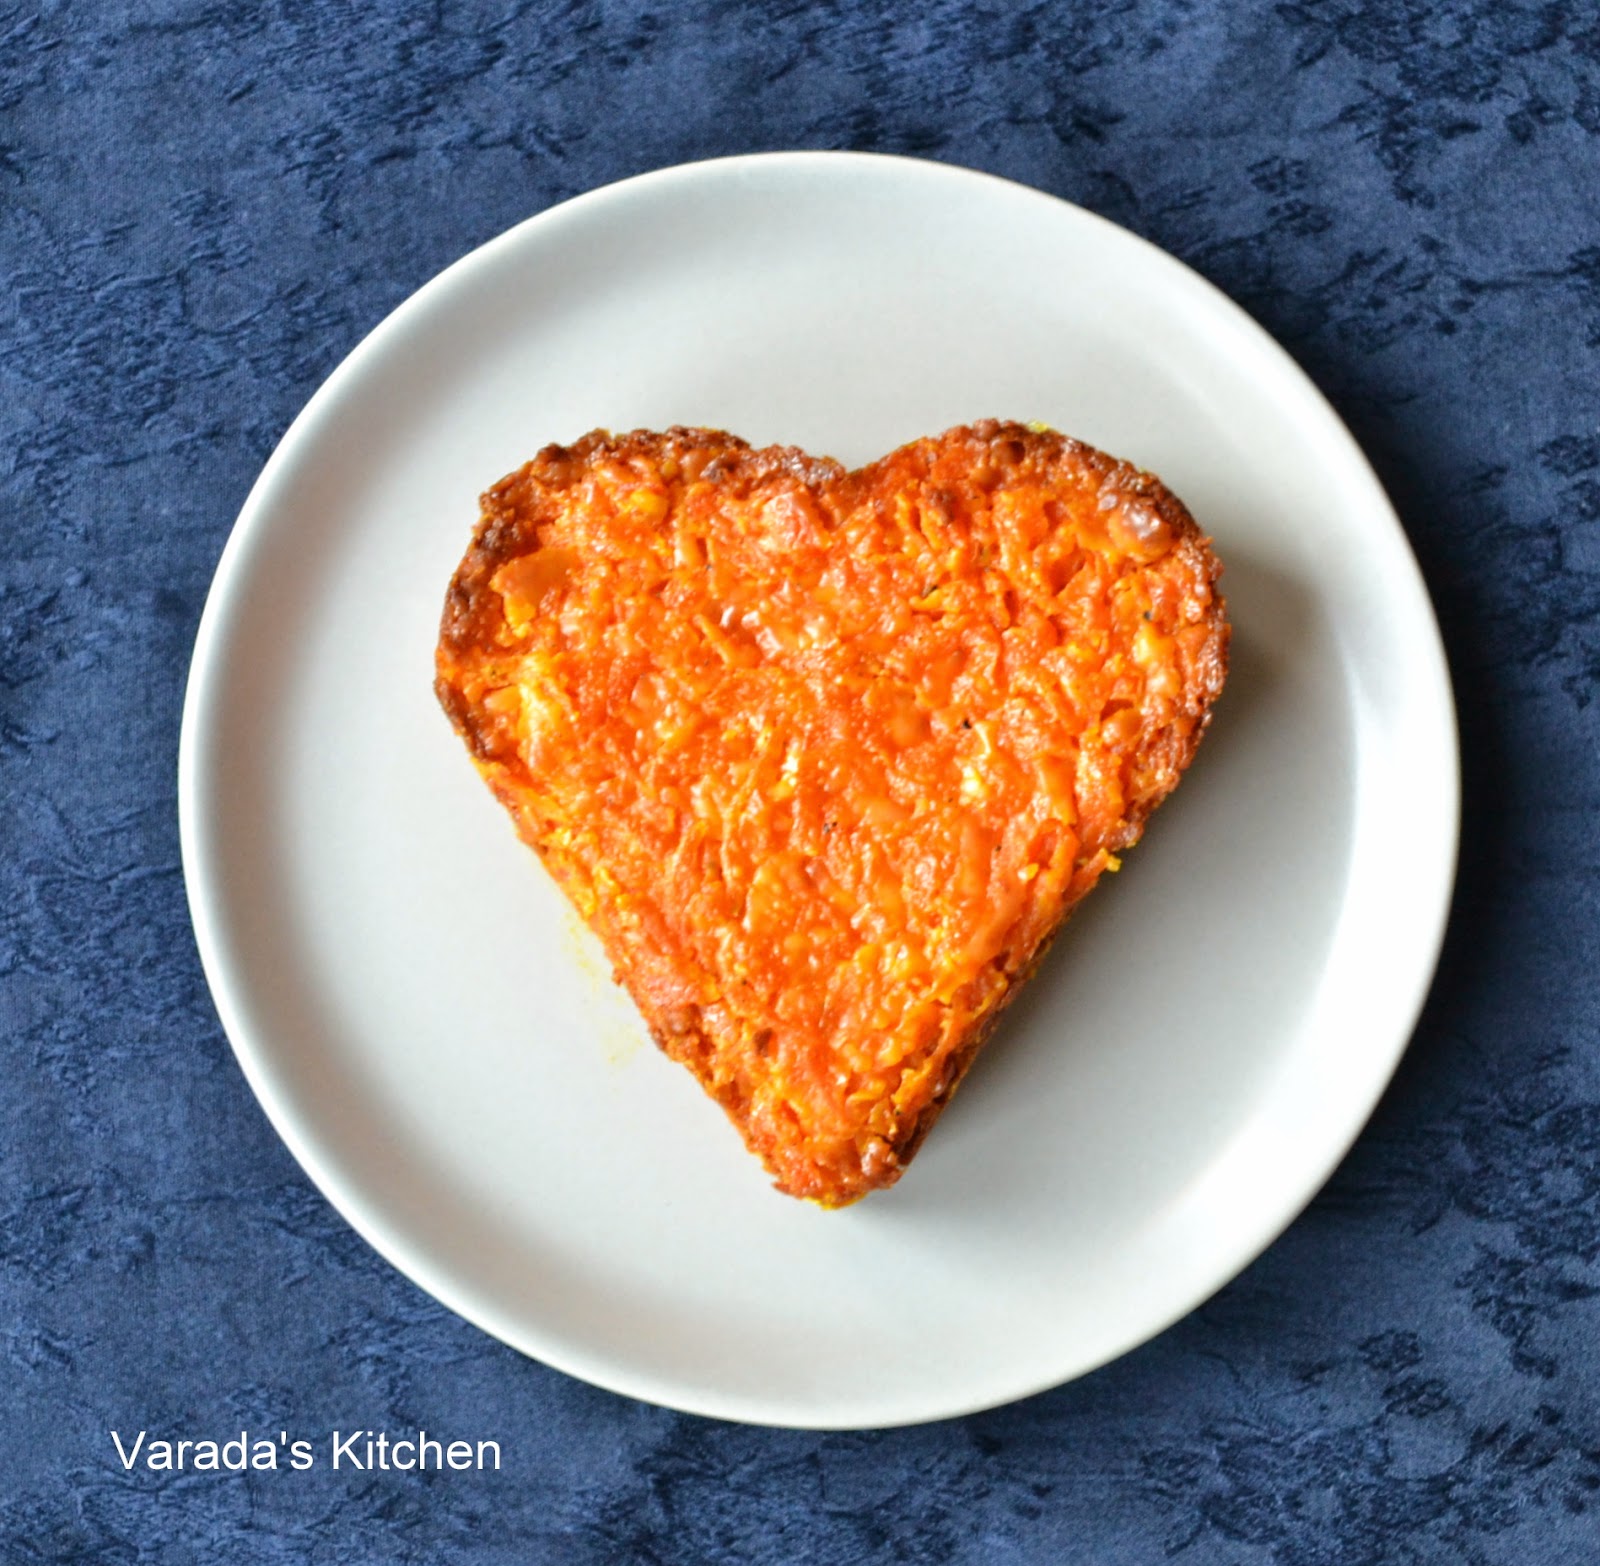
Gajar halwa is common in south west Asia. But this version in my opinion takes the cake. Literally. It is baked into a cake. This will be my go to halwa recipe from now on. We all liked it very much. My daughter who is not really into sweets chose to pass on it but anyone who likes sweet dishes would love it.


I made a small portion with just two carrots because I did not want too much leftover. The last few days I seem to be trying new things all the time and making them in tiny portions has worked out well. Especially of something as delicious as this halwa, that I love. It was an effort to have a small piece for dessert after dinner and leave the rest for another day. The only tiny pan I had on hand was heart shaped, so the cake is in the shape of a heart.

You will need
2 carrots
2 tbsp. sugar
1/4 cup + 1 tbsp. heavy cream
1 tbsp. ghee

Wash and peel the carrots and shred them. Heat the ghee in a pan and add the shredded carrots. 


Saute on medium heat until the carrots are cooked and browned slightly. You will see the quantity drop as the carrots cook.


Add the sugar and mix well. The sugar will melt and coat the carrots. Continue to saute the carrots for couple more minutes.

Preheat oven to 375 F. Add the 1/4 cup of cream and let the mixture cook until the cream is incorporated in the carrots to form a paste.


Transfer to an oven proof mold. Spread the tablespoon of cream over the top. 


Bake for 15-20 minutes until the top and sides are brown. Let it cool on the kitchen counter. 


Refrigerate for a couple hours. 


Best eaten chilled.