Sunday, May 24, 2015

100% Whole Wheat Eggless Burger Buns

Burgers are a favorite in my house as soon as they temperature begins to rise. They are quick to put together and can be cooked outside. Summers are too nice to spend the time indoors. This year just as the temperatures began to go up in early March Mother Nature decided to hit us with three winter storms in a week. The snow, ice, schools were closed and everything was a mess. We were waiting for the temperature to go up again. As soon as it did I celebrated with burgers. While the burger patti is a post for another day I am posting the burger buns today.


I found baking in warmer weather a pleasure. The dough is easier to work with and it rises a lot quicker too. It is amazing how everything living responds immediately to warmer temperatures.


I have two burger buns recipes on this space. The first is a sourdough burger bun and the second is a regular burger bun. These buns are made with 100% whole wheat flour and are eggless. I used flaxseed instead. The recipe is very similar to the regular bun except for the use of a different flour.

For the buns (for 8 buns)
500 gm whole wheat flour
3 tsp. yeast
50 gm sugar
2 scant tsp. salt
1 tbsp. ground flax seed + 3 tbsp. water
2 tbsp. butter, melted
1 1/4 cup water
1 tbsp. butter, melted for brushing
sesame seeds for topping (optional)

Grind the flax seed to a fine powder. In a bowl add the ground flax seed to the water and let it rest for a few minutes. Meanwhile sift the flour into a mixing bowl. Mix in the other dry ingredients. Now add the flax seed mixture and melted butter. Add the water and form into a soft dough. Knead until the  dough is smooth and elastic. Cover and keep aside until it is doubled in size, about 1-2 hours.

Divide the dough into 8 equal portions. I halved the recipe and got 4 portions. Gently fold over dough from all sides to the center. Pinch closed. Roll on a floured work surface with pinched side down. Cupping the dough with your finger pull towards you to create some tension in the surface. Place the shaped bun on a parchment paper covered baking sheet. Repeat for the other portions. Using a plate or bowl gently flatten each bun.


Cover loosely with plastic wrap and allow to rise another 30 minutes. Meanwhile preheat the oven to 375 F.

Brush the tops with half the butter reserved for brushing. Sprinkle sesame seeds over the top if you like. Bake for 12-15 minutes or until brown. Remove from oven and brush again with remaining butter.


Use as needed to make burgers.


Tuesday, May 19, 2015

Watermelon Cooler

After a long winter we had almost two weeks of rain. Then the rain stopped and we are left with hot muggy weather. To think this is just spring and summer is way out there is not a pleasing thought. Just the thought of something cool is refreshing. This watermelon cooler with a hint of lime does the trick.


I had bought a huge watermelon and cut it up. It was cooling the refrigerator. Then my husband bought grapes, raspberries and blueberries. With all that fruit I knew I had to make something. So I made this cooler with the watermelon. I used my Vitamix blender and it blended the juice into a very smooth mixture. The lime was infused in the watermelon giving the drink a refreshing hint of freshness in every sip.

You will need
4 cups watermelon cut into cubes
1 lime
3 tbsp. sugar
1/2 cup ice

Put all the ingredients in a blender jar and blend until smooth. Taste the mixture. Adjust the tart and sweet taste using lime juice and sugar. Pour into glasses.


Enjoy!


This is my entry for week three, day three of BM #52 for the theme Seasonal Fruit/Vegetables Spotlight. Check out the Blogging Marathon page for the other Blogging Marathoners doing BM#52.

Monday, May 18, 2015

Zucchini Spinach Paratha

Trying different parathas is almost my hobby. I have a lot of paratha or stuffed roti recipes in this space. The other day I had zucchini in the refrigerator and nothing else that I usually cook with it. I also had a little spinach left over. So I decided to mix it all together and make parathas. I added a bunch of different spices and flavors to the mix. The end result was a soft and delicious paratha. Perfect as packed lunch.


Packed lunch is a beast. You need something that will satisfy everyone, taste great even if eaten cold, will not smell too strong and will not be too messy. And you need something five days a week. When my daughter was in middle school there were 300 children in the school and four lunch breaks. While there would be a line for use of the microwave, it was possible to occasionally expect her to heat up the food. Now she goes to a very large high school and it is just impossible to heat up lunch. So every weekend I have to come up with suitable options that will work for all of us. Parathas especially those that are soft and taste great hours after they were made make me very happy.


This week I am showcasing summer fruits and vegetables. Zucchini is one of the most versatile vegetables. It can be used in all kinds of dishes. It can be the star of the dish or play a quiet side role. I usually stock up on small organic zucchini during the summer.

You will need
2 small zucchini (I use organic so I can use the skin)
5-6 sprigs of spinach
2 cups whole wheat flour
1 tbsp. oil
1 tsp. cayenne pepper
1 tsp. coriander cumin powder
1 tsp. amchur powder (mango peel powder)
salt to taste

Shred the zucchini, dice the spinach. Mix all the ingredients together in a mixing bowl.


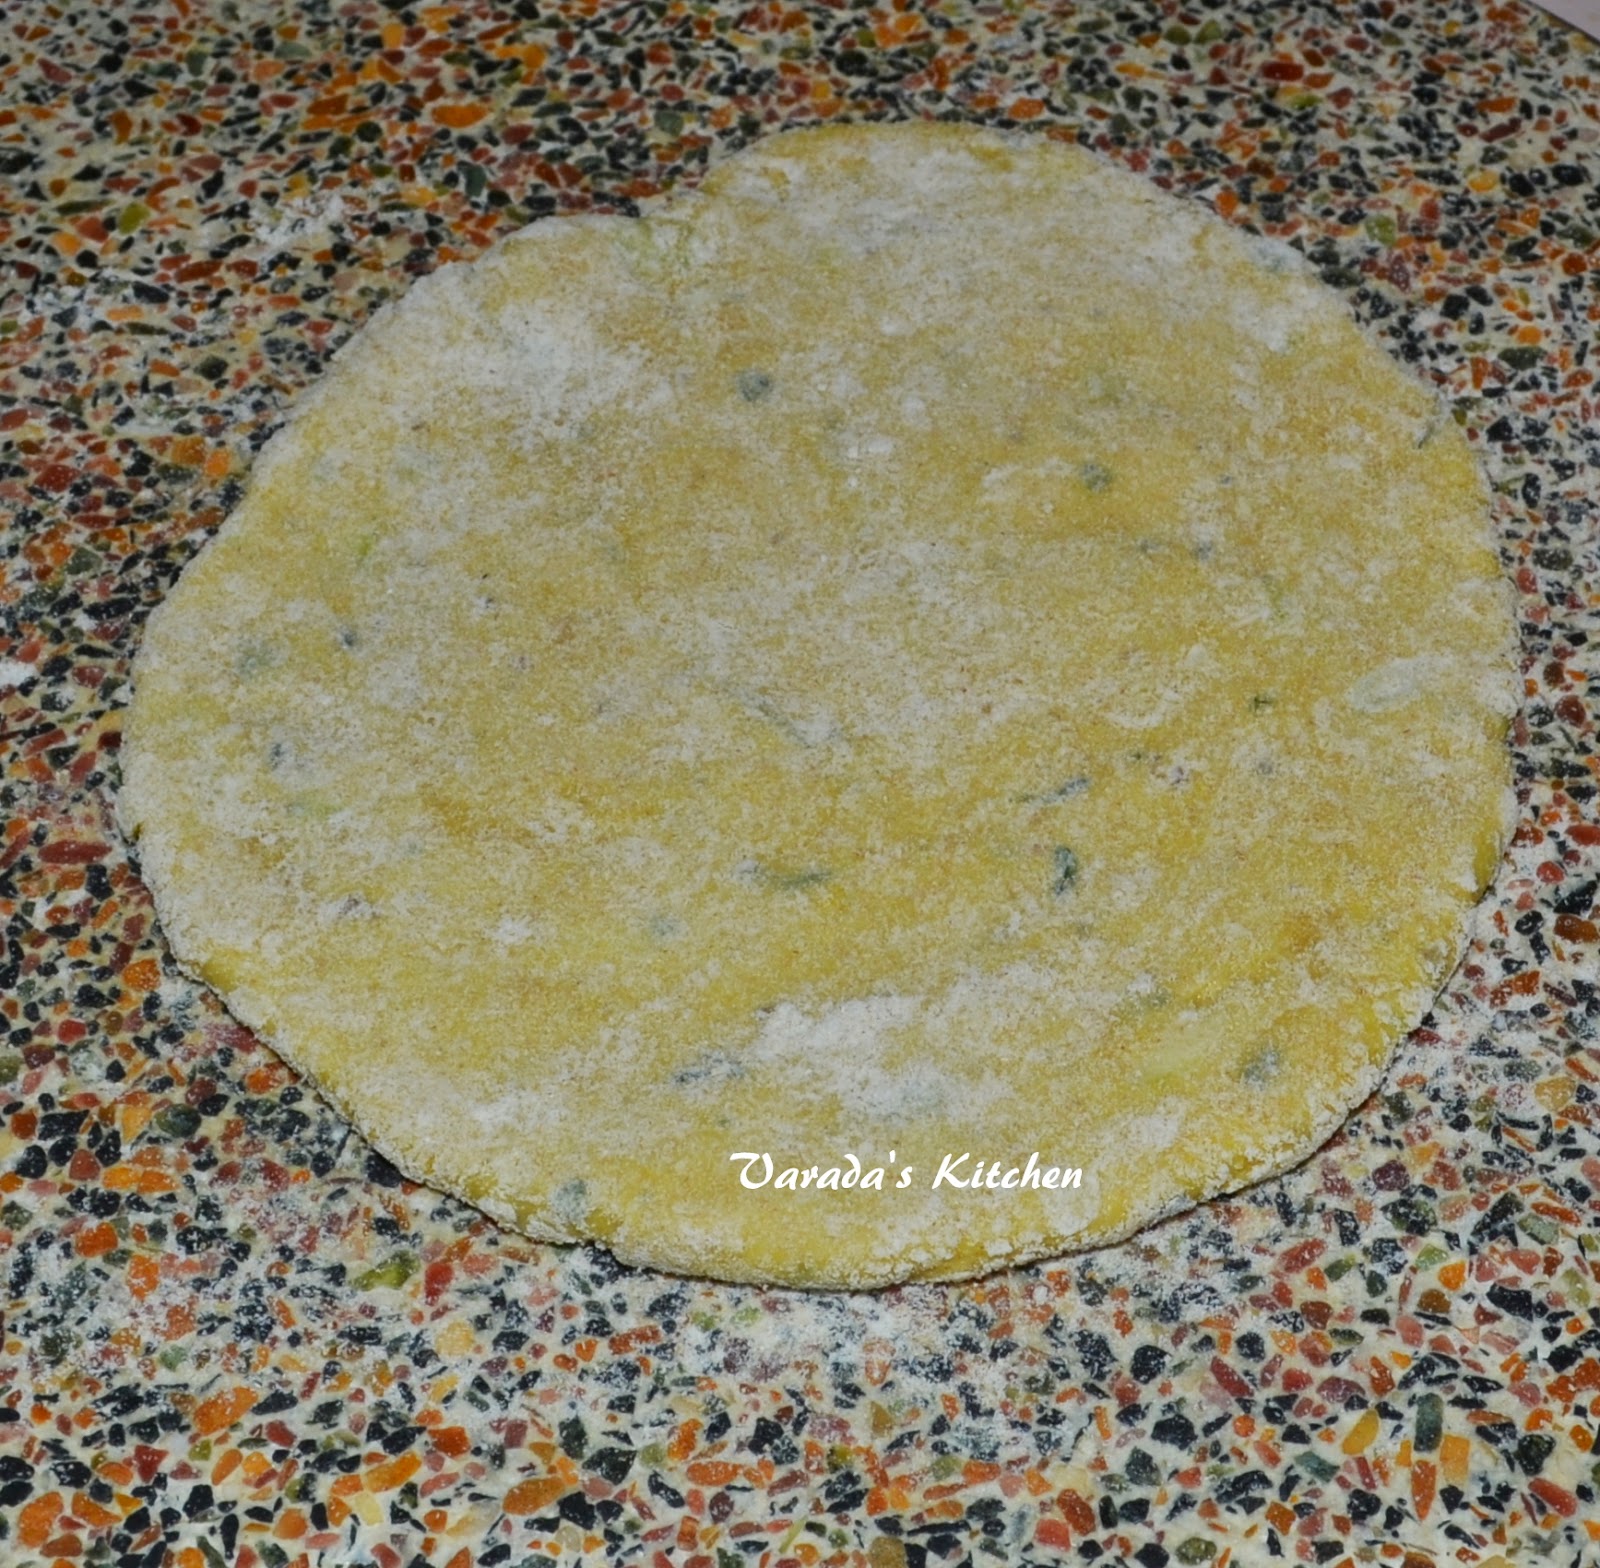
Using a little water form a soft dough. Keep aside for 10-15 minutes. Meanwhile heat a cast iron griddle. Divide the dough into lemon sized portions. Take a portion of dough and using a little flour to keep it from sticking roll out a large paratha.


Place it on a hot griddle. When one side is cooked flip it over.


Cook the second side until it is cooked.


Take it off the heat. Repeat with the other portions of dough.


Enjoy!


Sunday, May 17, 2015

Tomato Panzanella

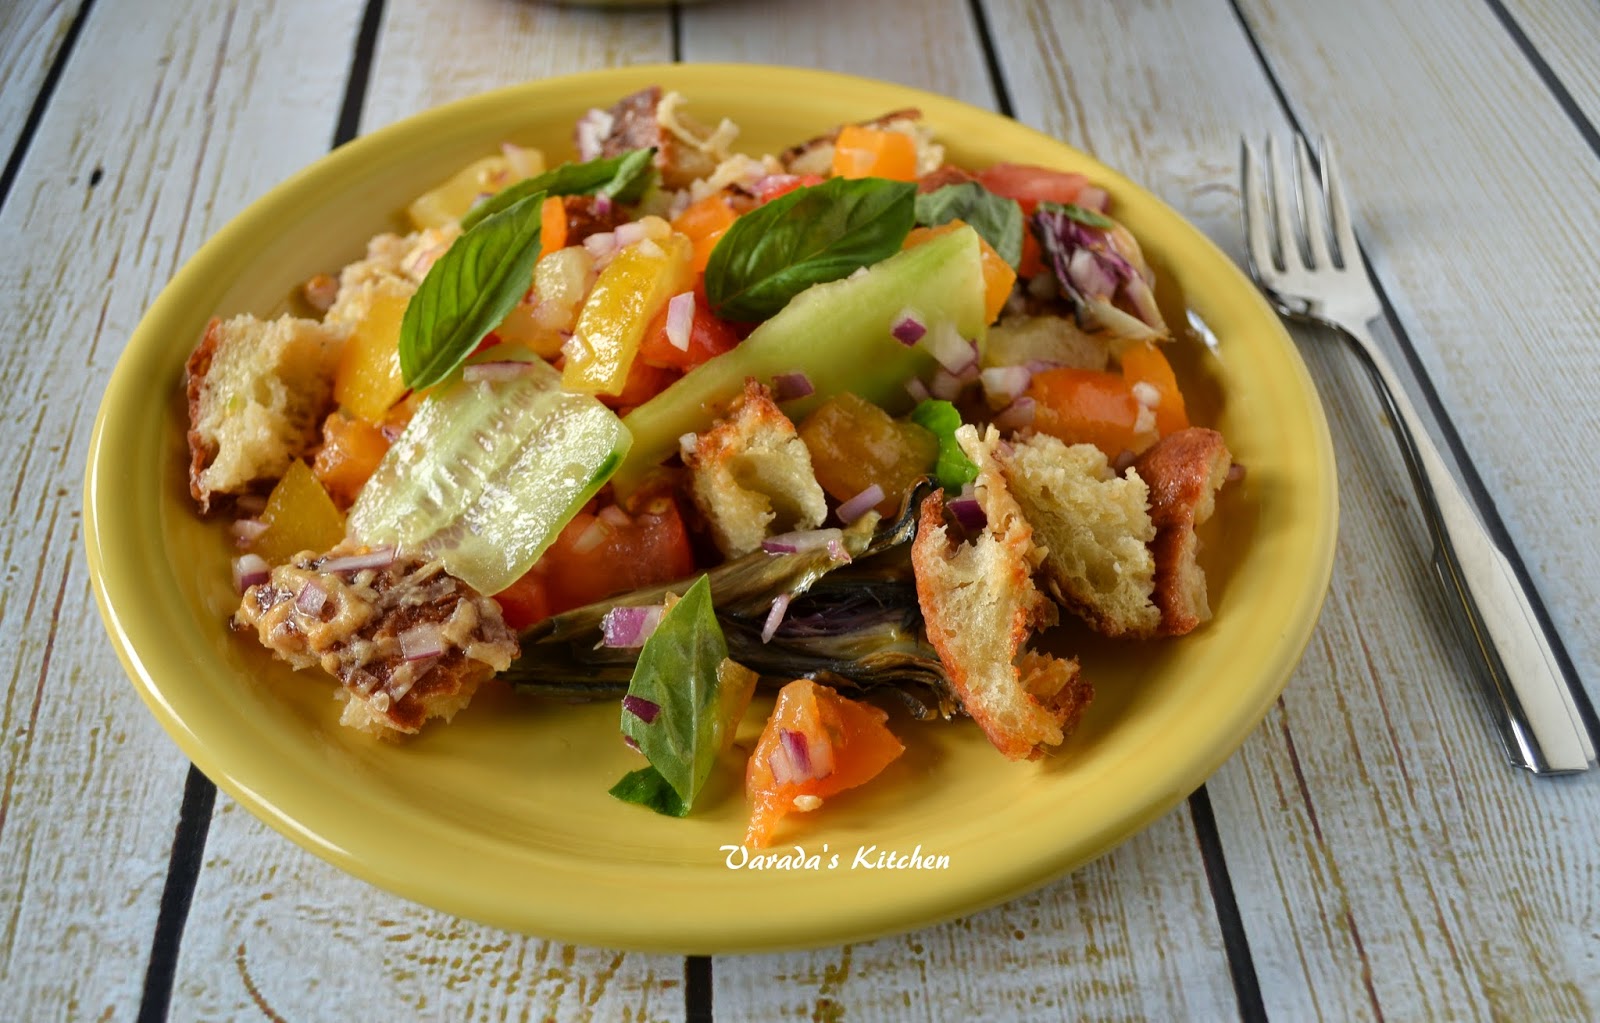
Tomato Panzanella is one of the most flavorful salad you will have. I made it using a day old loaf of ciabatta. I baked the ciabatta for this salad the night before I needed it so I would have a day old loaf. Ciabatta is very high hydration bread and it is one of the lightest loaves I have ever baked. It was perfect for this salad. If you do not wish to bake the ciabatta, though I would highly recommend you do, you can use a store bought loaf.


The day I made this salad my daughter was out for the evening at a friend's house for a project. I made the salad, clicked the pictures and handed the plate in the picture to my husband. He has taken a liking to salads lately but he likes gourmet ingredients. He took one bite and was hooked. Unfortunately for my daughter I had mixed the whole batch for the pictures so by the time she got home the salad was not very crisp. If you plan to eat some of the salad later mix it up in batches.


This week I am showcasing seasonal fruit and vegetables. I had to plan a post with my favorite summer fruit, heirloom tomatoes. The flavor of these fresh tomatoes in combination with the ciabatta is the base for this salad. I used fresh artichoke for the first time but did not cook it right. Fortunately the artichoke did not alter the taste of the salad, but it was inedible and had to be removed. I clicked pictures before I realized the artichoke was not cooked right so it shows up in the pictures. I will figure out what I did wrong and use them again, but for now I would skip the artichoke.

You will need
1 day old loaf ciabatta, recipe here
1 English cucumber
5-7 basil leaves
4 heirloom tomatoes
1/4 red onion
2 tbsp. red wine vinegar
3 tbsp olive oil

Preheat oven to 400 F. Break up the bread into 1 inch pieces and place in an oven safe dish (I used cast iron). Toast in the oven for about 15 minutes or until the bread is browned, heated through and toasty.


Meanwhile cut the tomatoes into two and collect all the juice and seeds in a mixing bowl. To the seeds add the remaining ingredients except the basil and cucumber. Let the dressing sit aside. Cut the cucumber into thin strips, Dice the tomatoes into long strips and tear the basil. When the bread is done combine everything in a mixing bowl. Let it sit for a couple minutes, not more, and serve.


Enjoy!

Tuesday, May 12, 2015

Garam Masala or Basic Spice Mix

A trip to any grocery store will show you how popular ready made spice mixes are. It takes the guess work out and it is convenient. There was a time when the basic spice mixes were family secrets passed down through the generations. Unlike pickles that were made to last a year spices mixes were not made in large quantities. The idea was to use them before they lost their freshness. If you choose one thing to continue making at home choose spice mixes. The fresh ground spices will add a fantastic flavor and aroma to your food.


This is my mother's recipe for garam masala. Actually it was my grandmothers recipe and she passed it down to my mother. Spicy curries were almost never cooked in the house when I was growing up. But this masala or spice mix was a staple. I took the picture at night and it did not come out very well. The color of the masala is brownish but the pictures shows it as yellow. I will click new pictures and update this post.

You will need
500 gm coriander seeds (dhane)
100 gm cumin seeds (jeera)
50 gm shaha jeera
10-15 dried red chilli peppers
4-5 bay leaves (tamal patra)
5-7 gm of cinnamon stick (dalchini)
5-7 gm star anise (dagadphool)
3-4 cloves (lavanga)
8-10 black pepper (miri)

1 tbsp. oil
1 1/2 tsp. salt

Heat a flat bottom pan with the oil. Add the coriander seeds, cumin seeds, shaha jeera, red chili peppers and bay leaves. Roast until the spices fill your kitchen with their aroma and begin to change color. Turn off heat and transfer the spices to a plate. In the same pan roast the remaining spices until they start to change color. Turn off heat. Allow the spices to cool and grind to a fine powder. Allow them to cool completely, add salt and store in an airtight container.


Enjoy!


Monday, May 11, 2015

Red Enchilada Sauce

Mexican cuisine is very loved in my house. Though the green sauce or verde sauce is preferred in my house I sometimes make this red enchilada sauce. It is very easy and has a surprise ingredient - cacao, that gives it a very distinct taste and color.


It is very easy to make and stores well for a couple days in the refrigerator. My daughter gives it two thumbs up.

You will need
4-5 ripe tomatoes
1/2 cup water
1 tbsp. basil
1 tbsp. oregano
1 Serrano pepper, diced fine
1 tsp. red chili pepper powder
1 tbsp. cacao shavings
salt and black pepper to taste

Dice the tomatoes and keep aside. Mix the spices except the cacao with the water. Bring to a boil.


Add the tomatoes and the chocolate. Cook until the tomatoes are softened. Add salt and pepper. Turn off the heat and let it cool. Run the mixture through a blender until smooth. Use in your recipe as needed.


Enjoy!

Tuesday, May 5, 2015

Semolina Porridge

My mother used to make the best porridge. She did not make it often but I loved it every time she made it. Back then I did not know if it was easy or difficult to make the porridge. All I knew was that I loved the sweet creamy goodness.


Today I made this porridge for breakfast for my daughter. Like my mother I do not make it often. I prefer oatmeal. But just like me my daughter enjoys a warm cup of porridge. I like a moderately thick porridge. Adjust the ratio of semolina to milk based on whether you like the porridge runny or thick.

You will need (2 servings)
2 cups milk
1/2 cup semolina
2 tbsp. sugar (adjust to taste)

Warm the milk and keep aside. Roast the semolina in a pan over medium heat. When there is a very slight change in color add the sugar and the warm milk. Bring it to a boil and turn off the heat.


Enjoy!


Sending this to the Kid's Delight event hosted this month by Mireille who blogs at Chef Mireille's East West Realm.


This is my entry for week one, day three of BM #52 for the theme Creamy Foods. Check out the Blogging Marathon page for the other Blogging Marathoners doing BM#52.

Monday, May 4, 2015

Sabudanyachi Lapsi / Sago Kheer

Food is such a basic need and we eat so many different types of foods through out our life. There is food we grew up eating, food we cook in our own homes as adults, food we have tasted in a restaurant, food that entices us with a look at a picture, food we taste on our travels, and so on. And then there is that small collection of recipes that does more than nourish our body, it wraps us in this cocoon of comfort and takes us back to a safe happy place. Today I will present one such recipe.


This is the recipe my mother used to make when I recovered from an illness and had no taste for food. Sabudana lapsi would bring a smile to my face and I would do my best to finish the bowl. The recipe is nothing special but it is comfort food. I rarely make it but today I was thinking of all the recipes I used to love as a child and wondered how many of those I have made for my daughter. And I remembered this. So I made a small bowl full.

You will need
1/4 cup sabudana/sago
1 cup milk
1-2 tbsp. sugar (adjust to taste)

Wash and soak the sabudana in very little water for a couple of hours. Take 2-3 tablespoon of water in a pan and add the soaked sabudana to it. Heat the water and when it is almost gone add the the milk and sugar. Bring it to a boil and let it simmer for a few minutes. Turn off the heat. You can eat it either hot or cold.


Enjoy!


Sending this to the Kid's Delight event hosted this month by Mireille who blogs at Chef Mireille's East West Realm.


This is my entry for week one, day two of BM #52 for the theme Creamy Foods. Check out the Blogging Marathon page for the other Blogging Marathoners doing BM#52.

Sunday, May 3, 2015

Pineapple Mousse

With summer right around the corner all the cold comfort foods are making their way back into the menu. It was when I was planning ahead for the week that I realized I did not have a recipe for mousse in this space. The light and airy foamy dessert is perfect for a hot summer day.


I had some crushed pineapple in the refrigerator so I decided to puree it and made pineapple mousse. I used agar agar to thicken it and heavy whipping cream as the base. Since the pineapple was not sweetened I used a little sugar. The end result for so light and creamy! I liked the mildly sweet taste. My daughter on the other hand said she would have preferred chocolate mousse.

You will need
3 cups crushed pineapple in juice or cubed pineapple
3/4 cup cream (I used heavy whipping cream)
2 tbsp. sugar (adjust to taste)
1/2 cup water
2 tsp. agar agar

Puree the pineapple chunks and keep aside. Heat the water and add agar agar. Stir to dissolve and turn off heat. In a separate bowl whip the cream and sugar until fluffy. It should visible double in size. Add the fruit puree and agar agar. Blend together. Do not allow the aerated cream to deflate. Transfer to single serving bowls and refrigerate for 3-4 hours.


Enjoy!


Sending this to the Kid's Delight event hosted this month by Mireille who blogs at Chef Mireille's East West Realm.


This is my entry for week one, day one of BM #52 for the theme Creamy Foods. Check out the Blogging Marathon page for the other Blogging Marathoners doing BM#52.

Saturday, May 2, 2015

Fire up the oven - An assortment of baked dishes

I love to bake. I love baking bread, dinner casseroles, desserts and traditional recipes. Though I like to bake cakes and cookies my real passion is trying out Old World recipes using my natural levain also sometimes called a sourdough starter. During the month of April a group of blogger friends got together for a baking event we called Fire up the Oven. As part of this event I showcased baked recipes using a different theme each week.

The first week I had recipes that were fun to bake. The second week was sourdough breads. The third week was baked hor d'oeuvres. The last week I posted one dish from each course ending the week and the month with a dessert. Here is a recap of everything I baked.


Everything is better and more fun with friends and this was no exception. It was nice to chat and plan with friends. Showing off your special pictures and admiring the pictures shared by friends ahead of time made the whole journey enjoyable.

Thursday, April 30, 2015

Ganache filled Whoopie-pie

Whoopie pie is a cream filling sandwiched between two cake like cookies. By cake like I mean they taste more like cake even though they are shaped like cookies. This is the last day of my month long baking challenge. I have posted a baked recipe this month every day except Sundays. Most of those recipes used either whole wheat flour or vegetables. I strongly believe in the concept of everything in moderation so this is my last recipe for the month made with all purpose flour and butter.


My daughter is fond of chocolate but not milk chocolate. She prefers bitter or bittersweet high percent cacao. So I thought a chocolate ganache made with 75% cacao would make the perfect filling for these pies. I was right. She loved them. And uncharacteristically had two in one sitting.


For some reason I did not take step-by-step pictures. All I have is the end result.

Recipe source for the cookies is here
You will need (for 12 pies)
For the cookies
2 cups all purpose flour
1 cup sugar
1/2 cup cocoa powder
1 tsp. baking soda
1 tsp. salt
1/4 tsp. vanilla extract
1 large egg or equivalent egg substitute
4 tbsp. butter, softened
2 tbsp. oil

For the ganache
2 oz 75% cacao
2 tsp. dark chocolate powder
1/2 cup heavy whipping cream
a pinch salt

To make the ganache, bring the cream to a boil and turn off heat. Add the chocolate and the salt and let it sit for a few minutes. Stir to smooth out the mixture and let it cool and thicken.


Meanwhile make the cookies. Preheat oven to 350 F. Sift the flour and combine with all the ingredients until smooth. The dough will be soft. Drop a tablespoon of cookie dough on a parchment paper covered baking sheet. Continue to place the cookie two inches apart. I got 12 cookies to a sheet. And I got two sheets. Bake both together in preheated oven for about 7 minutes. Switch the trays and bake another 5-7 minutes or until the cookies are cooked through. Cool on a cooling rack.

Apply a tablespoon of ganache on the flat side of one cookie and place another cookie over the top. Repeat for all the cookies.


Enjoy!


Wednesday, April 29, 2015

Bird Shaped Dinner Rolls

One of the weekend staples in my house is pav bhaji. Pav bhaji is a vegetable side served with dinner rolls. Bread hot out of the oven is always appetizing and paired with a mixed vegetable side allows me to clean out the refrigerator in preparation for a new week. I usually make one of the many rolls recipes I have on this blog. But sometimes I like to try something different. Today I shaped the rolls to look like birds.


There was no difference in taste but they are fun to shape and fun to eat. I had seen a picture of these birds on Pinterest a while back. They was no recipe or blog associated with it. It was just a picture. I saved it for a later day. Using the dinner roll recipe for these birds turned out to be a great decision. They were eaten for lunch and tasted great.


My daughter was very reluctant to eat the birds. She said they were too pretty to eat. My husband and I had no such problems.

You will need (8 birds)
1 egg or egg substitute of your choice
1/2 cup + 2 tbsp. milk
3/4 cup water
1 tsp. instant yeast
2 tbsp. sugar
1/4 cup olive oil
1 tsp. salt
1 cup all purpose flour
3 cups whole wheat flour (I used chapati flour, you can use any whole wheat flour)
8 cloves for eyes
1 tbsp. heavy cream as wash (you could use milk instead of cream)

Beat the egg in a large bowl. Heat the milk and water together until lukewarm and combine the solution with the egg. Add the yeast, sugar, oil and salt. Sift in the flour and knead into a soft dough. Continue kneading until the dough is smooth and elastic, about 5-7 minutes. Cover and keep aside until it doubles in volume.

Divide the dough into 8 equal and 2 smaller portions. The 2 smaller portions will be used to make the feathers, beaks and legs. Take one of the larger portions. Roll it out as a long rectangle using a rolling pin. Now fold it along the long side and make a think rope. Keep rolling the rope to make it longer and a little thinner. Start from one end fold the edge of the rope and continue rolling it inward. Repeat from the other side. You should get something like this.


Keep aside on a baking sheet covered with parchment paper. Repeat for the other large portions. Ensure the shaped bird is covered with a damp towel to prevent it from drying. Using the smaller portions shape the legs, beak and wings. Use the picture below as a guide. Place the cut shapes under the main body.


Let the shaped birds rest for 15-20 minutes. Meanwhile preheat the oven to 375 F. Just before placing the birds in the oven wash with the cream or milk.


Bake for 20-25 minutes or until they begin to change color and are cooked through. The same recipe in the shape of a roll takes a little longer to bake. When shaped like a bird using ropes the bread cooks faster.


Transfer to a cooling rack and serve with butter/cheese or as I did with a mixed vegetable side.


Enjoy!


Monday, April 27, 2015

Herbed Feta Focaccia

Focaccia made a great afternoon snack. My daughter loved it. So here is my version with herbed oil and feta cheese.


I had planned on taking pictures of the crumb but she thought it would be cool to tear instead of cut the bread. I let her have her way. It was only after it was all gone that I realized I have just one picture of this recipe. If you need help with detailed instructions you can refer to an earlier version of focaccia I have on this space.

You will need
1 1/2 tsp. sugar
1/4 cup olive oil
3 1/2 cups whole wheat flour
1 tsp. instant yeast
1 tsp. salt
1 1/2 cup warm water

For topping
2 tbsp. olive oil
1/4 tsp. basil
1/4 tsp. organo
1/4 tsp. thyme
2 tbsp. feta cheese

Combine the topping except the cheese and allow the oil to soak up the flavor of the herbs.

Combine all the ingredients for the dough in a mixing bowl and form a soft dough. Knead for a few minutes, cover and keep aside. Allow it to double in volume, about 1-2 hours.

Preheat oven to 375 F. Divide the dough in two portions. I used half the recipe so I had just one portion. Roll out the dough to a 1/2 inch thickness. Using your fingertips dimple the rolled out dough. Brush the herbed oil and leave the dough aside for 15-20 minutes. Brush again with the remaining oil. Bake for 15-20 minutes. The top should be a light brown color. Remove from the oven and sprinkle on the feta cheese. Bake for another 5 minutes.


Enjoy!