Wednesday, November 5, 2014

Frequently Used Bread Baking Terms

The ability to understand bread baking books or recipes depends a lot upon your ability to understand frequently used bread baking terms. Here is a glossary of a small subset of terms. I will add to it as I run into more. If you have any you would like me to add please let me know.

Hydration
Hydration refers to the liquid in the dough. Hydration is expressed as a percentage of the flour in the dough. If hydration is 75% and you used 1000 gm of flour then you can deduce that 750 gm of water/liquid was used.

Levain or starter or sourdough starter or wild yeast
Flour and water and mixed together to encourage the yeast in the flour to grow. The yeast is fed with more flour and water as needed. Bacteria, the same as is found in yogurt, also grows in the culture. This mature culture can be used to levean bread. Apart from helping the bread rise the culture is very good for you. It ferments the flour helping to break down the protein and complex carbohydrates into animo acids, starches and organic acids helping more of the grain to be absorbed by the human body. It also neutralizes anti-nutrients like phytic acids. These acids attach themselves to iron, zinc and manganese preventing their absorption. When mature the culture is used to leaven the dough to make delicious bread the old fashioned way. The trick is to learn to control the ratio of yeast:bacteria thereby controlling the acidity of the dough. Higher bacteria gives you sour loaves, higher yeast gives you sweeter loaves.

Commercial yeast
A little over a 100 years ago fresh bakers yeast was discovered that made life easy for bakers. For a couple of decades bakers used both, their starters and the bakers yeast, to leaven the dough. With the popularity of bakers yeast the use of starters declined. Eventually most new bakers stopped using the starters altogether. Today you can get fresh bakers yeast or dry granules to leaven the bread.

Real Bread
Real bread is a campaign started in many countries to go back to the roots of bread baking and away from industrialized baking techniques. Typically real bread uses small quantity of yeast with long bulk fermentation and proofing times. Most bread recipes use only flour, water, salt and yeast.

Bakers percentage
A simple rule followed by bakers using weight measurements. This formula does not work for volume measurements. All ingredients like water, salt, yeast or levain (starter) are expressed in terms of the flour used. Flour is 100%. A recipe that calls for 500 gm flour, 400 gm water, 10 gm salt and 100 gm starter can be written as 100% flour, 80% water, 2% salt and 20% starter. Now you could use any quantity of flour and figure out the remaining quantities. Expressing any recipe in these terms allows you to predict how wet the dough will be or whether there is enough salt in a given recipe. Bakers percentage can also be used when using commercial yeast.

Bulk fermentation
Also called the first rise, bulk fermentation is the process of breaking down the wheat in simpler sugars that are them fermented by the yeast and bacteria. Long bulk fermentation results in greater break down and unlocking of nutrients in whole grain flours. Bakers baking a lot of bread called this 'bulk' fermentation because the dough was in one big undivided mass.

Proofing
Also called the second rise. After the first rise the dough is divided and then shaped into individual loaves or rolls. Proofing is the process of priming the dough for the oven. Pressing a finger in the dough will give you one of three results. If it springs back to the original shape immediately the dough is under proofed. If it does not spring back to the original shape the dough is over proofed. The dough is ready for the oven if it springs back to shape slowly. For best results the dough should be proofed just right.

Oven spring
When bread is placed in a hot oven it rises as it bakes. This rise is called oven spring and is different from when the bread rises during fermentation or proofing.

Score
Deliberately slashing the dough to control the vents through which the steam escapes is called scoring. Scoring prevents the bread from tearing. It is done with a sharp blade called a lame. Results similar to the lame can be achieved with the use of a sharp razor blade. Scoring is an art and adds to the beauty of a well baked loaf.

Ears
A scoring technique that results in one side rising above the other giving the appearance of a ear.

Crumb
The crumb is how the inside of the bread looks. An even crumb is desirable whether is is open or closed. An open crumb is one with large holes of varying sizes and a closed crumb is small evenly shaped holes. 

DO or Dutch Oven
Dutch ovens are usually made of cast iron, sometimes with an enamel coating. They have become very popular among home bakers. Steam is essential to develop the thin crust that you find on most well made old world breads. However, most home ovens are not equipped with a steaming option. The dutch oven when covered is a perfect isolated environment that creates its own steam. Dutch ovens have made it possible for enthusiastic home bakers to bake bread of professional quality.

Couche
The cloth used to separate the individual shaped loaves while they are proofing.

Banneton
Cane baskets used to proof bread. They give the bread the classic ring design.


This is my entry for week one, day one of BM #46 for the theme Taming the yeast. Check out the Blogging Marathon page for the other Blogging Marathoners doing BM#46.

Tuesday, November 4, 2014

Tomato, Basil, Mozzarella Bruschetta

I wanted to make something special with the baguette I had baked. I had thought of using it for sandwiches for school. But I shaped it thin so sandwiches were out. Slender French bread works best to make bruschetta. Bruschetta is a favorite snack in my house. I used to make it with store bought bread before I started baking bread. I also realized I did not have a recipe in this space for bruschetta. So I made tomato, basil, mozzarella bruschetta and I am so glad I did. It was all gone very quickly.


The mozzarella I used is from Whole Foods, notice the veg rennet label on the very bottom. It goes sour very quickly but is pretty good when eaten fresh. If you hesitated because of the rennet source this is the mozzarella for you.


Ensure the crust of the bread you use is very thin. The crust of my baguette was perfect - crunchy but so thin it crumbled in your mouth. I had planned to try artichoke bruschetta as well but my daughter was not too keen so I decided to stick to the tried and tested.

You will need
1 baguette
3 tomatoes
7-9 basil leaves (I got mine from the garden)
 mozzarella cheese, sliced
1 tsp. olive oil + a little to drizzle over the bread
salt and black pepper to taste

Preheat oven to 400 F. Cut the tomatoes in half and remove the seeds and juice. Dice the tomatoes. Place the basil leaves one over the other and roll them. Cut the roll to form thin strips or chiffonade. In a bowl combine the tomatoes, basil, olive oil, salt and pepper. Keep aside.

Slice the baguette into 1/2 inch slices. Drizzle with a little olive oil and arrange on a baking tray. Place mozzarella cheese over the top.


Bake for 5 minutes or until the cheese just starts to melt. Do not allow the cheese to melt and separate.


Transfer to a plate and top with the tomato mixture.


Enjoy!

Monday, November 3, 2014

Sourdough Baguette Take two

As the title states this is my second attempt at baking the perfect baguette. When I made my first attempt I had a new wild yeast starter and the baguette was my first bread fully leavened with the starter. That the dough rose was a big thing and so I was very happy with the results. A short eight months later my expectation is higher. An open crumb, thin crust, nice color and good scoring all in one baguette is the new dream. This baguette may not pass the stringent French rules with its length and weight specifications but I am sure no one would call it anything other than a baguette. Baking bread that crackles and speaks to me as it cools makes me happy. That is the bread that my family likes to snack on because it is tasty. Though I would have liked an evenly open crumb I am happy to have achieved my current goal.


The impetus behind this attempt came from Pradnya who blogs at The Pumpkin Farm. She set us this challenge as part of the tame the yeast event. I have to thank her for getting me to try the baguette again. I used my starter for this bread but I have given the recipe to use commercial yeast as well. The end result should be very similar as it is the technique as much as the ingredients that determine the end result.


I had watched videos on how the baguette is shaped without letting the gas escape. But I had never really looked into scoring techniques. I learnt that from my friends at Artisan Bakers. I bought a razor blade, the kind I remember my Dad shaving with when I was really little. I used it to score the bread. I have always loved the darker colored bread peeking though the score marks and could not believe how easy it was to make it happen. If you use this technique make sure you get an odd number of score lines, they are supposed to look better than an even number. I could have overlapped the score marks a little more and that would have given me a straighter edge but for now I am happy with this loaf.


I baked my first artisan boule using the recipe from the book Flour Water Salt Yeast by Ken Forkish. Now I find myself using that technique for most breads I bake. I even used it very successfully for the sourdough buns I baked a few months back. I use a shorter (~5 hour) bulk fermentation following by overnight proofing. I put the cold shaped dough directly in the hot preheated oven without allowing it to come to room temperature. I followed the same technique on this loaf too. Except I put a cast iron pan in the oven in addition to my baking sheet. When I transferred the loaf to the oven I filled the pan with ice cubes. This created the much needed steam to form a thin, crunchy crust.

For one baguette
If you are using a sourdough starter
You will need
105 gm white whole wheat flour (I used King Arthur)
90 gm all purpose flour
130 gm water
100 gm fed sourdough starter
6 gm salt

Alternately, if you are using commercial yeast
You will need
150 gm white whole wheat flour
100 gm all purpose flour
175 g water
6 gm salt
2 gm or 1/2 tsp. instant yeast

If using starter
Feed your starter. I keep 50 gm starter in the refrigerator. I feed it with 50-75 gm each of flour and water first thing in the morning and let it sit on the kitchen counter for a few hours. At around 2-3 pm I am ready to mix the dough. 50 gm of the starter goes back in the refrigerator for next time and the rest is used as needed in recipes. For this bread I needed 100 gm of starter so I refreshed the mother with 50 gm each of water and flour.

In a large mixing bowl add all the flour after running it through a sieve. Now mix in all of the water so that no lumps of dry flour are visible. Cover and keep aside for 20-30 minutes. This is called autolyse a process which gets the enzymes in the flour going by mixing it with water and letting it rest.

After half an hour sprinkle the salt over the dough. Add the sourdough starter or commercial yeast whichever you choose to use. Mix it in with the dough. You should break up the dough with your fingers and reform it at least twice to get all the ingredients to mix up well. Cover and keep aside.


Over the next two hours stretch and fold the dough to strengthen it. The dough will be wet and not very stiff. Moisten your hands with water before handling the dough. You reach for the dough on the far side, stretch it up and fold it over towards you. Turn the bowl 90 degrees and repeat. When you go all around once you have completed one turn. You will gradually notice a difference in the appearance of the dough. It will get smoother and easier to work with. Cover and keep aside for another 3 hours for a total of 5 hours of bulk fermentation.


Prepare a baking sheet that fits in your refrigerator by spreading a couche over it. I don't have a couche so I used a dry tea towel. Flour the tea towel and keep aside until needed. Flour your working surface and your hands. Transfer the dough to the working surface. Without letting the trapped gas escape form the dough into a floppy rectangle. Do not take too much time to get the shape right. Fold the top third over the dough and press down with the heel of your palm to create tension over the fold.


Now fold the bottom over the top and do the same with your palm. Now bring the top and bottom together and press down gently again. This exercise is meant to create tension in the outer surface of the dough. Seal the edge along the length. Cup your hands over the roll of dough and gently roll back and forth to make it longer to the desired length. For sandwiches you may want it slightly thicker. I made it thin and long.


When you are satisfied with the length transfer it to the waiting floured tea towel. Pull up the edges of the towel next to the shaped baguette to help it retain its shape. Professional bakers place baguettes next to each other separated by the pulled up couche. However, I baked just the one so I placed wooden spoons on either side of the folded up towel to help the baguette hold its shape.


Cover the baguette with the rest of the towel and place it in the refrigerator overnight. You can bake the baguette any time the next morning.


Preheat the oven to 500 F. Ideally place your baking stone and the cast iron pan in the oven when it is heating. Since I do not have a baking stone I put my baking sheet in when the temperature reached 450 F. I placed the empty cast iron pan in at the same time.

Let the oven heat for 5 minutes after it reaches 500 F. Keep a bowl of ice cubes or boiling water ready. Take the shaped baguette out of the refrigerator and put it on the kitchen counter. The cold dough will be firm and easy to handle. Handle it gently.


Take it out of the towel and ideally put it on a well floured peel. I do not have a peel so I floured the back of a baking sheet and used it to transfer the baguette to the sheet in the oven. Just before putting the loaf in the oven score it using a very sharp razor blade. The cuts should be almost vertical and a third of each cut should overlap. The overlap prevents the dough from looking lumpy.


Put the loaf on the hot baking stone, or in my case hot baking sheet, in the oven. Being very careful to protect the oven glass transfer the boiling water or ice cubes to the hot cast iron pan. Close the oven door and let the bread bake for 10 minutes. Remove the cast iron pan and allow the baguette to bake for another 15 minutes. I removed the baguette after 10 but next time I will keep it in for the additional 5 minutes for a darker color.


Remove the baguette from the oven and put it on a cooling rack. Allow it to cool completely before cutting into it.


Enjoy!

Sunday, November 2, 2014

Honey Roasted Peanuts

Yesterday my daughter asked me to buy her some honey roasted peanuts. I thought I could do better, I could make her some. This was my first attempt at making candied nuts. My goal was to get them to taste sweet with a hint of spice. I think I managed that and more. The nuts are crunchy and sweet. The spice is evenly distributed.


Next time I will skip the nutmeg and add cardamom instead.

You will need
1 cup peanuts
1/2 tsp. cinnamon powder
1/4 tsp. cardamom powder
3 tbsp. maple syrup
3 tbsp. sugar
a pinch of salt

Preheat oven to 325 F. In a bowl mix all the ingredients except the sugar.


Transfer to a baking sheet covered in parchment paper. Roast for 15 minutes or until the nuts are brown.


Cool and mix together. They will have a honey glaze.


You could stop at this step but I did not want them to be sticky. So I sprinkled sugar over the top. That gave the nuts a matt finish and dried them up some.


Enjoy!

Sunday, October 26, 2014

Bread Baking Tips

I have been asked a lot of questions about baking bread. Here are some of those questions answered.
  • How do I half the recipe? This is the most frequently asked question. If you work with weights halving a recipe is very easy. If you work with volume it can get tricky. I would say half all the ingredients but when mixing the dough reserve a little of the liquid. Use the reserved liquid only if needed. 
  • Is leavened bread good for you? Our body does not have the ability to digest whole grain without help. Soaking, fermenting and cooking help release enzymes that break down the complex carbohydrates and proteins in a form we can digest and absorb. All ancients cultures recognized the value of fermentation. Leavened bread is dough fermented with the help of yeast and bacteria. When soaked the enzymes in the flour start to break down the complex carbohydrates and proteins. The yeast and bacteria work on these further to convert them to flavorful forms we can easily digest. They also release carbon-di-oxide which helps leaven the bread.
  • NEVER PUNCH DOUGH. This is a very common instruction for home recipes, but don't do it. If you need to punch the dough and have it rise again to double the volume you probably used too much yeast. Be gentle with the dough. There is really no need to punch it down in order to shape it.
  • Watch the amount of yeast you use. A loaf with three cups of flour should have no more than a teaspoon of yeast. Adding more yeast does not improve the texture of the bread but cuts down on the flavor. Remember, you are trying to break down the grain and develop flavor. You are not trying to create an aerated mass. If you are in a hurry use lukewarm liquid and proof the dough in a warm place. That will help the yeast.
  • To get well risen bread you need flour with a high gluten content. Gluten fibers form a network in which the gases released by the yeast are trapped. It is a lot easier to get the large uneven 'holes' of an artisan bread using high gluten flour. You can bake with low gluten flours but expect a denser bread. 
  • If you choose to use refined flour ensure the flour is not bleached (bromated). Try to find unbleached aged flour.  In the US some brands of refined flour are bleached. Read the labels. Almost all the ready to eat bread available in the supermarket is made with bleached flour. 
  • Is maida the same as all purpose flour? This is the question most asked by new bakers from India. The answer is no. Maida can be compared to cake flour or pastry flour which is a much softer refined flour than all purpose flour. And maida is almost always bromated.
  • Why long rise times? As mentioned earlier, soaking releases enzymes already present in the flour. These enzymes break down the complex carbohydrates into simpler sugars. This takes time especially for whole grain flours. That is the reason a resting period for dough is recommended even for unleavened breads. The yeast feeds on this sugar. Giving this process time not only helps to develop flavor but breaks down the dough in a form that our body can absorb. The resultant bread not only tastes a lot better than the one hour wonders but is good for you. Take your time baking the bread. 
  • Using whole grain flour. Wheat is the most commonly used flour to bake bread. Bakers use a lot of different flours, spelt, einkorn, rye, semolina just to name a few. The rise and crumb size may depend upon the gluten content of your flour/flour blend but if you control the quantity of yeast and give the dough time you can make flavorful and healthy loaves with any flour you choose.
Don't be afraid to get those hands dirty. 

Saturday, October 25, 2014

Vada Pav

Vada Pav is a street food from Mumbai. Until I started working in Mumbai I had never tasted it or even heard of it. I was very wary of getting sick when I first started working in Mumbai so I stayed away from the street foods. Later a friend introduced me to it. She and I roomed together. She was from Nasik and had visited Mumbai many more times than I had. She insisted I try the vada pav from a street vendor. I was very skeptical. It was one thing to try grilled corn on the cob. The hot coals killed all the germs. But bread and vada were a different animal. After a lot of coaxing I tried it and really liked it. That version of vada pav was too spicy for me and I had to wash it down with lots of water. But the combination was great. And I did not get sick.


I am told there are wada pav chains in Mumbai now. I did not venture out to try it the last time I was in Mumbai but that may be because I was in a hotel close to the airport and the Mumbai office in Andheri, far away from these outlets.

After all these years the taste stayed with me and when I was wondering how to use these laadi pav I had baked I kept going back to vada pav. Finally I made vada pav at home. I made the garlic coconut chutney but deliberately kept it is very mild. You can spice it up with dry red chili peppers if you want. I had posted the recipe for batata vada a few days ago. I posted whole wheat laadi pav yeasterday. Today I bring it all together to present the wada pav.


It was only when I edited the pictures that I realized I had not put any green chutney on the bun I used for the pictures.

You will need
Laadi pav or Dinner roll
Batata vada
Green chutney

For the garlic coconut chutney
1 cup dry coconut flakes or powder
1 tsp. tamarind pulp
2 cloves garlic, minced
1 tbsp sesame seeds
1-2 red chili peppers (depends upon how brave you are, I am a wimp I skipped this)
1 tsp. red chili pepper powder (optional, use if not using red chili peppers)
3 tbsp. peanuts
salt to taste

Heat a small saute pan and add the dry coconut to it. Mix in the tamarind pulp such that it is distributed evenly. Continue to roast the coconut on low medium heat mixing it up occasionally so it does not burn. Remove from pan when done and add the minced garlic to the same pan. When roasted remove from pan and add the sesame seeds. Next add the red chili pepper. Let all the roasted ingredients cool before adding them to a grinder along with the peanuts and salt. Grind to a powder.

If you used red chili peppers your chutney will turn an orange red. Since I used red chili pepper powder mine was a dull orange.

To put it all together
Cut the pav though the center. Add the garlic chutney to one side and apply the green chutney to the other. Place the vada over the garlic chutney and place the other half of the pav over the top.


Enjoy!

Friday, October 24, 2014

Whole Wheat Eggless Dinner Rolls / Laadi Pav

The best yeast bread I bake is one leavened with wild yeast. It has nothing but flour, water and salt and tastes great. However, dinner rolls and buns can be a little different. Most recipes call for an egg or egg yolk, butter or oil and some sugar. These dinner rolls use flax seed instead of an egg and a little oil and sugar. The rolls were soft and fluffy and browned very well. I used King Arthur whole wheat flour and that gave the buns a lovely dark color. The dark specks are from the crushed flax seed. Though visible they do not alter the taste at all.


This recipe is the latest in the taming the yeast challenge where one member of our group presents a recipe that we all try to replicate. This recipe was shared by Priya of Priya's Versatile Recipes. Priya is an expert baker and has a large collection of baked goods on her blog. You should check it out. Thanks Priya for this awesome recipe.


Some changes I made - The dough was very wet. I like wet dough but this one needed more flour. I added about a 1/4 cup of additional flour. The original recipe called for 2 1/2 teaspoon of yeast. I reduced the amount to a scant teaspoon and increased the rise times. If I had mixed the dough in the morning instead of early afternoon I would have added no more than a 1/2 teaspoon. The long rise time allowed the flavors to develop making the rolls delicious on their own.

I have flax seed in my pantry that I run through a blender before I use it. Humans lack the enzymes needed to digest whole flax seed but it stores better as seed than powder. Running it through the blender crushes the seed making it possible to digest and absorb the nutrients.

You will need
1 1/4 cup whole wheat flour
2 cups all purpose flour
1/2 cup ground flax seed
1 tbsp. sugar
1 1/2 tsp salt
1 scant tsp. yeast
2 tbsp. olive oil
1 1/2 cup lukewarm milk
1 tbsp milk for brushing the rolls
oil to grease the dough while rising

Sift the flours in a large mixing bowl. Add the ground flax seed, sugar, salt and yeast. Heat the milk in a microwave and add it to the flour along with the oil. Mix together to form a dough. Knead for a few minutes until smooth and elastic. Put a few drops of oil on the palm of your hand and rub around the dough. Place the ball of dough in the bowl, cover and allow to rise for 3-4 hours until it doubles in volumes. On a hot day this process might go faster.

Flour your hands and your working surface and transfer the dough on to it. Do not punch it. Be gentle as you work the dough into a rectangle. Using a pastry cutter cut equal portions of the dough. I got 9 rolls of ~95 gm each and one tiny tester roll.


Place the rolls a half inch apart on a baking sheet covered in parchment paper. Sprinkle a little flour on the top of the rolls and cover loosely. Allow the rolls to rise for 20-30 minutes.


In the last 10 minutes preheat the oven to 350 F. Brush the tops of the rolls with a little warm milk.


Bake for 20-30 minutes or until the tops are brown and a tester inserted in the center comes out clean. Transfer to a cooling rack for a couple minutes.


You can have them hot with a stuffing/ filling or sides of your choice.

This is my entry for week four, day one of BM #45 for the theme Taming the yeast. Check out the Blogging Marathon page for the other Blogging Marathoners doing BM#45.

Thursday, October 23, 2014

Pumpkin Spice Chai Latte

It is fall and pumpkins are everywhere! Even in your chai latte! Pumpkin spice flavors are very popular in coffee and tea. If you are one of those people who love pumpkin spice latte then you should try this at home. I am not really a tea or coffee person but I like the occasional cup. And in fall I like to indulge in a pumpkin spice flavored tea.


I used a BPA free can of pumpkin puree but you could make your own if you like. Cinnamon and nutmeg are must haves for this recipe. They flavor the otherwise bland pumpkin brown sugar combination.


I am not going to call this the pumpkin spice chai tea latte because it would be saying pumpkin spice tea tea latte. Chai is Hindi for tea.

You will need
For the pumpkin spice
1 cup pumpkin puree
3/4 cup brown sugar
1 tsp. dried ginger powder
1 tsp. cinnamon powder
1 tsp. nutmeg
1 tsp. cardamom powder
a pinch of salt

For the latte
3 tbsp. water
1 tsp. tea leaves or one bag of chai
2 tsp. pumpkin spice mixture
1/2 cup milk

For the topping
whipped cream (optional)
cinnamon or nutmeg powder

Combine all the ingredients for the pumpkin spice. You can keep this mixture refrigerated for up to two weeks.


To make the latte, boil the water and take it off heat. If using tea leaves, add the leaves to the water. Allow it to sit for a minute, longer if you like strong tea. Run the water through a strainer and discard the leaves. If using a tea bag drop the bag in the water and allow to seep to the desired strength.

Meanwhile combine the milk and the pumpkin spice mixture. Bring it to a boil. Turn off heat and add it to the tea water. If you like top with whipped cream. Sprinkle cinnamon or nutmeg on the top.


Enjoy your hot cup of pumpkin spice chai latte!

Wednesday, October 22, 2014

Shubh Deepawali / Happy Diwali

Today is Narka Chaturdashi. We Maharashtrians celebrate this day with a family breakfast of the Diwali goodies, being thankful for what we have and enjoying each others company. The house is clean, the diyas are in place, the rangoli is painted and everywhere you look there is a festive atmosphere. This is a time to rejuvenate. I would like to take this opportunity to wish all my readers a very happy Deepawali!


May this season bring warmth, good health and happiness for the year to come.

Monday, October 20, 2014

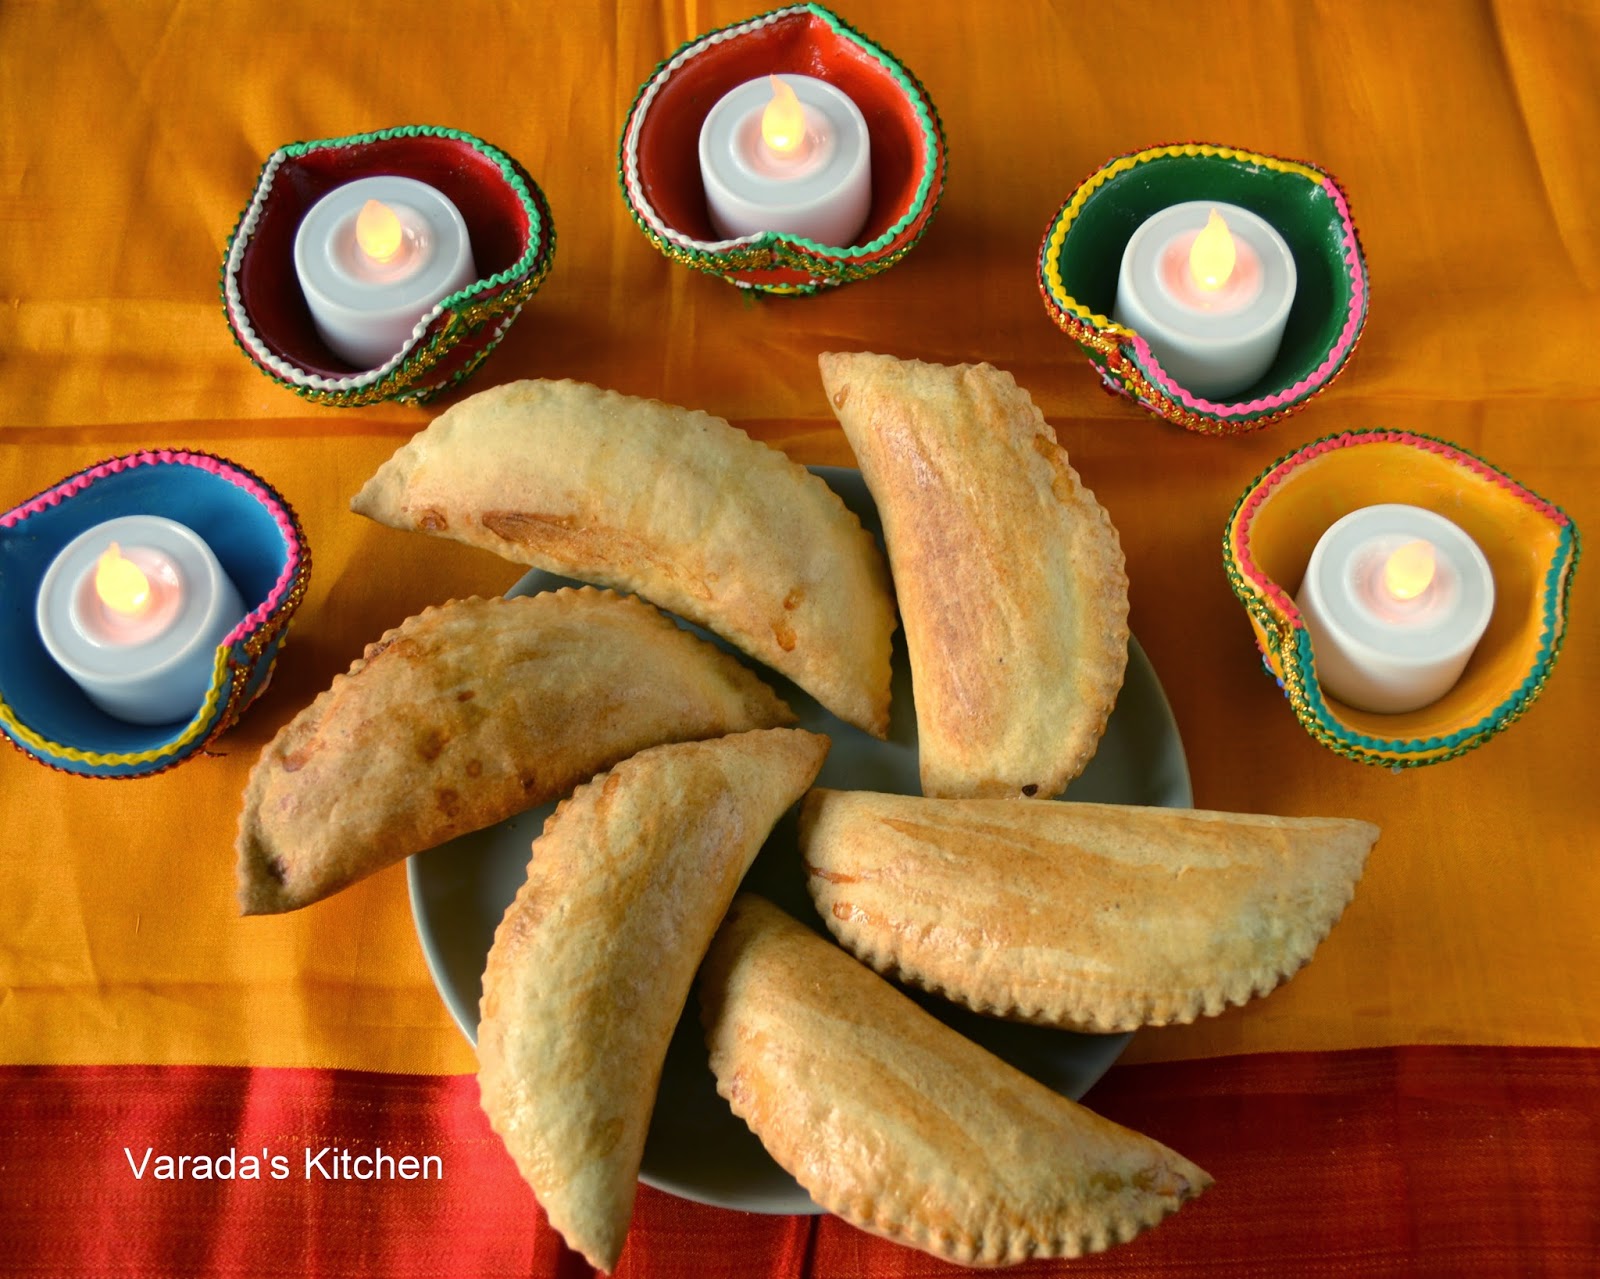
Baked Dry Coconut Karanji (Kordya Khobryacha Karanjya)

Karanji is an must have faral item on the Maharashtrian Diwali faral platter. Two types of karanji are made. One is with fresh coconut and the other is with dry coconut flakes. The one made for Diwali is with dry coconut flakes. Traditionally the karnaji is deep fried but I baked it as I have done with all the faral recipes I made this year.


The karanji 'pari' or shell is crunchy but not hard. The stuffing is made of dry coconut, roasted poppy seeds, roasted semolina (rawa) and powdered sugar. Generally dry coconut flakes are used but I used shredded dry coconut and I believe that helped to keep the filling well distributed throughout the karanji. My daughter could not resist having one while it was still warm.


As a child I remember coming home from school to find fresh made karanjis. My mother always made them with the help of the maid while we were out of the house. I can understand why. Then as a teenager I remember helping my mother with karanjis. I always got very tired of the amount of time it took to deep fry them but on the whole we enjoyed ourselves. I remember being very strict about how many could be eaten before Diwali. With all the effort I would put in I would be pretty mad if they were all gone before Diwali and we had to make them again. Now I don't really care, in a way I am happy if everyone wants to eat them. Time passes and our roles change.


It is tradition to make at least one modak when making karanji, one puri when making shankarpale and one kadbola when making chakli. You see, just like Spanish, the Marathi language classifies everything as masculine or feminine. So at least one feminine piece is made with the masculine faral and vice versa. Karanji is feminine and hence the masculine modak. I will let you draw your own inference as for the reason behind the tradition.

You will need (makes 15 karanjis and 2 modaks)
For the shell
1 cup rawa (semolina)
1 cup all purpose flour
3 tbsp. melted warm ghee or clarified butter
~ 1/3 cup lukewarm milk or as needed

For the filling
1 cup shredded dry coconut
2 tbsp. poppy seeds
1 tsp. ghee
1/4 cup rawa (semolina)
1/2 cup + 2 tbsp. powdered sugar
1 pod cardamom, shelled and seeds crushed

1/4 cup milk for sealing the karanji and brushing

To make the shell, combine the semolina and all purpose flour in a bowl. Rub in the melted ghee. Using a little milk at a time form a ball of dough. Do not make the dough too soft. Reserve the remaining milk. Cover the dough and keep aside for an hour.

Meanwhile make the filling. Roast the shredded coconut taking care to ensure it down not brown. Take it off heat and place in a mining bowl. Next roast the poppy seeds in the same pan. Keep aside to cool when done. Next melt the ghee in the same pan and roast the semolina in it. Again, ensure it is well roasted without turning brown. Take it off heat and add it to the roasted coconut. Grind the roasted and cooled poppy seeds to a powder. Add them to the coconut along with the powdered sugar and cardamom powder. Mix it well and keep aside until needed.


After an hour break the dough into pieces and run it through the food processor. If it is too dry add a tablespoon of milk and run it again. It should be soft and pliable. If not add another tablespoon of milk and run it through again. Transfer the softened dough to the mixing bowl and knead a little. Cover with a moistened tea towel.


Preheat the oven to 375 F. Prepare a baking sheet with parchment paper. Pour a little

Break away a portion of dough the size of a large marble. Keep the rest of the dough covered. Knead the small portion of dough in the palm of your hand and place it on a work surface.


Using a rolling pin roll the dough to form a thin round disc.


Place the filling in the center. Moisten the perimeter with milk.


Fold the dough over to form a half moon shaped dumpling. Press it down with your fingers to seal.


Using a special decorative cutter cut the edges off. If you don't have a cutter use the tines of a fork to form a decorative edge.


Remove the discarded dough and place it separately from the rest of the dough under the tea towel. Place the prepared karanji on the baking sheet. Keep it covered and work with the rest of the dough. When the sheet is full brush the karanji with the milk and bake for 28-32 minutes or until brown. Flip them over once after 15-17 minutes. If you have sealed the edges right the karanji will puff up and stay that way.


Transfer to a cooling rack. Store in an airtight container when completely cooled.


Enjoy!

Sunday, October 19, 2014

Baked Bhajani Chakli

Chakli is Diwali faral that is made year around as a snack. In Maharashtrian homes chakli is usually made with bhajani. Whole grains are roasted separately, combined together and milled. Roasted coriander and cumin seeds are added for flavor. The resultant flour or bhajani is combined with sesame seeds and carom seeds (ajwain or ova) to form a dough. The chakli is shaped from this dough and is usually deep fried. I baked it.


I do not have the ability to mill grains so I started out with store bought flours. I roasted them separately and then combined them together with roasted coriander and cumin powder. Thereafter I followed the traditional process to prepare the dough. Once the dough was prepared I shaped the chakli and baked them.


Chakli is an integral part of the Diwali faral. It is one of the must have savory faral. I kept the chakli mild so we could all enjoy it.

You will need
Special equipment to shape the chakli

For the bhajani
3 cups rice flour
2 cups channa dal flour (besan or bengal gram flour)
1/2 cup urad dal flour
1/2 cup moong dal flour
1/2 cup coriander seeds
1/4 cup cumin seeds

For the chakli
3 cups water
2 tbsp. oil
1/4 cup sesame seeds
1 tbsp. ova (ajwain, carom seeds)
1 tsp. red chili pepper powder (optional)
2 tsp. salt (adjust to taste)
3 cups bhajani

To make the bhajani, roast all the ingredients one by one. Put the roasted coriander and cumin seeds in a grinder and grind to a fine powder. Combine all the flours and the ground powder in a mixing bowl. The bhajani is ready. It can be stored in an airtight container for a couple of weeks.


For the chakli
Bring the water to a boil in a pan along with the oil, salt, sesame seeds and red chili pepper. Working quickly lower the heat and add the bhajani. Mix it well with the water for a couple of minutes. Take the pan off of the heat, cover and keep aside for half an hour. Knead the dough well or run it through a food processor until you have a soft pliable dough. Keep this dough covered with a moist tea towel while you work.


Preheat the oven to 350 F. Prepare a baking sheet with parchment paper. Prepare the chakli mold. Break off a lemon size ball of the dough. Knead well in the palm of your moistened hands. Place it inside the mold. Press the lever to form the chakli. Try not to make them too big so they are baked evenly. Continue until you fill the baking sheet.


Bake for 20-30 minutes flipping them over once after 10 minutes. Transfer to a cooling rack and continue with the remaining dough. Store in an airtight container when completely cooled.


Enjoy!

This is my entry for week three, day three of BM #45 for the theme Healthy tea time snacks. Check out the Blogging Marathon page for the other Blogging Marathoners doing BM#45.