Friday, September 12, 2014

Githeri (Corn and Bean Stew)

A Kenyan style side dish made with corn and beans perfect for when fresh corn is available in the market. The contrasting colors of the dark red kidney beans, the corn and the carrots are a treat for the visual eater.


As with any stew the dish takes a while to cook but it does not need constant attention. This is perfect for a day when you have the time but do not want to spend it hovering in the kitchen.

You will need
1 cup dark red kidney beans
2 corn on the cob (or 2 cups frozen corn)
1 onion
1 large tomato
1 carrot
1 potato
1 tbsp. paprika
2 tbsp. garam masala (curry powder)
salt to taste (optional)
cilantro to garnish

Note: If you would like this soup style, increase the amount of water.

Soak the beans overnight. Take the husks off the corn and rinse. Using a sharp knife cut the corn kernels off the cob. Cook the corn and beans in a pressure cooker until just done, about 5 minutes once it is pressurized. 

Alternately, you can cook the beans and corn in boiling water on the stove top. This is the traditional way of cooking the beans and corn. If using frozen corn you can microwave the kernels for 1 minute before use.

Drain the cooking water and reserve. Keep the beans and corn aside. Dice the onion. Saute in a couple tablespoons of water until it is translucent. Add more water a tablespoon at a time if needed. 

In the meantime, dice the tomatoes. Separately peel and chop the potatoes. Peel and slice the carrots. Keep aside. When the onions are done add the tomatoes along with the reserved cooking liquid and cook until the tomatoes are mushy.


Add the potatoes, carrots, paprika and garam masala. Combine and cook on medium heat until the potatoes are cooked, about 15-20 minutes. Make sure there is enough cooking liquid, add either the reserved cooking water or plain water as needed.


Add the cooked beans and corn. Add another cup and a half of the cooking water and bring to a boil. Add salt to taste (optional).


Simmer for 15 minutes.


Enjoy!
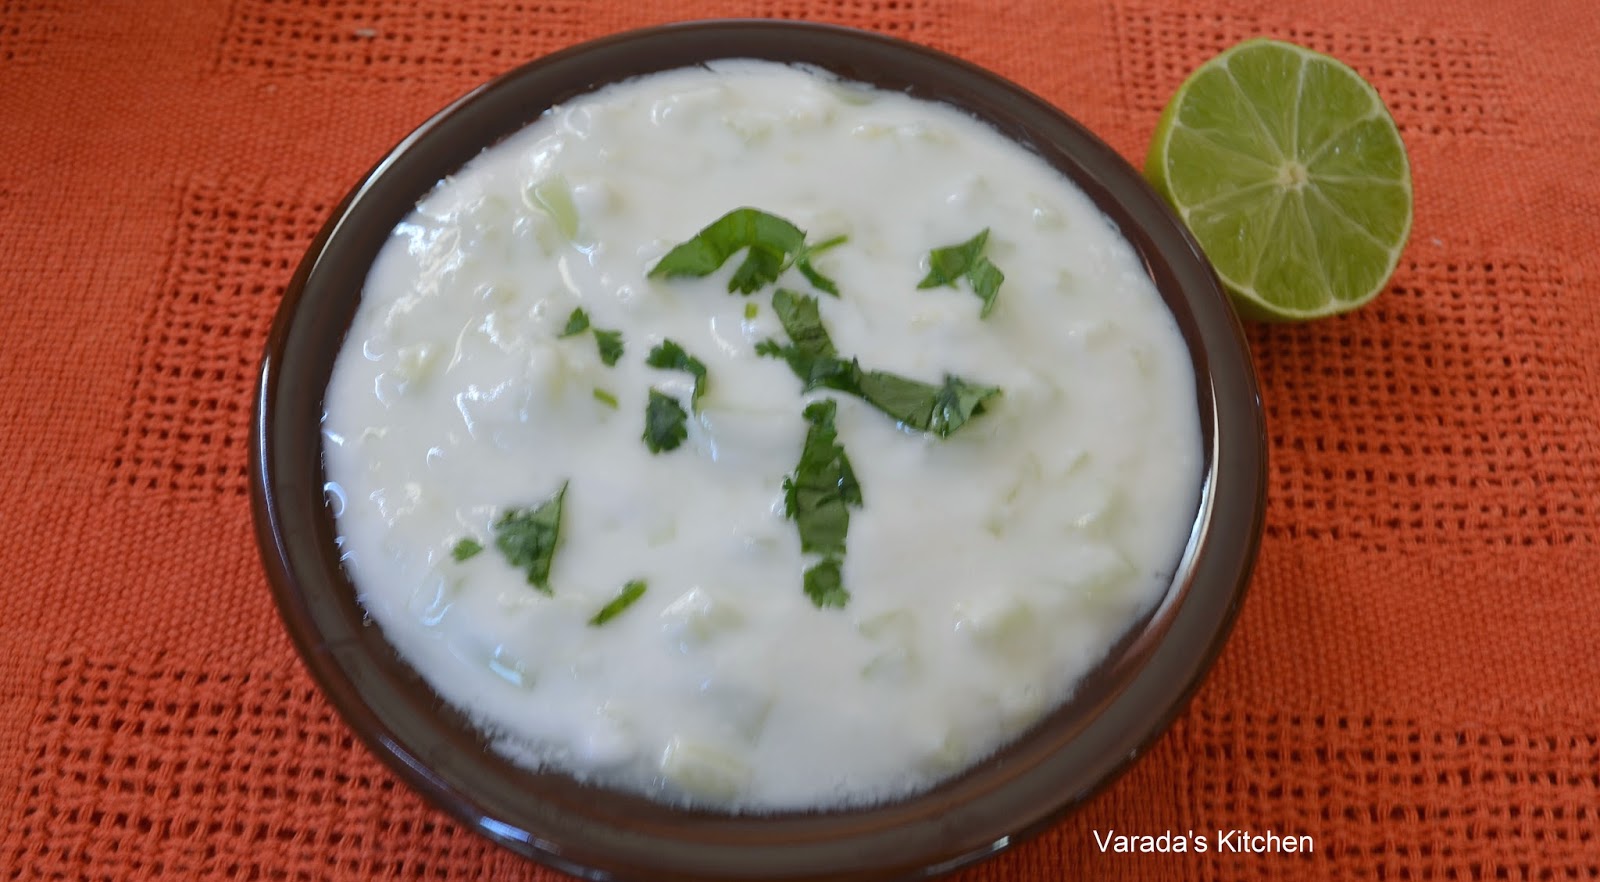
Tzatziki (Kenyan Cucumber salad)

There is a version of the cucumber salad in a lot of countries and Tzatziki is the Kenyan variation of this salad. It goes well with rice.


Finely dice half a cucumber. Combine with 1/2 cup of yogurt. Season with salt and a minced garlic. I never use garlic in my everyday cooking. It is one thing to add it to dishes that are cooked, it is something else to eat it raw. I left the garlic out.

Kachumbari (Kenyan Tomato Salad)

I was not surprised to find this salad but I was surprised by the name. So I read up on it from multiple sources until I was sure I was on the right track.


A simple salad made with two thinly sliced tomatoes and half thinly sliced onion. Flavor the salad with a teaspoon of lime juice. Season with salt and black pepper. Garnish with cilantro.

Kenyan Pulao

A simple rice dish made with basmati rice. Whole spices are roasted in oil until the oil is fragrant. The rice is then cooked in this spice infused oil. The resulting rice has a lovely aroma of the spices.


As always I used brown basmati rice. We have eliminated white rice from our house years ago. My daughter the only member of the family who loves rice prefers rice to be super soft rather than fluffy. So I tend to make it the way she likes it.

Recipe adapted from here

You will need
1 cup basmati rice
1 tbsp. olive oil
4-5 cloves
1 inch cinnamon
2-3 cardamom pods
4-5 peppercorns
1/4 cup onion, diced
2 cups water (I used some of the water in which the beans and corn had been cooked for Githeri)

Rinse the rice thoroughly and soak it in water for 20-30 minutes. Drain the water and keep aside.
Heat oil in a pan and add the spices. Let them sit in the hot oil for a minute or two. Add the onion and saute until the onion is translucent. Add the drained rice and roast for a couple minutes until the rice starts changing color. Add the water and bring it to a boil.


Cover, lower heat and let the rice cook for 15-17 minutes. Turn off heat and let it rest for another 5-10 minutes. The rice is ready to eat.

Kenyan Chapati

Kenyan chapati is super soft and tasty. It is a layered chapati made entirely with all purpose flour. A lot of oil is used to make the layers flaky. I compromise. I use the all purpose flour but go easy on the oil/ghee. The layers in my chapati are clearly visible but are not as flaky as they could be.


Recipe adapted from here

You will need
4 cups all purpose flour
1 tbsp. olive oil
1 1/2 tsp. salt
1 tsp sugar
1 1/2 cups warm water
oil when roasting

Sift the flour, sugar and salt into a mixing bowl. Add oil and rub it into the flour. Use warm water to mix the dough adding a little water at a time until you have a soft ball. Knead the dough for 20-25 minutes. Take a couple drops of oil in the palm of your hand and rub it all over the dough. Wrap in plastic wrap and keep aside for half an hour.


The dough will be soft but will dry out quickly. Divide the dough into 6 equal portions. Each portion will give you a chapati that is 8-9 inch in diameter. If you prefer smaller chapatis divide the dough into 8 or 10 portions. Use one portion keeping the others wrapped in the plastic wrap. On a floured surface roll the portion of dough into a large disc of 8 inch in diameter.


Brush the surface with oil. Sprinkle with dough and spread it all over the surface. Now fold the chapati accordion style starting from the center.


Press together.


Hold on to one end and twirl the other end around until you have a disc. Tuck the loose end into the center.


Press flat and keep aside. Repeat with the other portions of dough. Let it sit for another half hour.


Heat a griddle pan on high. Roll out one of the portions of dough into a disc about 8-9 inches in diameter.


Place it on the hot griddle pan. After about 5 seconds flip  it over.


Brush oil on the surface and flip it over after another 5 seconds. Brush oil on the surface now on the top. When the underside has brown spots all over flip it over. When both sides have brown spots take it off heat and keep it covered so it remains soft.


Repeat for all the portions of dough. Serve hot.


Enjoy!
Kashata Za Nazi (Coconut Cake)

Very similar to coconut barfi that I make frequently. One big (and nice) difference is that this dessert uses water instead of whole milk called for in the coconut barfi. The end result if flakier than the recipe that uses milk. We really liked this lighter version.


In fact I think this is the way I will make coconut barfi in the future. If you like coconut barfi you should try this one.

Recipe adapted from here

You will need
2 cups desiccated sweetened coconut flakes
1 1/2 cups sugar
1 cup water
green food coloring
1 pod cardamom, shelled, and seeds crushed to a powder
ghee to grease the pan

Grease a pan with some ghee and keep aside. Soak the coconut flakes in 1/2 cup water and keep aside. Meanwhile heat sugar, water in a thick bottomed pan. Bring it to a boil and let it simmer until the syrup is thickened. Add a drop of food coloring and the powdered cardamom. Swirl the pan to combine. Add the coconut flakes along with the soaking water, almost all the water should have been absorbed.


Let the mixture cook on medium low heat until the syrup is almost gone. At this time the mixture should leave the sides of the pan easily and try to stick together to form a ball. Transfer to the greased pan and pat down to form a uniform top.


Let it cool for 5 minutes. Using a blunt knife cut into squares. Let it cool completely before storing.


Should last for a couple days outside in summer longer in winter. Should last for a couple weeks in the refrigerator.

Thursday, September 11, 2014

Japanese Meal

This meal comes from Japan. It is a simple meal that is suitable for a Bento box. The flavors in this meal are very different from what we are normally used to. I did not know much about Japanese cuisine and needed help with all the basics of this cuisine. I was happy to find Just one cook book, a blog with a lot of information about Japanese cuisine. I was fascinated with how dishes are selected for bento boxes. I found additional information at Just Bento and I decided I wanted to cook a meal fit for a bento box.


My Japanese bento box menu has a big bowl of Japanese sticky rice topped with Furrikake that is a kelp topping made with kelp leftover from preparing dashi. The rice was served with several side dishes. Negimiso yaki tofu or grilled tofu, flavored with a strong miso paste, provides intense flavor in every bite. Nori tomagoyaki or seaweed rolled into omelette rolls is a unique omelette preparation where multiple layers of thin egg crepes rolled together. Together the tofu and eggs meet the protein requirement of a bento box meal. Spinach gomaae or spinach with sesame seeds is a surprisingly crunchy dish with the roasted sesame seeds. The blanched spinach adds a mild flavor. For dessert I made Matcha white chocolate chip cookies or green tea cookies. Matcha has a strong green tea flavor and an equally strong aroma that reminded me of henna.


The new ingredients I used were kombu (kelp), nori (seaweed) and macha powder (special green tea powder). When I cooked this meal I was in a mood to experiment. All the meals I had cooked from the different countries up until this time were full of dishes known to us. So I went out on a limb and picked dishes whose flavors would be very new. I went shopping for groceries at the local Japanese store, a delightful mom and pop store with a lot more than just groceries. My husband was travelling so it was just me and my daughter. Nori or seaweed is not completely new to me. I remember my father had brought home some nori from Japan when I was about 10 years old. I had bravely attempted to eat it in a rice roll as my Dad showed me. But I had not been able to eat it. Finally I cut little pieces of the nori and placed a couple in a ball of rice and was able to eat it. Let us just say that neither my taste buds nor my enthusiasm to try new foods has changed much over the years. My daughter didn't do much better than me. We did enjoy the rest of the meal.

As they say in Japan, Itadakimasu!

Here are the recipes for the dishes on the menu
And for dessert

Dashi (Kombu Stock)

This is a basic stock recipe that I got from here. Usually dashi is not a vegetarian stock. But this recipe uses kelp just kelp, a sea vegetable, to make the stock. Dashi is used in varying quantities in a lot of the Japanese dishes.


Heat a Kombu (kelp) leaf in 4 cups water. As the color of the water changes and well before the water boils remove the leaf.


Let the water heat some more then take it off the heat. This is the dashi or kombu stock that is used in a lot of Japanese recipes.

Matcha Cookies (Green Tea Cookies)

Japanese green tea cookies are made with a special green tea powder called Matcha. It is a very strong green tea. It is bright green in color as it is made from leaves that are grown in the shade and are not fermented. Did I mention this tea is pretty strong?


If brewed as tea this powder would make the tea quite bitter but as a flavoring in cookies it gives the cookie a beautiful color as well as flavor.


I went to the local Japanese store to buy this powder. The owner excitedly showed me an array of matcha flavored products that had just arrived from Japan. One of them were these matcha cookies and the most surprising was matcha flavored Kitkat. After trying these cookies I can understand why the flavor is so popular. Unfortunately, it was way too strong for me. I should have waited for my dad's visit before making them. He likes green tea, he would have liked them. I nibbled on half a cookie at a time and finished them. They had an addictive taste and I would have loved them had they not been as strong.

Recipe adapted from here
You will need
75 gm unsalted butter
65 gm sugar
pinch of salt
1 large egg yolk
120 gm all purpose flour
7 gm matcha powder
1/4 cup white chocolate chips

Beat softened unsalted butter in a mixing bowl. Add the sugar and beat until creamy. Add the salt and the egg yolk and beat well. Sift in the flour and matcha powder and form a soft dough. Fold in the chocolate chips. Roll into a cylinder, wrap in plastic and refrigerate overnight.


Preheat oven to 350 F. Prepare a baking with parchment paper. Remove the cylinder from the refrigerator. Using a sharp knife cut into 1/4 inch slices. Place the slices on the baking sheet and bake for 20-22 minutes.


Cool on a cooling rack.


Store in an air tight container when they are completely cooled.

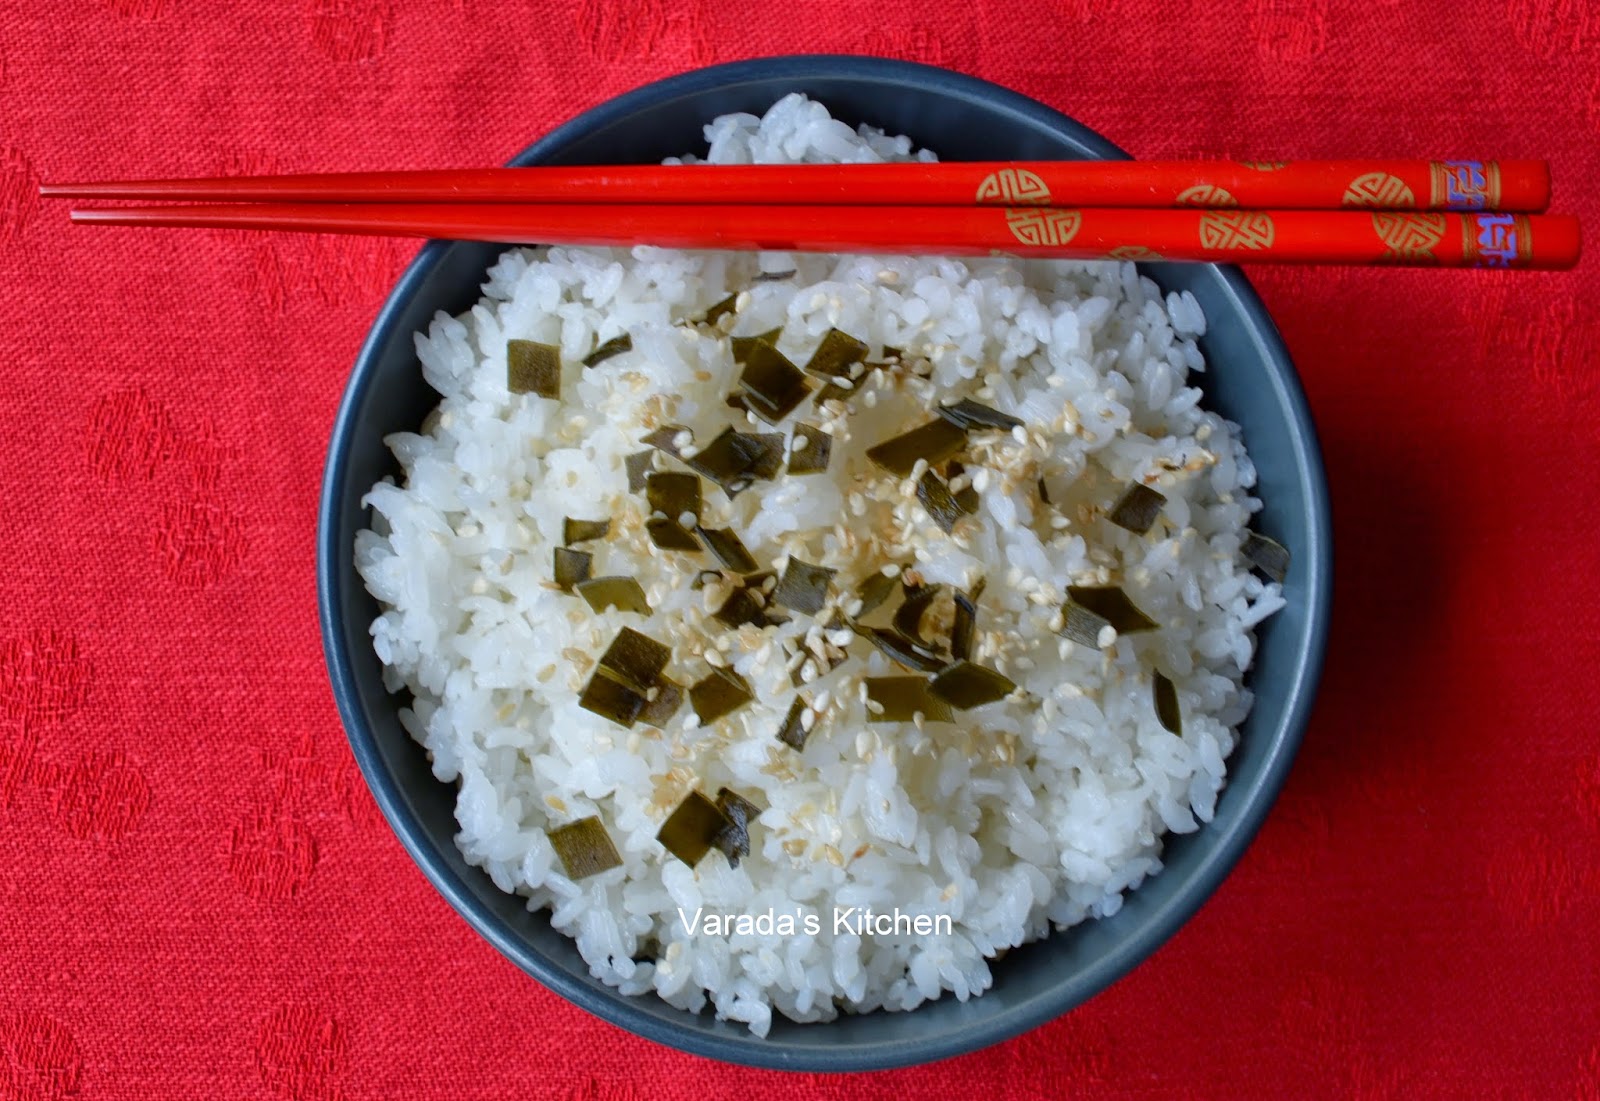
Gohan with Furrikake (Sticky Rice with Kelp topping)

Sticky rice is a staple in Japanese meals. I bought Japanese sushi rice from Whole Foods. Since it is sold in bulk I was able to buy a small quantity of 1 cup. The furrikake is made with kelp leaves with which dashi or stock has been prepared. This used kelp does not have a bitter or overpowering taste but it does smell of the sea.


This recipe serves two people.

Recipe adapted from here
For the Gohan
1 cup Japanese short grain rice (sushi rice)

Recipe adapted from here
For the Furrikake
1 tbsp. sesame seeds
1 sheet kombu (Kelp) that was used to make dashi
1 tsp. soy sauce
1 tsp. sugar

Washing and cooking rice the right way is a big deal when rice is the staple. To wash rice the Japanese way watch this video. I followed it to a T. In fact I now wash every grain and bean the same way.

Put the washed rice in a pan with a little over a cup of water.


Keep aside for an hour. The rice turns an opaque color.


Cover the pan and put it on high heat to bring the water to a boil. Lower the heat and let the rice cook for about 5 minutes. When the water is all gone turn off heat. Using a rice paddle or a wooden spoon turn the rice over in the pan. Cover and steam for another 5 minutes without heat.


The rice is ready. Mix all the ingredients for furrikake in a separate bowl and sprinkle it over the bowl of rice. Serve with Japanese side dishes.

Spinach Gomaae

Blanched spinach served with a sesame seed sauce garnished with roasted sesame seeds. I made this dish in a very very small quantity because I did not know if we would be able to eat it. Ability to eat spinach in this form is an acquired taste.


Since this small quantity was made as part of a Japanese meal we were able to mix it in the rice and finish it.

Recipe adapted from here
You will need
a handful of spinach
1 tbsp. sesame seeds, roasted and ground
1 tsp. soy sauce
1 tsp. sugar
1 tbsp. sesame seeds, roasted for garnish

Boil water in a pan. Add the spinach and let it cook for a minute. Remove the blanched spinach and drain. Meanwhile, mix the sesame powder with the soy sauce and sugar.
Cut the drained spinach into pieces, squeeze the water out completely and combine with the sesame seed mixture. Sprinkle with roasted sesame seeds and serve.

Negimiso Yaki Tofu (Grilled Tofu)

Tofu side dishes are added to Japanese meals to increase the protein content of the meal. This is a simple dish where tofu is sliced and grilled. Miso paste is applied to one side of the tofu to provide a strong flavor. This dish is typically served with Japanese rice.


I do not use tofu much in my kitchen. It is usually used as part of my trials with dishes from new cuisines. I also use it when I try to convert east Asian recipes to vegetarian ones. This is one of the free stand alone dishes I made with tofu. I picked up a tub of miso paste from the local Japanese store. The amount of choices were astounding. It took me 10 minutes to decided which tub would be best suited to our taste.

Recipe adapted from here
You will need
3.5 oz. firm Japanese tofu
4-5 tbsp. negimiso paste
2 tbsp. olive oil

For the negimiso paste
2 tbsp. green onion
1 tbsp. olive oil
1/4 cup smooth miso paste
1/4 cup dashi
1 tsp. sugar
1 tsp. soy sauce

Place the tofu under some weight to extract all the liquid from it. 

Meanwhile prepare the negimiso. Chop the green onion (not the green leafy part). Heat oil in a pan and add the chopped onion. Saute for a few minutes until the onion is translucent. Combine all the other ingredients and add them to the onions.


Keep cooking until the paste is the desired consistency.


Slice the tofu into 1/2 inch slices. Heat oil in a pan and place the tofu slices.


Brown both sides. Apply a little of the miso paste to one side of the slices. Flip them over to brown the paste.


Take off heat.


Negimiso yaki tofu is ready.

Nori Tomagoyaki (Seaweed Omlette)

Tomagoyaki is an omelette that is made in multiple layers. Each layer is a thin egg crepe cooked and then rolled up. A sheet of nori is rolled in the middle to add additional flavor.


I made this dish as part of a Japanese meal and I picked this dish because I wanted to try my hand at rolling the egg. It was fairly easy to do until the addition of the nori. The omlette from that point on had a mind of its own. Lack of a square flat pan may also have contributed to the rolling woes. The taste is definitely an acquired one.

Recipe adapted from here and here
You will need
2 eggs
1 tbsp. dashi (kombu stock)
1 tsp. sugar
1 sheet nori or seaweed
1 tsp. olive oil

You need a special pan to make this omelette. I used a stove top safe Corelle casserole dish.
Beat 2 eggs in a bowl. Add the sugar and dashi and keep aside. Cut a sheet of nori to fit about 3/4 of the inside of you casserole dish.


Heat olive oil in the dish and add a thin layer of beaten eggs to it. Let the egg crepe cook on low medium heat. Using a spatula roll the crepe to one side of the dish. Pour another thin layer of beaten eggs in the dish. Lift the dish to ensure the egg mixture covers the entire bottom of the dish including under the egg roll. Once the crepe is cooked roll the already prepared egg roll over the newly formed crepe.


Repeat with another layer of beaten eggs but this time add the sheet of nori on the top.


Roll it up as before. Put the last layer of beaten egg and roll it up.


Nori Tomagoyaki is ready.