Thursday, May 19, 2016

Ratatouille

With the arrival of spring the vegetable market is transformed with fresh bright colored vegetables. For me, the fresh local vegetables are always a delight. I always find myself buying lots of vegetables and figuring out different ways to use them up. Ratatouille is one such recipe and though it can be time consuming the flavors in the final result are amazing.


There are a lot of variations of this recipe and I tweaked it to suite our taste. I used red bell pepper instead of green. Also eggplant is one of the vegetables used in the preparation of Ratatouille. However, I am not a fan of eggplant so I skipped it.

You will need (6 servings)
5 small zucchini (I used organic so I could keep the peel)
2 tbsp. olive oil
2 red bell peppers
1 yellow onion
2 cloves garlic
5 small tomatoes
a handful cilantro (you can use parsley)
1 tbsp. basil
salt to taste

Wash and clean all the vegetables. Cut the zucchini along the long edge. Heat the oil in a pan and place a single layer of zucchini slices in it. When they turn brown flip the slices over. When browned on both sides take them out of the pan. Repeat for the remaining slices.


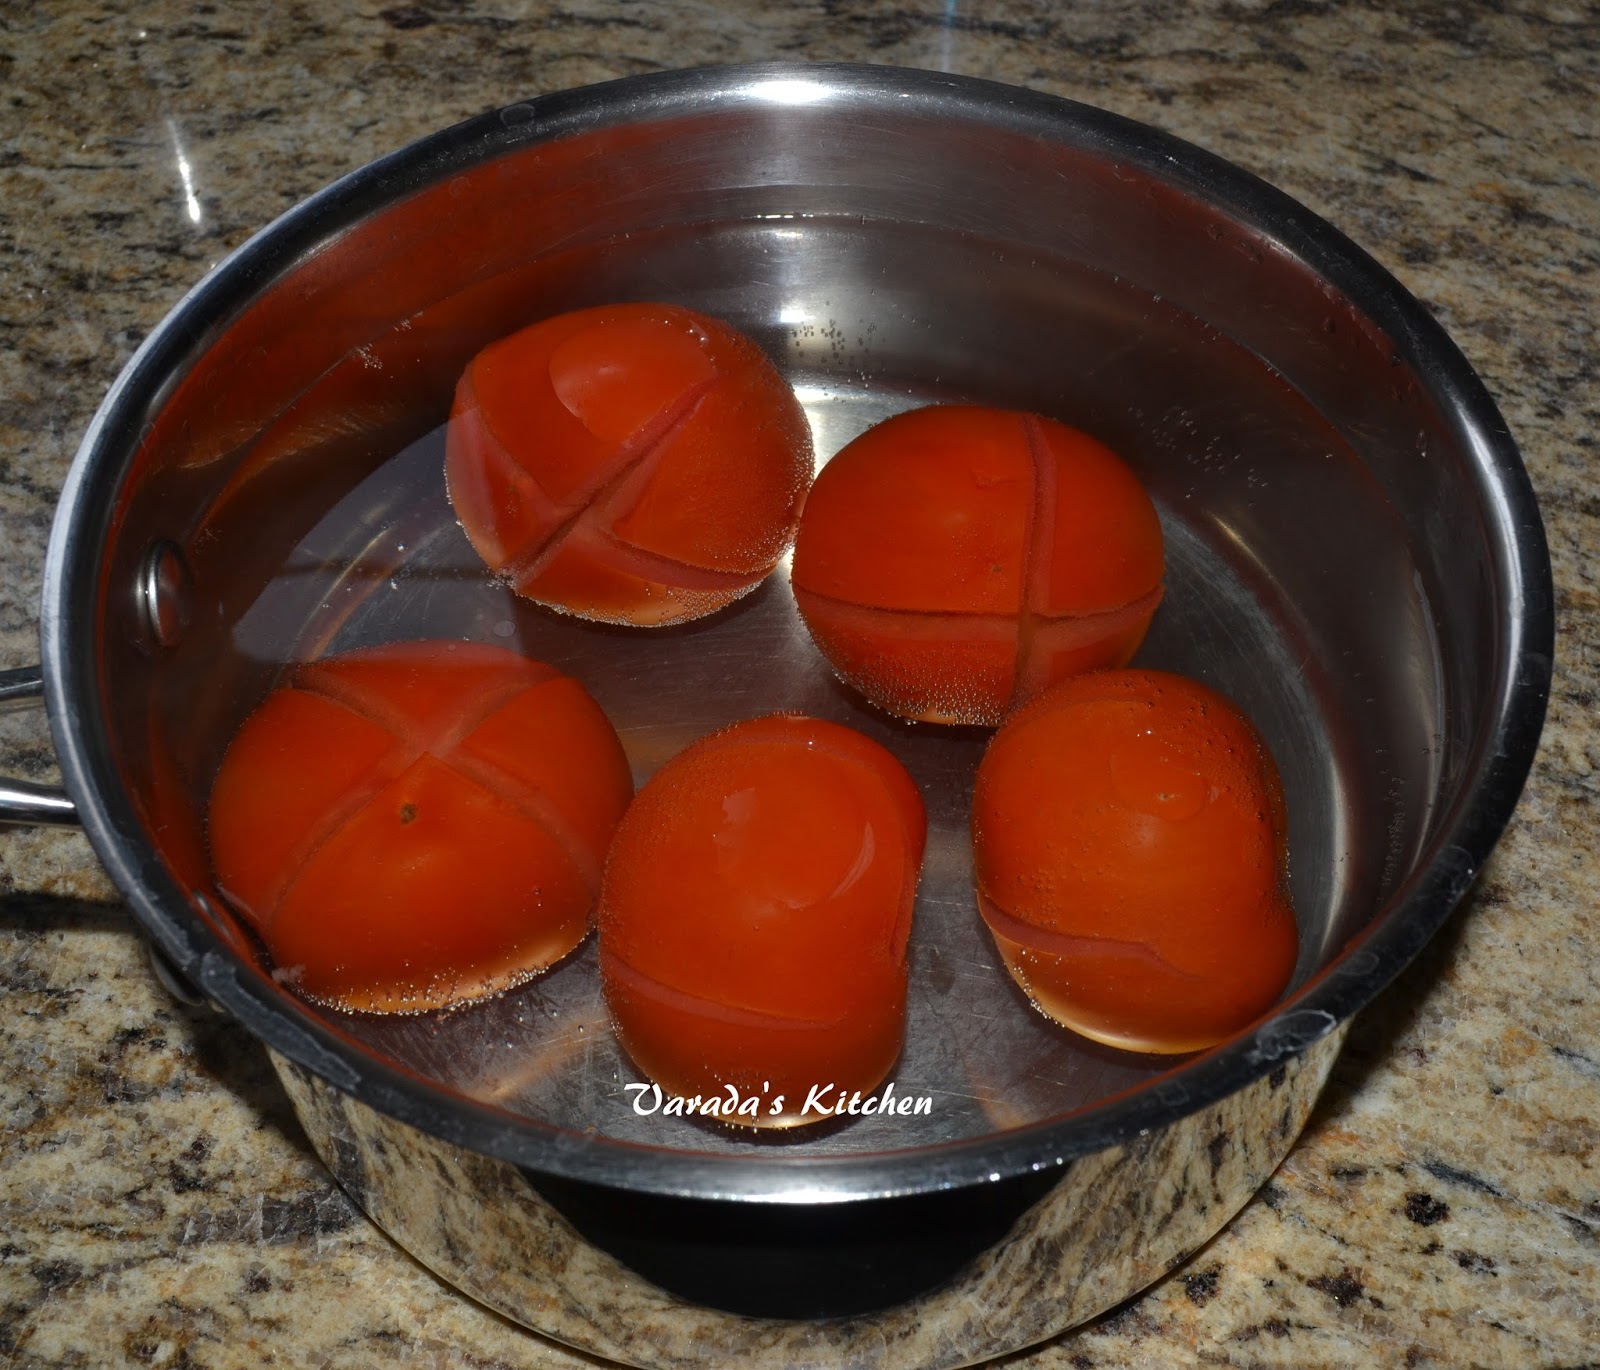
While the zucchini cook, heat water in a separate pan. Cut slits in the tomatoes and place them in the hot water for a few minutes. Drain and put the tomatoes in cold water. Then peel and chop them and keep aside.

Dice the onion and peppers into cubes. In the pan in which the zucchini were cooked add the onions and saute for a couple of minutes. Add the peppers and continue to cook.


Once the onions are peppers are cooked through add the tomatoes. Season with salt and allow the juices to flow. Dice the cilantro and add them to the mixture along with the basil. Turn off the heat and drain the juice. Reserve the juice. Separately, chop the zucchini.


In a casserole dish, place half the onion and pepper mixture. Layer half the zucchini over it. Then place the remaining onion and pepper mixture. Place the remaining zucchini as the last layer. Pour the reserved juice over the top. Place the casserole on medium/low heat and allow the juice to thicken. Occasionally collect and pour the juice over the top of the vegetables. Once the juice is thickened turn off the heat and serve hot.


Enjoy!

Wednesday, May 18, 2016

Socca

Socca is a French crepe made with chickpea flour. I found this very interesting because it is so similar to the Maharashtrian dhirdi. The big difference is that this crepe is cooked under the broiler as opposed to the stove top. The thickness of the crepe can vary and I tried different thickness. We liked the medium thickness better than the thin crepes.


I sourced the flour from Whole Foods and bought just enough for a very small batch. I used thyme and oregano along with some paprika to spice it up. The web is flooded with a lot versions of the recipe so not sure which is the original. I referred to this one and this one.

You will need (3 crepes)
1 cup chickpea/garbanzo flour
1 tsp. oregano
1 ts. thyme
paprika to taste
salt to taste
1 cup water
1 tsp. olive oil

In a bowl add all the dry ingredients along with the water. Whisk to make a batter. Keep it aside for 30-45 minutes.


Place an iron skillet on the top rack of the oven and switch on the broiler. Once the oven is heated take the pan out with a mitten and place it on the stove top. Add a ladle of batter and swirl the pan to coat. Drizzle a few drops of oil along the sides.


Place the pan back in the broiler and let the crepe cook for about 5 minutes. Watch the broiler to prevent burning. When the top is cooked flip it over and cook the other side.


When both sides are cooked take the pan out of the oven. Slide the socca out to a plate and repeat for the remaining batter. I enjoyed eating this crepe on its own.


Enjoy!


This is my entry for week three, day three of BM #64 for the theme European cuisine (French). Check out the Blogging Marathon page for the other Blogging Marathoners doing BM#64.

Tuesday, May 17, 2016

Potato Sarladaise

Potatoes are a huge favorite in my house. My daughter loves them in all shapes and form so I am always trying out new things to do with potatoes. This one is a French classic and popular as street food. It has three main ingredients, potatoes, garlic and fat. I used olive oil as the fat. The recipe I used as a guide is here.


I made these as a backup side when I was experimenting with another recipe. I knew my daughter would love these and she was visiting from college. Not only did she love it, she asked if there was more that she could take with her to her dorm. I actually made a second batch so she could have some to take with her.

You will need (for 2 servings)
2 medium potatoes
1 tbsp. olive oil
1 clove garlic
1/4 onion
2-3 springs cilantro (you could use parsley)
salt to taste

Wash and peel the potatoes. Cut into thin circles or semi-circles. Heat oil in a pan and add the sliced potatoes. Sprinkle salt to taste. Cook until tender. In the meantime, peel and crush the clove of garlic. Dice the onion. Wash and mince the cilantro. Add the onion, garlic and cilantro to the pan of potatoes. Saute until the onions are cooked through. Turn off heat.


Enjoy!

Thursday, May 12, 2016

Kelyachi Koshimbir / Banana Salad

This recipe is an easy and quick. A sweet and sour salad made with ripe bananas and yogurt. It adds a unique flavor to the meal and is served as a side to the poli/flatbread. If you are looking for something to round out the menu, this is perfect.


There is no real recipe here, just a bunch of ingredients thrown together. Bananas and yogurt are usually found in the house. And the sweet and sour taste is a welcome change. The first time I made this my daughter said she would pass on it. I insisted she try it, which she did. And she had seconds. Banana and yogurt do not do much to add color but the combination is big on flavor.

You will need (4 servings)
2 ripe bananas
1/2 cup yogurt
1 tsp. sugar
salt to taste

Mash the bananas. You may also slice them if you prefer. Combine with all the other ingredients. Do not make ahead of time. Serve immediately.


Enjoy!


Wednesday, May 11, 2016

Dashmi / Poli with milk / Flatbread with milk

Dashmi is a variation of the everyday poli or bhakri. The dough is mixed with milk instead of water. The resultant bread is super soft and tastes great. To make this vegan I used soymilk.


I made this as a special treat when my daughter was visiting from college. If you make bhakri instead of poli, you can do the same with the bhakri flour. Just mix the dough using milk instead of water.


The real challenge here is to roll out perfect circles of dough after you have folded it into a triangular shape. It takes practice and the initial trials can resemble shapes of countries on the map. But if you stick to it you will get a hang of how to roll out perfect circles.

You will need (15 dashmi)
3 cups whole wheat flour
1 1/2 cups warm soymilk (approximately)
1 tbsp. oil

Place the wheat flour in a bowl. Using milk as needed bind the flour into a soft dough. Add a little milk at a time, you may not need all the milk. When done pour a teaspoon of the oil over the palm of you hand and knead the dough for a minute. Keep aside for 15-20 minutes.

Heat a flat griddle pan on medium heat, I use Lodge cast iron pan. While the pan heats up prepare the work surface. You will need a flat surface to roll the dough and a rolling pin. Keep a little wheat flour handy to sprinkle around the surface when the dough is rolled. In a bowl place the remaining oil and place it on the work surface. Divide the dough in lemon sized portions.


Work with one portion at a time. Roll the ball of dough in the flour, tap out the excess and place the ball on the rolling surface. Roll out to a little bigger than the palm of you hand.


Dunk the tips of your finger in the bowl of oil and apply it to half of the rolled dough. Fold the other half over it making a half moon. Apply the remaining oil from your fingers to what is now the top and fold one more time to give you a triangular shape. Roll this in flour, tap the excess and place it on the rolling surface.


The challenge is to convert this to a circle. Roll out the dough to a thin 1/4 inch thick disc shaping it as close to a circle as you can. Place this one the hot griddle. While you work on rolling the next portion of dough keep an eye on the one placed in the pan. As soon as you see it puffing up turn it over.


Let it cook on the second side. Turn over again. You can use a spatula to plug any steam that is trying to escape allowing the bread to puff up and cook completely making sure it does not burn.


Take it off the heat and continue to work through all the portions of dough.


Enjoy as part of you meal with a side of vegetable!


Note:
* the presence of milk makes it want to burn quickly. Make sure you turn it over or take it off the heat before it burns
* Adjust the heat under the pan such that it take about half a minute for the bread to cook on each side. Lower or turn up heat as needed. Once you get to the optimum you can leave the setting unchanged.


This is my entry for week two, day two of BM #64 for the theme 3 ingredient recipe.

Thursday, May 5, 2016

Swedish Cinnamon Knots / Kanelbullar

A long time ago I bookmarked the recipe for cinnamon rolls. Instead I tried this beautiful bread. Last week I finally decided to make the cinnamon rolls. I am very happy with the proportion of sugar in this recipe and will be making this one again.


My original plan was to make the cinnamon rolls. Then I saw this video and really liked what she did there. So I made knots instead of rolls. It does not change the taste just the presentation.

You will need (for 6 small buns)
2.75 tbsp. butter
1/2 cup milk
1 cup + 2 tbsp. flour
a pinch salt
1 1/2 tsp. yeast
2 tbsp. sugar
1/2 tsp. cardamom powder

For the filling
2.5 tbsp. butter
2.5 tbsp. sugar
1/4 tsp. cinnamon powder

sugar pearls
milk to brush the top or use an egg diluted with a little water

In a large bowl melt the butter and the milk. Sift in the flour and salt. Add the yeast, sugar and the cardamom powder. Mix into a soft sticky dough. Work the dough kneading it until it is soft and elastic. Cover and keep aside until it doubles in volume, about an hour.

In the meantime, in a bowl soften the butter for the filling. In a separate bowl mix the sugar and cinnamon powder. Prepare a baking sheet and cover with parchment paper. Keep aside. When the dough has risen, transfer it on a floured flat surface. Light flour the rolling pin and roll out the dough to a large long rectangle.


Brush the dough with the butter. Sprinkle the sugar and cinnamon powder mixture over the top.


Fold the rectangle along the long side in thirds. Fold the other side over the first. Press down a little, roll with a pin if needed.


Cut 2 - 2 1/2 inch portions along the length of the dough. I got six portions. Next cut a slit half way up in each of the portions as in the picture.


Work with one portion at a time. Gently tug the two legs of the dough while holding to the top. Start twisting them in opposite directions.


When you can twist no more fold them up to the top and tie them in a knot. Place the knot over the base. Move the bun to the baking sheet and repeat with the other five portions.


Cover with a tea towel and allow the buns to rise again for another 30 minutes. Preheat oven to 450 F while the buns are rising. Brush the top with milk or egg wash. Sprinkle sugar pearls and bake in the preheated oven for 8-10 minutes. I did not have any sugar pearls so I skipped the step.


Enjoy!


Wednesday, May 4, 2016

Empanada Gallega (With Vegetarian Filling)

The name Empanada or wrapped dough reminds me of the classic half moon shape. This recipe is a variation of the Empanada from Galicia. It is like a pie with dough as the base and as the top.


My original plan was to use paneer, my go to substitute. It adds flavor and is filling too. But that did not happen so the filling was all vegetables. My daughter said it was like eating bread with vegetables. I guess next time I will make it a point to add paneer.

You will need
400 gm whole wheat flour (I used whole white wheat flour)
6 gm salt
5 gm yeast
15 gm olive oil + a little more to brush the top
200 gm water

For the filling
3 organic zucchini
1 carrot
2 scallion (both white and green)
1/2 red bell pepper (you can use 1 whole)
1 tbsp. olive oil
salt and pepper to taste
spices of your choice (I used cumin and coriander powder)
cayenne pepper to taste (optional)

In a large bowl add all the dry ingredients followed by the wet ingredients and combine to form a dough. Cover with cling wrap and allow it to rise.


Meanwhile dice the vegetables and saute on medium high heat until cooked but still crunchy. Add the remaining ingredients and continue to cook on high heat for a couple more minutes. Turn off the heat and allow the mixture to cool.


Preheat oven to 350 F. Prepare a baking sheet 9 by 13 inches and place a parchment paper in it. Transfer the ball of dough to a flat floured surface and cut into two slightly unequal portions. Reserve the smaller portion in the bowl covered in cling wrap.


Roll the larger portion into a large rectangle until it is the same size as the baking sheet. Transfer it to the sheet. Now place the filling in the center and spread it on the dough leaving an inch on all sides. Now place the reserved dough on the rolling surface and cut out a fifth of the dough. Keep the small piece aside. Roll the larger piece of dough until it is larger enough to cover the filling. Place it over the filling.


Now for each of the sides, roll up the spare inch of dough where no filling was placed. Press it over the top piece. Repeat for all sides. Using a fork press down where the two sheets meet to seal.


Using the palm of your hand roll the piece of remaining dough to form a slender rope. Cut it as you please an use to decorate the top. Using a sharp knife cut slits in the top sheet to allow air to escape.


Brush the top with some oil and place the baking sheet in the oven for 40-50 minutes.


Enjoy!


Tuesday, May 3, 2016

Lattice Top Stuffed Bread

I love to play with dough and create different shapes. Some of them are authentic recipes made for centuries and the others are my crazy ideas. This one was inspired by a picture I saw on Pinterest. I used a simple filling of mixed vegetables and used whole wheat bread for the dough. The lattice pattern was what I was after. It was an entertaining half hour and the result was tasty dinner.


I made this bread a while back but never got around to posting it. Soon after I made it my daughter announced she was done with stuffed bread and could I not make it again. Without my most ardent fan I had to stop my experiments. Now several months later she said I never make stuffed bread anymore. And so once again I am back to my crazy shapes. Her reaction may be the result of eating dorm food. That food is known to make home cooked food taste a lot better. But I am not asking, as long as she is willing to eat it, I am willing to make it.


You will need
For the shell
250 gm whole wheat flour
4 gm salt
3 gm yeast
10 gm olive oil
110 gm water

For the filling
2 medium potatoes
1 large carrot
1 tbsp. olive oil
a few springs cilantro
salt and black pepper to taste
spices of your choice (I used a tsp. each oregano and basil)

In a large bowl add all the dry ingredients followed by the wet ingredients and combine to form a soft, tacky dough. Knead for about 5 minutes or until the dough is soft and shiny. Cover the bowl with cling wrap and leave aside for an hour to let it rise.

While the dough is rising, peel the potatoes and carrot. Dice into small cubes. Heat the oil in a pan and add the vegetables. Saute until tender. Add the remaining ingredients, turn off heat and allow it to cool completely.

When the dough rises to twice its volume transfer it to a flat floured surface. Using a rolling pin roll the dough into a large rectangle. Leaving a good 5 inches in the middle cut the sides into strips as show in the picture below. The strips should be attached to the center. Now place the cooled filling in the center of the rolled dough.


Now for the fun part. Start at one end. Fold the dough over and tuck the ends so it looks neatly folded in. Now fold in a strip from one side and then fold in a strip from the other side over the first one. Continue folding in the strip from alternate sides making sure you go over and under the strip already placed over the filling. It seems a lot harder than it really is.


Continue folding the strips until you reach the end. Finally tuck in the end piece under the last couple strips. If you did a better job of tucking in the ends you would get a better rounded edge than I did in the picture below.


Preheat the oven to 350 F. Prepare a baking sheet by placing parchment paper over the top. Transfer the finished piece to the baking sheet, brush it with a little milk/water solution and let it rest for about 10 minutes.


Bake in the preheated oven for 20-30 minutes or until the bread is cooked through.


Enjoy!