Last week I was very surprised to find that I had not posted any green lentil recipe in this space. Green lentils in my opinion are the most flavorful of the lot. I use green lentils frequently and usually in a simple preparation like the one I am sharing today. The day I cooked this my husband had lunch and dinner plans at work and I was cooking for one. I had bought some green lentils during the weekend grocery shopping and decided to make this recipe. It is a one pot meal.
I have used feta cheese in all three recipes this week. I rarely use feta cheese though we all like it a lot. Crumbled feta is usually available in tubs and 1-2 tablespoons of it goes a long way. Once you get a tub you have a couple weeks to finish it so I use it as garnish on everything.
I always keep a small stock of green lentils in the pantry. In fact I usually have all varieties, yellow, green, orange and black in the pantry as we like them all. If you have not tried the green lentils yet you should try this simple green lentils with mixed vegetable and feta. Lentils taste best the day they are cooked. Green lentils take longer to cook than the orange ones but they do not have to be pressure cooked. I usually soak them in a little hot water and they soften up. I then cook them with the rest of the ingredients in a pan on the stove top.
You will need (2 large servings)
1 cup dry green lentils
1/2 cup onion, finely diced
1/2 cup carrots, finely diced
1/2 cup red bell pepper, finely diced
1 large handful spinach or arugula or kale, diced
2 tsp. oil (I used olive oil, any vegetable oil will do)
2 tbsp. feta cheese
salt and pepper to taste
1 tsp. paprika (adjust to taste)
1 tsp cumin coriander powder (optional)
1/2 cup warm water + 2 cups water to soak lentils
Wash and rinse the lentils. Boil 2 cups of water in the microwave in a microwave safe cup. I use the large measuring cups. Add the water to the lentils and let them soak for about 15 minutes while you prep the vegetables as indicated in the ingredient list.
Heat oil in a pan and add all the vegetables. Saute for a couple of minutes and add the lentils. Add the warm water and let the lentils cook covered on medium heat for about 5-10 minutes until tender. Add salt and pepper to taste, paprika and cumin coriander powder. Turn off the heat after another couple minutes.
Enjoy!
Tuesday, February 5, 2019
Monday, February 4, 2019
Roasted Winter Vegetables
I frequently bake a medley of vegetables as a snack or a side. Most combinations do not make it to the blog. This is a very rustic flavorful mix so I wanted to record it. I made it on a weekend when my daughter was visiting and we all enjoyed it a lot. Next time you see these vegetables at the grocery try roasted winter vegetables.
It is said you should try to eat five different colors everyday. This one vegetable mix will suffice to provide all the colorful foods for a day. I had leftovers so I used it in a winter warm salad with chickpeas. A little lime juice and paprika is all that it needed. That was my very filling lunch.
This combination tastes great on its own as a snack. You could add it to noodles as I have done here with a different set of vegetables. Except for the yellow squash which I added for color the other vegetables all take a while to cook. Make sure all the chunks are on the sheet in a single layer.
You will need
An assortment of vegetables. I used
Red and Purple mini potatoes
Orange Sweet Potato
A Fuji Apple
A bunch of Green Beans
A Yellow Squash
1 tbsp olive oil
salt and pepper to taste
Preheat oven to 425 F.
Chop the vegetables into chunks. Combine with oil, salt and pepper and spread in a single year on a baking sheet.
Bake for 20-30 minutes until vegetables are tender.
Enjoy!
It is said you should try to eat five different colors everyday. This one vegetable mix will suffice to provide all the colorful foods for a day. I had leftovers so I used it in a winter warm salad with chickpeas. A little lime juice and paprika is all that it needed. That was my very filling lunch.
This combination tastes great on its own as a snack. You could add it to noodles as I have done here with a different set of vegetables. Except for the yellow squash which I added for color the other vegetables all take a while to cook. Make sure all the chunks are on the sheet in a single layer.
You will need
An assortment of vegetables. I used
Red and Purple mini potatoes
Orange Sweet Potato
A Fuji Apple
A bunch of Green Beans
A Yellow Squash
1 tbsp olive oil
salt and pepper to taste
Preheat oven to 425 F.
Chop the vegetables into chunks. Combine with oil, salt and pepper and spread in a single year on a baking sheet.
Bake for 20-30 minutes until vegetables are tender.
Enjoy!
Sunday, January 20, 2019
Chocolate Raisin Chewy Cookies
My daughter is home for the long weekend as we have Monday off - Martin Luther King day. She will leave for school some time tomorrow and I am packing all kinds of goodies for her. I may have to make a second batch of these if there are not enough left by tomorrow.
I do not make cookies often but there are a couple of recipes we like and when I do make the cookies I stick to those recipes. Today I wanted to bake cookies but wanted to try something different. I had cocoa but no chocolate chips. I had raisins so I tried these Chocolate and Raisin chewy cookies using the base cookie recipe I follow. The batter is gooey and sticky from the cocoa powder but on the thicker side. The cookies do not spread much in the oven. The trick is to take them out when they are still soft so you get that soft chewy cookie we all love.
You will need (about 18)
1/4 cup butter, softened
1/2 cup cane sugar (use any granulated sugar you have on hand)
1 egg
1/2 cup flour (all purpose or whole wheat)
1/2 cup cocoa
1 tsp. baking powder
~1/8 sparse tsp salt
1/2 cup raisins
Preheat the oven to 350 F.
Cream the softened butter in a bowl. Mix in the sugar. Now break an egg in the bowl and beat until the mixture is well combined. Sift in the flour, cocoa, baking powder and the salt. Mix everything together. Finally mix in the raisins.
On a baking sheet drop a tablespoon on cookie batter at a time 2 inches apart. You may use a parchment paper or directly place the batter on the baking sheet.
Bake for about 12-15 minutes. The cookies should be soft when they are taken out of the oven. Cool and a rack.
Enjoy!
I do not make cookies often but there are a couple of recipes we like and when I do make the cookies I stick to those recipes. Today I wanted to bake cookies but wanted to try something different. I had cocoa but no chocolate chips. I had raisins so I tried these Chocolate and Raisin chewy cookies using the base cookie recipe I follow. The batter is gooey and sticky from the cocoa powder but on the thicker side. The cookies do not spread much in the oven. The trick is to take them out when they are still soft so you get that soft chewy cookie we all love.
You will need (about 18)
1/4 cup butter, softened
1/2 cup cane sugar (use any granulated sugar you have on hand)
1 egg
1/2 cup flour (all purpose or whole wheat)
1/2 cup cocoa
1 tsp. baking powder
~1/8 sparse tsp salt
1/2 cup raisins
Preheat the oven to 350 F.
Cream the softened butter in a bowl. Mix in the sugar. Now break an egg in the bowl and beat until the mixture is well combined. Sift in the flour, cocoa, baking powder and the salt. Mix everything together. Finally mix in the raisins.
On a baking sheet drop a tablespoon on cookie batter at a time 2 inches apart. You may use a parchment paper or directly place the batter on the baking sheet.
Bake for about 12-15 minutes. The cookies should be soft when they are taken out of the oven. Cool and a rack.
Enjoy!
Friday, January 18, 2019
Oatmeal Chia Peanut Butter Energy Balls
Today I am posting a recipe with a combination of flavors mixed into a small ball. Rolled oats and chia seeds combined with peanut butter, coconut flakes and honey make a delicious snack. This recipe is quick to put together and is the perfect mid morning snack. Just one of these energy balls and you are good to go for a couple of hours. Energy balls have been on my list of recipes for the blog for a long time. I am glad I was finally able to post it.
When my daughter came home for winter break she brought home leftover jars of honey and peanut butter. The raw unfiltered honey had turned to a soft solid mass as the temperature had dropped. And unlike the processed peanut butter with loads of additives, the organic peanut butter she had was just peanut paste with very little salt. I had the rest of the ingredients on hand. The oatmeal chia peanut butter energy balls were ready in no time.
You will need (for 16 balls)
1 cup old fashioned rolled oats
1/3 cup dry coconut flakes
2-3 tbsp. chia seeds
3 tbsp. maple syrup
3 tbsp. organic peanut butter
1 tsp salt (optional)
Lightly roast the oats and coconut until warmed. Run through a food processor to break down into small pieces. Do not blend to a powder.
Combine with all the ingredients in a bowl. Adjust honey and peanut butter if needed. Take about a small lime size ball of the mixture and using your palm form into a ball. Repeat for the rest of the mixture. You can store it for a week or two in the refrigerator.
Enjoy!
When my daughter came home for winter break she brought home leftover jars of honey and peanut butter. The raw unfiltered honey had turned to a soft solid mass as the temperature had dropped. And unlike the processed peanut butter with loads of additives, the organic peanut butter she had was just peanut paste with very little salt. I had the rest of the ingredients on hand. The oatmeal chia peanut butter energy balls were ready in no time.
You will need (for 16 balls)
1 cup old fashioned rolled oats
1/3 cup dry coconut flakes
2-3 tbsp. chia seeds
3 tbsp. maple syrup
3 tbsp. organic peanut butter
1 tsp salt (optional)
Lightly roast the oats and coconut until warmed. Run through a food processor to break down into small pieces. Do not blend to a powder.
Combine with all the ingredients in a bowl. Adjust honey and peanut butter if needed. Take about a small lime size ball of the mixture and using your palm form into a ball. Repeat for the rest of the mixture. You can store it for a week or two in the refrigerator.
Enjoy!
Thursday, January 17, 2019
Millet, Chickpea and Buckwheat Flour Crackers
I buy whole millets, buck wheat groats, oats and anything else that catches my eye in the Whole Foods bulk bins. I lightly roast, cool and grind each one to a fine powder in my Vitamix dry grinder. I combine all the flours and use as needed mostly for crepes/dhirdi. Lately I have used it to make crackers. When I started experimenting with different flours for crackers this mixed flour seemed like a good candidate. Last month I posted the recipe for Besan or Bengal gram flour crackers and Semolina crackers. This post was supposed to be the third of that series but for some reason I forgot to schedule it to post. So I am posting it today.
I blog with a group of fellow bloggers for a monthly event called Blogging Marathon. Posts are based on themes and one of the themes I picked this month is Elevenses. A quick google search says Elevenses is a meal from the Lord of the Rings. I have read all the books but I could not remember Elevenses. Luckily for me I now have the books on Kindle and there is a search option. The only reference was to the 'expected party' but even that was so vague I wondered why the series show up in a google search for Elevenses. Then I found it has to do with the movies and not the books. As I am a fan of the books let us leave it at that.
So what is Elevenses? Is it food eaten at eleven? The answer is yes and no. If you lived and followed the meal pattern of the country in which Elevenses originated then food you ate at eleven would be Elevenses. This would include a very light snack with a drink like tea or coffee. So would it be okay to have this meal at ten? Of course! Elevenses is really a light mid morning snack. A snack that keeps you going till lunch but is light enough to not ruin your appetite for lunch. This week I will post some light snacks.
You will need (45 crackers)
1 cup flour (I used combination of millets, buckwheat and oats)
1 cup sourdough starter 100%
1 tsp salt
1 1/2 tsp paprika
1 tbsp. dried basil or any combination of dried herbs
2 tbsp. oil (I used olive oil)
Combine all the ingredients in a bowl and knead into a ball of dough. Cover and refrigerate for an hour.
Preheat the oven to 400 F. On a piece of parchment paper roll out the dough into a think sheet. Using a pizza cutter or a specialized roller cut into the desired size. I cut the dough into rectangles.
Bake in the preheated oven for 20 minutes. Cool on a cooling rack.
Enjoy!
I blog with a group of fellow bloggers for a monthly event called Blogging Marathon. Posts are based on themes and one of the themes I picked this month is Elevenses. A quick google search says Elevenses is a meal from the Lord of the Rings. I have read all the books but I could not remember Elevenses. Luckily for me I now have the books on Kindle and there is a search option. The only reference was to the 'expected party' but even that was so vague I wondered why the series show up in a google search for Elevenses. Then I found it has to do with the movies and not the books. As I am a fan of the books let us leave it at that.
So what is Elevenses? Is it food eaten at eleven? The answer is yes and no. If you lived and followed the meal pattern of the country in which Elevenses originated then food you ate at eleven would be Elevenses. This would include a very light snack with a drink like tea or coffee. So would it be okay to have this meal at ten? Of course! Elevenses is really a light mid morning snack. A snack that keeps you going till lunch but is light enough to not ruin your appetite for lunch. This week I will post some light snacks.
You will need (45 crackers)
1 cup flour (I used combination of millets, buckwheat and oats)
1 cup sourdough starter 100%
1 tsp salt
1 1/2 tsp paprika
1 tbsp. dried basil or any combination of dried herbs
2 tbsp. oil (I used olive oil)
Combine all the ingredients in a bowl and knead into a ball of dough. Cover and refrigerate for an hour.
Preheat the oven to 400 F. On a piece of parchment paper roll out the dough into a think sheet. Using a pizza cutter or a specialized roller cut into the desired size. I cut the dough into rectangles.
Bake in the preheated oven for 20 minutes. Cool on a cooling rack.
Enjoy!
Saturday, January 5, 2019
Spicy Hot Chocolate
Hot chocolate is a very popular recipe with a lot of variations. I don't make hot chocolate often but I wanted to try that chili pepper with hot chocolate and hence this recipe. I made two cups, one for my daughter and one for me. To my cup I also added a pinch of cinnamon. It was the perfect drink for a cold winter afternoon.
Before posting this recipe I checked what I already had on the blog. My first Hot Chocolate post has an intro about snuggling with a blanket, book and cat, except my cat would never cooperate. That year was 2014 and we had a new 3 year old rescue Buttercup who refused to sit on our lap for more than a few seconds. Interestingly four years with us has changed her completely. She is now a lap cat who calls me to sit on the couch so she can nap on my lap. Now on a cold or rainy day I can say I snuggle under a blanket with this hot chocolate, a book and my cat.
I added chocolate chips as well as cocoa powder to enhance the flavor because I happened to have both at home.
You will need (for 2 cups)
2 tbsp. mini chocolate chips
2 tbsp. sparingly filled cocoa powder
2 tbsp. sugar
1/4 tsp. paprika (adjust based on your heat tolerance)
1 1/2 cups soymilk
1 pinch of cinnamon (optional)
Combine all the ingredients in a pan. Heat the pan on medium heat whisking to ensure the chocolate and milk are thoroughly combined and do not burn. When the milk is heated through but not boiling turn off the heat.
Enjoy!
Before posting this recipe I checked what I already had on the blog. My first Hot Chocolate post has an intro about snuggling with a blanket, book and cat, except my cat would never cooperate. That year was 2014 and we had a new 3 year old rescue Buttercup who refused to sit on our lap for more than a few seconds. Interestingly four years with us has changed her completely. She is now a lap cat who calls me to sit on the couch so she can nap on my lap. Now on a cold or rainy day I can say I snuggle under a blanket with this hot chocolate, a book and my cat.
I added chocolate chips as well as cocoa powder to enhance the flavor because I happened to have both at home.
You will need (for 2 cups)
2 tbsp. mini chocolate chips
2 tbsp. sparingly filled cocoa powder
2 tbsp. sugar
1/4 tsp. paprika (adjust based on your heat tolerance)
1 1/2 cups soymilk
1 pinch of cinnamon (optional)
Combine all the ingredients in a pan. Heat the pan on medium heat whisking to ensure the chocolate and milk are thoroughly combined and do not burn. When the milk is heated through but not boiling turn off the heat.
Enjoy!
Friday, January 4, 2019
Creamy Tomato Soup
When the mercury drops soup and bisque make their way to the dinner table. With the winter storm keeping temperatures in the 30s for the last few days, I decided we needed thick creamy Tomato Bisque, the old family favorite. This soup never fails to provide comfort on a cold or rainy day. We all love the strong garlic flavor in the soup. Serve it with a savory scone or bread.
I was surprised to find that I did not have a tomato soup in the blog especially as this is one of our favorites. This soup has a rich creamy texture and a lovely orange color. I used to make it with canned plum tomatoes for their delicious citrus flavor until I found organic tomatoes that provide the same taste. The regular grocery store tomatoes taste very bland.
I used almond milk in my recipe. You can skip the milk and the soup will taste just as delicious.
You will need
1 tbsp. olive oil
1/2 onion, chopped
2 pods garlic, minced
3 large Plum Tomatoes, diced
1 tbsp sugar
1 tsp. salt
1 tsp. paprika
1 1/2 tbsp. almond milk
Heat oil in a pan and add the chopped onions. Saute for a few minutes until they are cooked. Add the minced garlic and saute for a few minutes. In the meantime chop the tomatoes and them to the pan. Add the sugar, salt and paprika. Simmer for about 10-15 minutes until the tomatoes are cooked and thickened. Take off heat and blend to a puree. Return to the pan and simmer for about 3-4 minutes. Turn down the heat and add the cream. Turn off the heat after another minute. Optionally garnish with cream.
Serve hot with bread or savory scones. Enjoy!
I was surprised to find that I did not have a tomato soup in the blog especially as this is one of our favorites. This soup has a rich creamy texture and a lovely orange color. I used to make it with canned plum tomatoes for their delicious citrus flavor until I found organic tomatoes that provide the same taste. The regular grocery store tomatoes taste very bland.
I used almond milk in my recipe. You can skip the milk and the soup will taste just as delicious.
You will need
1 tbsp. olive oil
1/2 onion, chopped
2 pods garlic, minced
3 large Plum Tomatoes, diced
1 tbsp sugar
1 tsp. salt
1 tsp. paprika
1 1/2 tbsp. almond milk
Heat oil in a pan and add the chopped onions. Saute for a few minutes until they are cooked. Add the minced garlic and saute for a few minutes. In the meantime chop the tomatoes and them to the pan. Add the sugar, salt and paprika. Simmer for about 10-15 minutes until the tomatoes are cooked and thickened. Take off heat and blend to a puree. Return to the pan and simmer for about 3-4 minutes. Turn down the heat and add the cream. Turn off the heat after another minute. Optionally garnish with cream.
Serve hot with bread or savory scones. Enjoy!
Thursday, January 3, 2019
Blueberry and Brie Scones
This is my first post of the new year so let me take this opportunity to wish you all a very happy and prosperous 2019. The year here has started with a winter storm. While we got none of the sleet and snow, the temperatures have plummeted into the low to mid 30s (F). This is the time when everyone wants hot drinks and piping hot food to keep warm. Scones are one such recipe. They are great all year around but are especially nice in winter when eaten hot out of the oven. I have a couple of scone recipes on this space but today I have a unique combination of flavors.
Our home is always stocked with fruit. Some blueberries were really ripe and needed to be used up. I decided to make blueberry scones. But then I also had some left over Brie in the refrigerator and so figured I could use that too. On a whim I decided to google if anyone had been adventurous enough to try the two together and I was pleasantly surprised. A lot of people have tried this combination. This recipe caught my eye. Instead of using brie as a filling after baking the scones, it used the brie in the dough. If you have used brie before you will know that it melts well and does not have a savory or sweet taste. This makes it ideal for all kinds of recipes. This is my experiment with blueberries and brie in scones. I just added these ingredients to my original scone recipe and the results were awesome! This is a keeper.
1/2 cup whole wheat bread (I used King Arthur white whole wheat flour)
1/2 cup all purpose flour
1/2 tsp. salt
1/2 tbsp. baking powder
2 tbsp. butter
1/4 cup milk
1 small egg or 1/4 cup yogurt
1/2 cup blueberries, chopped
2 oz. brie (I did not use the rind, you could use it if you like)
Preheat the oven to 450 F. Chop the berries and cut up the brie. Keep aside. On a flat work surface add the flours, salt and baking powder. Add the cold hard butter. Using a pastry cutter or knife cut the butter and combine it with the flours without melting it. The mixture will be crumbly and have small blobs of butter.
In a bowl combine the egg and milk. If using yogurt combine the milk with the yogurt. Make a well in the flour and add mixture to it. Slowly combine the mixture with the flours without kneading the dough. Add the blueberries and brie and pull the dough together. You should get a dough that just about holds together.
Place the dough on a floured surface and cut into wedges. Flatten the scones and place them on a balking sheet. I used parchment paper on my sheet before placing the scones on it. Bake for 15-20 minutes or until they change color. Serve hot with a cup of tea or coffee.
Enjoy!
Our home is always stocked with fruit. Some blueberries were really ripe and needed to be used up. I decided to make blueberry scones. But then I also had some left over Brie in the refrigerator and so figured I could use that too. On a whim I decided to google if anyone had been adventurous enough to try the two together and I was pleasantly surprised. A lot of people have tried this combination. This recipe caught my eye. Instead of using brie as a filling after baking the scones, it used the brie in the dough. If you have used brie before you will know that it melts well and does not have a savory or sweet taste. This makes it ideal for all kinds of recipes. This is my experiment with blueberries and brie in scones. I just added these ingredients to my original scone recipe and the results were awesome! This is a keeper.
1/2 cup whole wheat bread (I used King Arthur white whole wheat flour)
1/2 cup all purpose flour
1/2 tsp. salt
1/2 tbsp. baking powder
2 tbsp. butter
1/4 cup milk
1 small egg or 1/4 cup yogurt
1/2 cup blueberries, chopped
2 oz. brie (I did not use the rind, you could use it if you like)
Preheat the oven to 450 F. Chop the berries and cut up the brie. Keep aside. On a flat work surface add the flours, salt and baking powder. Add the cold hard butter. Using a pastry cutter or knife cut the butter and combine it with the flours without melting it. The mixture will be crumbly and have small blobs of butter.
In a bowl combine the egg and milk. If using yogurt combine the milk with the yogurt. Make a well in the flour and add mixture to it. Slowly combine the mixture with the flours without kneading the dough. Add the blueberries and brie and pull the dough together. You should get a dough that just about holds together.
Enjoy!
Monday, December 31, 2018
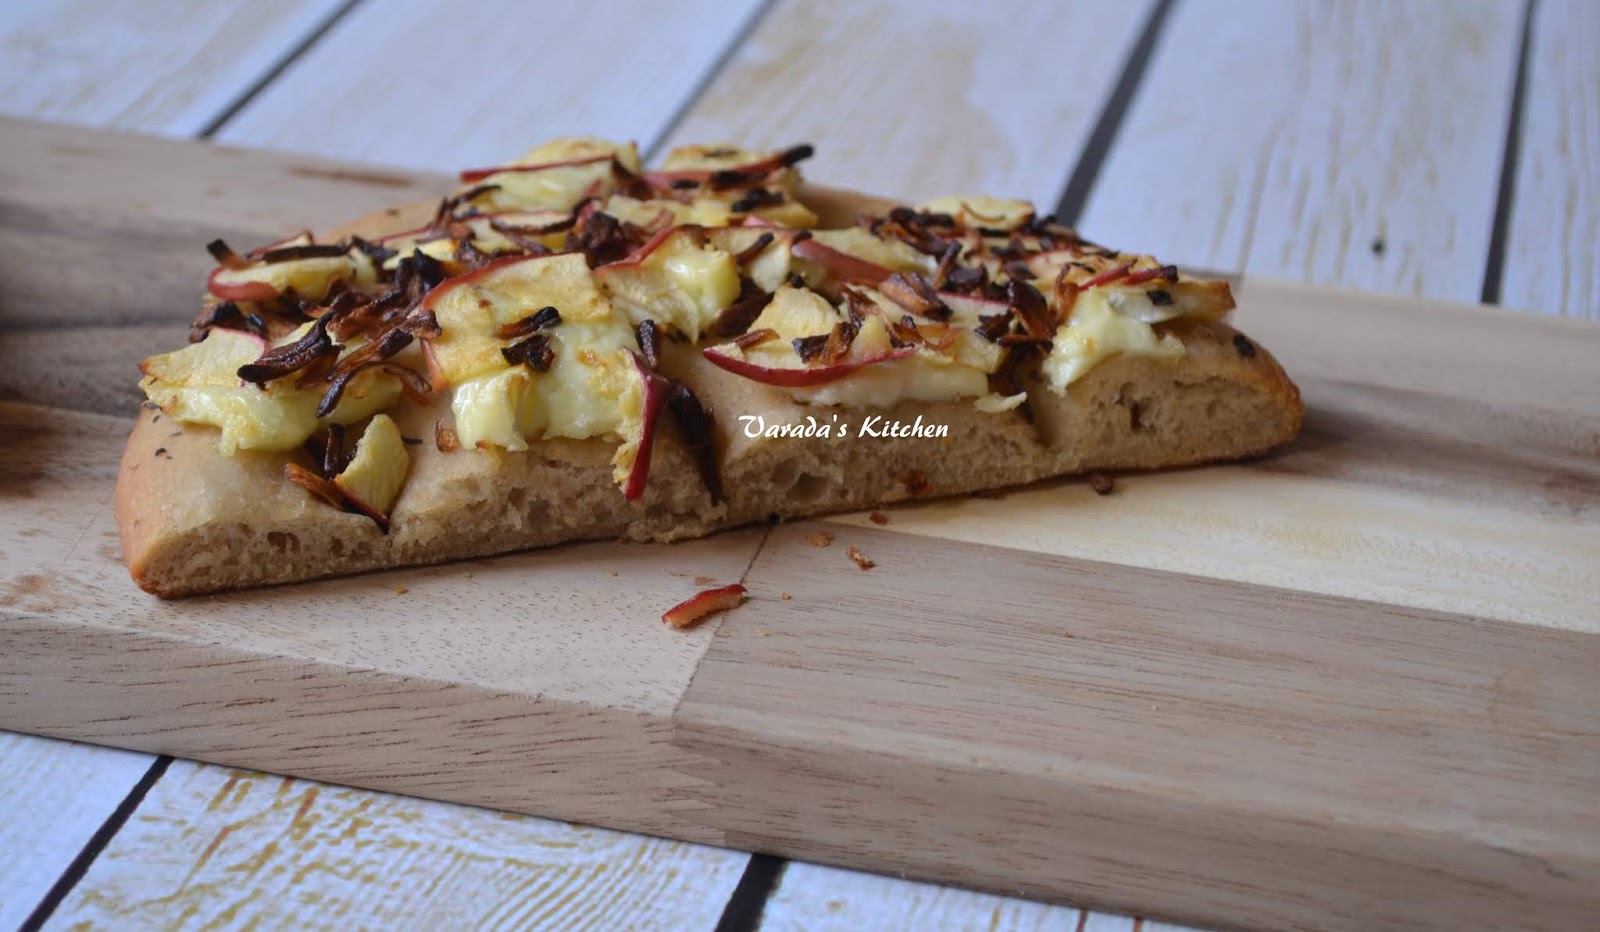
Apple, Caramelized Onion and Brie Focaccia
My daughter is home for the winter break. I took the last week and a half off from work and made plans to bake a lot of classic recipes from my bookmarked list. Things didn't go the way I had planned. First my daughter wanted to bake/cook some tried and tested dishes she had been craving. Then I pulled a muscle in my back and had to take it easy. At the end of the day I am glad I got to spend time with her and plan to make the most of the next few days before she heads back to school.
I baked this Focaccia as the last baked recipe of the year. The idea for this recipe started with some Brie I had left over from a party. I wanted to use it up and started brainstorming ideas. A few years back I made sandwiches with the classic combination of apple, caramelized onions and Brie. We loved the flavors. We always have apples in the fruit basket so this seemed the perfect way to use the cheese. But then I thought I should try something different. A few years back I had made these mini Brie en Croute. I figured I could add the apple and onions in place of the fruit preserve. I had some dough made with my sourdough starter intended for dinner rolls or pav for Vada pav that my daughter was craving. I was planning to use some of the dough for this recipe. The percentages of ingredients in that would were better suited for a Focaccia than the Brie en croute and so in the end I went with this Focaccia. Everyone enjoyed the flavors of apple, caramelized onion and Brie with the sourdough base.
You will need
Dough for the base
200 gm Whole wheat/All purpose flour combination
70% water
40% sourdough starter
10 gm salt
For the topping
1/4 large onion preferably white/yellow
Half an apple sliced thin
some slices gouda cheese (I ran out but would have like to add some)
an inch wide wedge of Brie
Herb oil
1 tbsp. oil (I used olive)
dried herbs of your choice (I used basil and oregano)
Combine all the ingredients for the dough in a bowl, cover and let it rest. After 15 minutes fold the dough over itself in the bowl. Turn the bowl a quarter turn and repeat. Repeat the stretch and fold 8 times. Let the dough rest for 15 minutes. Repeat the process 3 more times. Cover the dough and place it in the refrigerator for 5-6 hours.
When you are ready to bake prepare the herb oil by whisking all the ingredients in a bowl. Keep aside until needed. Next caramelize the onions. Slice the onion into thin slices. Cook the onion on low heat until it sweats and starts turning color. When it is a deep brown, turn off the heat and let it cool. It should be sweet.
Preheat oven to 400 F. Take the dough out of the refrigerator and roll it into an oval shape. Cover and let it rest on the counter top for 15-20 minutes. Uncover and brush with the oil. Using your fingertips make dimples all over the dough. Bake uncovered for about 15 minutes.
Prep the rest of the ingredients. Remove the partially baked bread from the oven and add the Brie, gouda if using and the apple slices. Return the bread to the oven for about 8 minutes. Sprinkle the onions over the top and bake for 5 minutes more.
I baked this Focaccia as the last baked recipe of the year. The idea for this recipe started with some Brie I had left over from a party. I wanted to use it up and started brainstorming ideas. A few years back I made sandwiches with the classic combination of apple, caramelized onions and Brie. We loved the flavors. We always have apples in the fruit basket so this seemed the perfect way to use the cheese. But then I thought I should try something different. A few years back I had made these mini Brie en Croute. I figured I could add the apple and onions in place of the fruit preserve. I had some dough made with my sourdough starter intended for dinner rolls or pav for Vada pav that my daughter was craving. I was planning to use some of the dough for this recipe. The percentages of ingredients in that would were better suited for a Focaccia than the Brie en croute and so in the end I went with this Focaccia. Everyone enjoyed the flavors of apple, caramelized onion and Brie with the sourdough base.
You will need
Dough for the base
200 gm Whole wheat/All purpose flour combination
70% water
40% sourdough starter
10 gm salt
For the topping
1/4 large onion preferably white/yellow
Half an apple sliced thin
some slices gouda cheese (I ran out but would have like to add some)
an inch wide wedge of Brie
Herb oil
1 tbsp. oil (I used olive)
dried herbs of your choice (I used basil and oregano)
Combine all the ingredients for the dough in a bowl, cover and let it rest. After 15 minutes fold the dough over itself in the bowl. Turn the bowl a quarter turn and repeat. Repeat the stretch and fold 8 times. Let the dough rest for 15 minutes. Repeat the process 3 more times. Cover the dough and place it in the refrigerator for 5-6 hours.
When you are ready to bake prepare the herb oil by whisking all the ingredients in a bowl. Keep aside until needed. Next caramelize the onions. Slice the onion into thin slices. Cook the onion on low heat until it sweats and starts turning color. When it is a deep brown, turn off the heat and let it cool. It should be sweet.
Preheat oven to 400 F. Take the dough out of the refrigerator and roll it into an oval shape. Cover and let it rest on the counter top for 15-20 minutes. Uncover and brush with the oil. Using your fingertips make dimples all over the dough. Bake uncovered for about 15 minutes.
Prep the rest of the ingredients. Remove the partially baked bread from the oven and add the Brie, gouda if using and the apple slices. Return the bread to the oven for about 8 minutes. Sprinkle the onions over the top and bake for 5 minutes more.
Enjoy!
Wednesday, December 19, 2018
Apple Raisin Muffins
My daughter is home from school for winter break and all she wants are my tried and tested recipes. Between cooking those and work there is no time to try anything new. I am posting a recipe today that I made a while back. It was in my drafts and we like it a lot. I have a list of things to try while she is home. Hopefully I will get to it soon.
These muffins are made with whole wheat and have no added sugar. The apples and the raisins provide the sweet flavor. If you like muffins really sweet then you could add some sugar.
You will need
1 Fuji apple
1/2 cup raisins
1/4 cup shredded unsweetened toasted coconut flakes
1 cup whole wheat flour
1/3 cup All purpose flour
1 1/2 tsp. baking soda
1 tbsp. cinnamon
1 tsp. vanilla extract
2 eggs
2/3 cup olive oil
Preheat oven to 375 F. Grease muffin molds with olive oil on a muffin pan.
In a bowl mix the flour, cinnamon and baking soda. Whisk the eggs with the oil and vanilla extract in a separate bowl and add it to the dry ingredients. Mix them together. Peel and dice the apple. Add the diced apple, raisins and coconut to the flour mixture. Mix it well but do not knead. The resultant batter is very thick.
Scoop the batter into the greased muffin molds. You should get 12 muffins. Bake for about 20 minutes. Place on a cooling rack to cool completely before storing.
These muffins are made with whole wheat and have no added sugar. The apples and the raisins provide the sweet flavor. If you like muffins really sweet then you could add some sugar.
1 Fuji apple
1/2 cup raisins
1/4 cup shredded unsweetened toasted coconut flakes
1 cup whole wheat flour
1/3 cup All purpose flour
1 1/2 tsp. baking soda
1 tbsp. cinnamon
1 tsp. vanilla extract
2 eggs
2/3 cup olive oil
Preheat oven to 375 F. Grease muffin molds with olive oil on a muffin pan.
In a bowl mix the flour, cinnamon and baking soda. Whisk the eggs with the oil and vanilla extract in a separate bowl and add it to the dry ingredients. Mix them together. Peel and dice the apple. Add the diced apple, raisins and coconut to the flour mixture. Mix it well but do not knead. The resultant batter is very thick.
Scoop the batter into the greased muffin molds. You should get 12 muffins. Bake for about 20 minutes. Place on a cooling rack to cool completely before storing.
Enjoy!
Monday, December 17, 2018
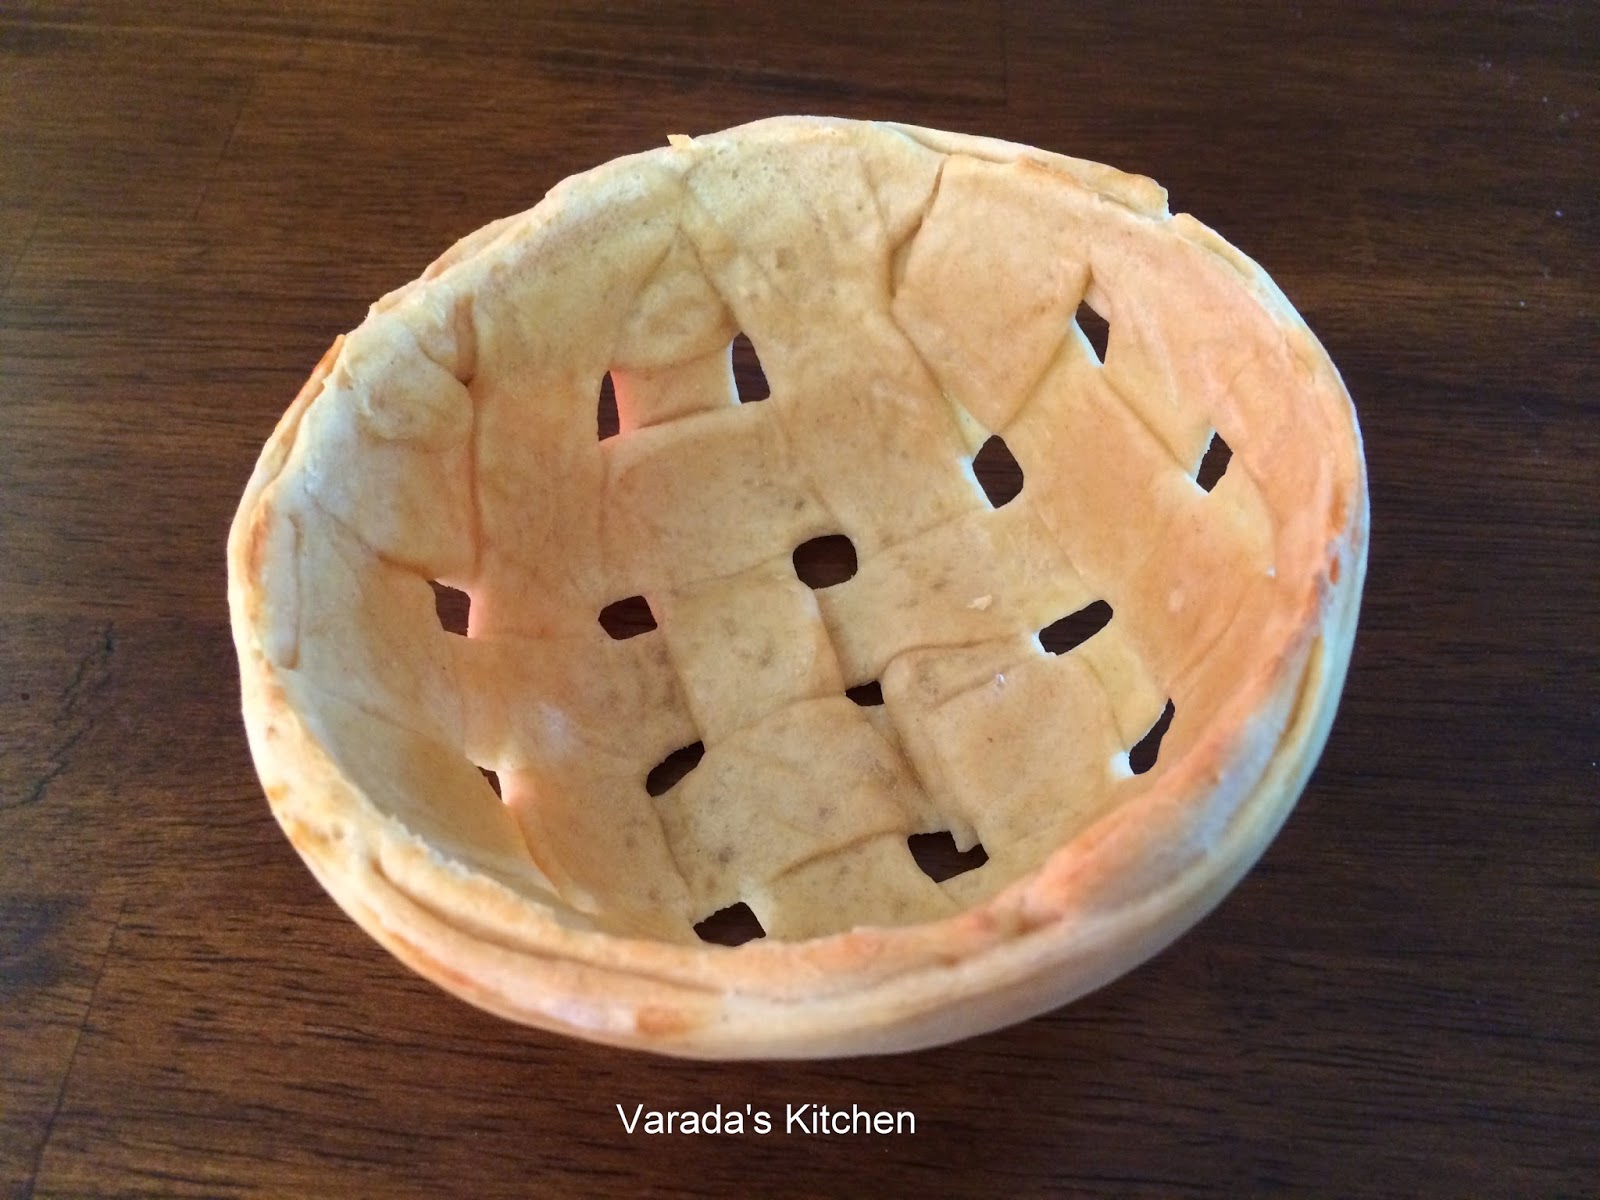
Edible Lattice Bread Basket
I few years back I baked two woven bread baskets. I have since found this edible spring basket referenced in a few easter articles. Both of my earlier versions of baskets used ropes and the weave was tight. I was very happy with those baskets but I wanted to try something different. I wanted a make a basket with open holes that looked like it was part of the weave. This is what I came up with.
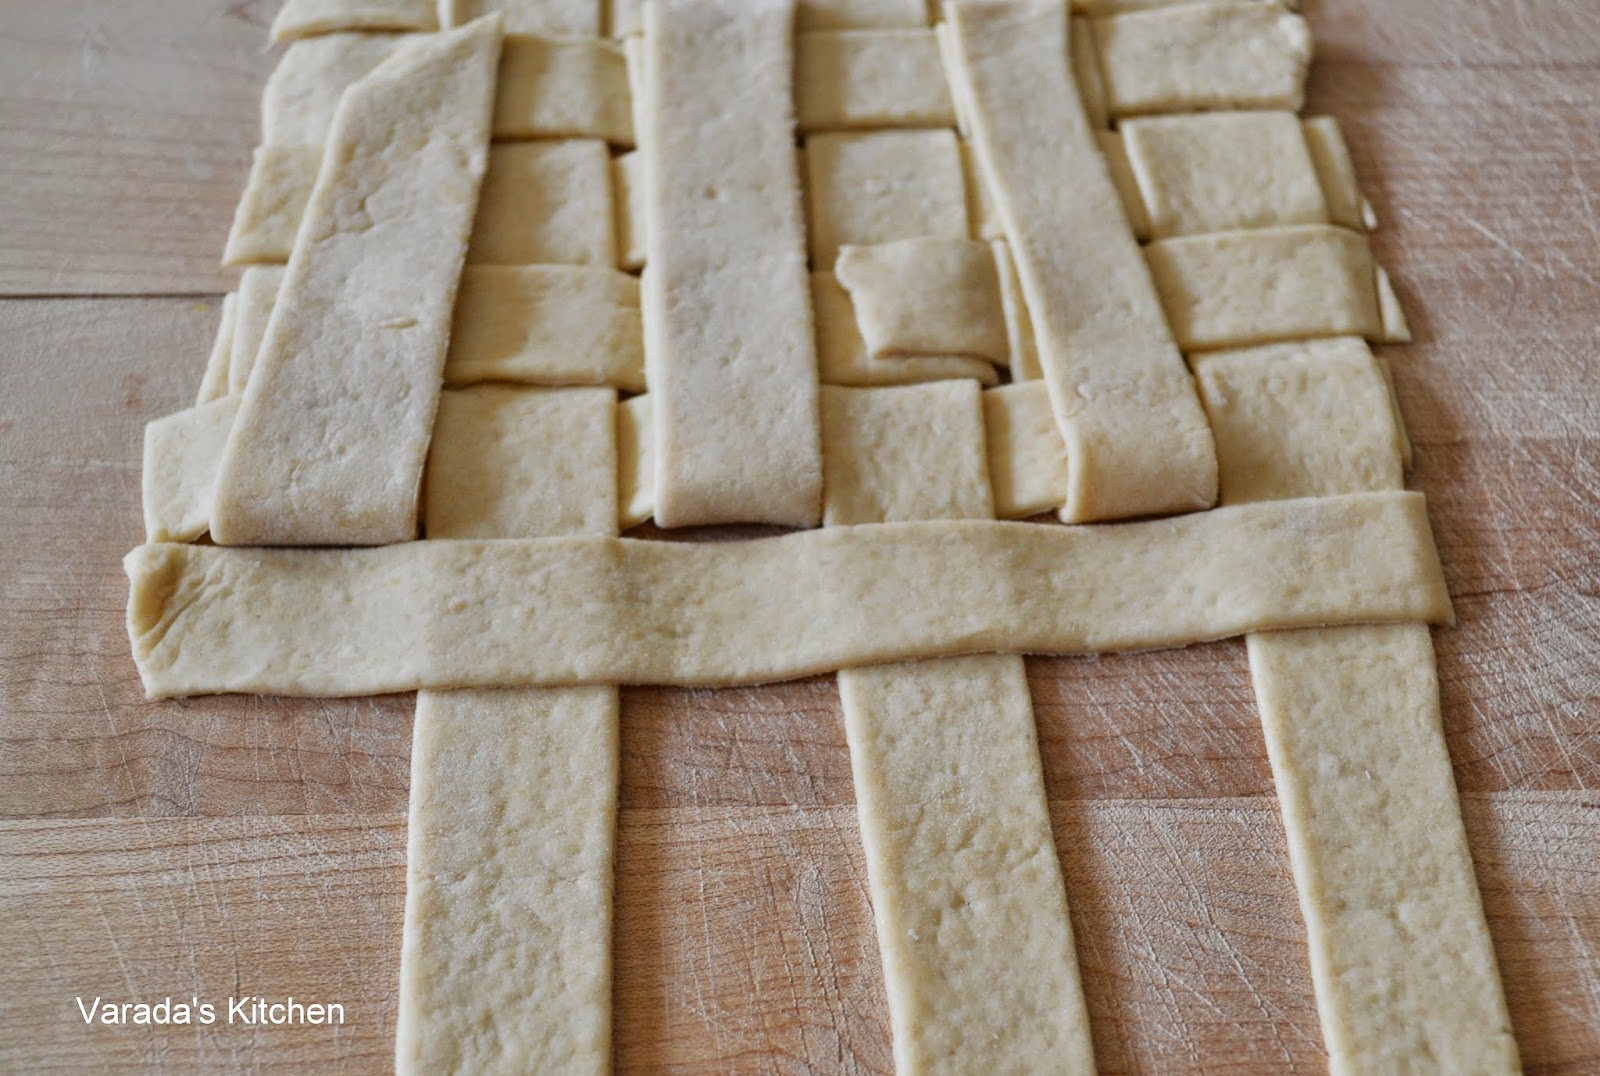
This basket was not made with ropes. Instead I made the lattice using flat strips of dough. I used a different technique with the weave. Instead of weaving it on the mold I wove it on a flat surface and then transferred it to the mold. This caused the holes to form in between the strips something I was looking for. In the end I was very happy with the result.
This basket is a lot easier to make than the two I made before. It is much smaller and uses a small amount of dough. The weaving technique is simpler too. I used my sourdough starter for this recipe but you could use commercial yeast if you wanted to. If you use commercial yeast refer to this basic dough recipe to prepare your dough.
Roll out a large rectangle from the dough. Using a small custard or similar bowl to ensure you have coverage cut a portion of the rectangle as the base (portion on left below). Cut this rectangle into wide strips being careful not to cut all the way through. Cut the remaining dough into wide strips cutting all the way through. These strips are to be used for weaving.
Preheat the oven to 375 F. On the base fold back alternating strips. Place a strip horizontally such that it covers end to end. Unfold the folded strips. Now fold back the other set of alternating strips and place a weaving strip horizontally.
Continue working the weave until you get to the end. Cover the outside of the bowl with foil. Place the woven lattice over the bowl taking care to see it does not unravel. Cut off the access.
Trim the edges to get a smooth edge around the edge of the bowl.
Using the discarded dough roll out a strip long enough to circle the edge of the bowl with a little overlap. Trim the strip to get neat edges and place it around the bowl. Seal the ends together by pressing the overlapping ends over one another.
Place the bowl on a baking sheet and bake for 10-15 minutes. The bowl should begin to brown slightly. Allow it to cool on a rack for a few minutes. Unfold the foil over the bowl and remove the bowl carefully. Now carefully peel off the foil from the bread.
Enjoy!
This basket was not made with ropes. Instead I made the lattice using flat strips of dough. I used a different technique with the weave. Instead of weaving it on the mold I wove it on a flat surface and then transferred it to the mold. This caused the holes to form in between the strips something I was looking for. In the end I was very happy with the result.
This basket is a lot easier to make than the two I made before. It is much smaller and uses a small amount of dough. The weaving technique is simpler too. I used my sourdough starter for this recipe but you could use commercial yeast if you wanted to. If you use commercial yeast refer to this basic dough recipe to prepare your dough.
Roll out a large rectangle from the dough. Using a small custard or similar bowl to ensure you have coverage cut a portion of the rectangle as the base (portion on left below). Cut this rectangle into wide strips being careful not to cut all the way through. Cut the remaining dough into wide strips cutting all the way through. These strips are to be used for weaving.
Preheat the oven to 375 F. On the base fold back alternating strips. Place a strip horizontally such that it covers end to end. Unfold the folded strips. Now fold back the other set of alternating strips and place a weaving strip horizontally.
Continue working the weave until you get to the end. Cover the outside of the bowl with foil. Place the woven lattice over the bowl taking care to see it does not unravel. Cut off the access.
Trim the edges to get a smooth edge around the edge of the bowl.
Using the discarded dough roll out a strip long enough to circle the edge of the bowl with a little overlap. Trim the strip to get neat edges and place it around the bowl. Seal the ends together by pressing the overlapping ends over one another.
Place the bowl on a baking sheet and bake for 10-15 minutes. The bowl should begin to brown slightly. Allow it to cool on a rack for a few minutes. Unfold the foil over the bowl and remove the bowl carefully. Now carefully peel off the foil from the bread.
Enjoy!
Wednesday, December 12, 2018
Savory Besan/Chickpea Flour Crackers
My post today is another version of crackers. I have few versions on this space already. Crackers are make a perfect snack with a cup of tea or coffee. After baking crackers with wheat flour I decided to try others flour combinations. Two days back I baked semolina crackers. Next I tried crackers with besan or chickpea flour. These were harder to perfect. I first tried with uncooked flour and realized the flour does not cook completely in the oven. The next time I used oil to roast the flour but that did not work either. Finally I tried ghee and it worked out. The crackers are crunchy and delicious.
Everyone at home loved the flavor but I think they have had too many versions of my baked crackers. I think I will have to finish these myself. Need to give these cracker experiments a break for a while. But now I have four perfect cracker recipes.
You will need (~50 crackers)
1 1/2 tbsp. ghee, melted
1/3 cup chickpea flour
1/3 cup unfed sourdough starter (100%)
1/4 tsp. salt
1 tsp. ajwain or carom seeds
Heat the ghee in a pan. Add chickpea flour and on low heat roast the flour until cooked. You could do the same in a microwave checking and mixing the mixture every 30 seconds until the flour is cooked. Let it cool. Combine with all the remaining ingredients. Place it in a bowl, cover and put it in the refrigerator for an hour.
Preheat the oven to 350 F. Remove the dough from the refrigerator and roll it on a parchment paper to about an eighth of an inch. Using a knife or roller cut into 1x1 inch pieces. Pierce with a fork. Bake in the preheated oven for about 15-20 minutes. Check often as these burn quickly.
When done transfer to a cooling rack and cool completely.
Store in an airtight container.
Enjoy!
Everyone at home loved the flavor but I think they have had too many versions of my baked crackers. I think I will have to finish these myself. Need to give these cracker experiments a break for a while. But now I have four perfect cracker recipes.
You will need (~50 crackers)
1 1/2 tbsp. ghee, melted
1/3 cup chickpea flour
1/3 cup unfed sourdough starter (100%)
1/4 tsp. salt
1 tsp. ajwain or carom seeds
Preheat the oven to 350 F. Remove the dough from the refrigerator and roll it on a parchment paper to about an eighth of an inch. Using a knife or roller cut into 1x1 inch pieces. Pierce with a fork. Bake in the preheated oven for about 15-20 minutes. Check often as these burn quickly.
When done transfer to a cooling rack and cool completely.
Store in an airtight container.
Enjoy!
Monday, December 10, 2018
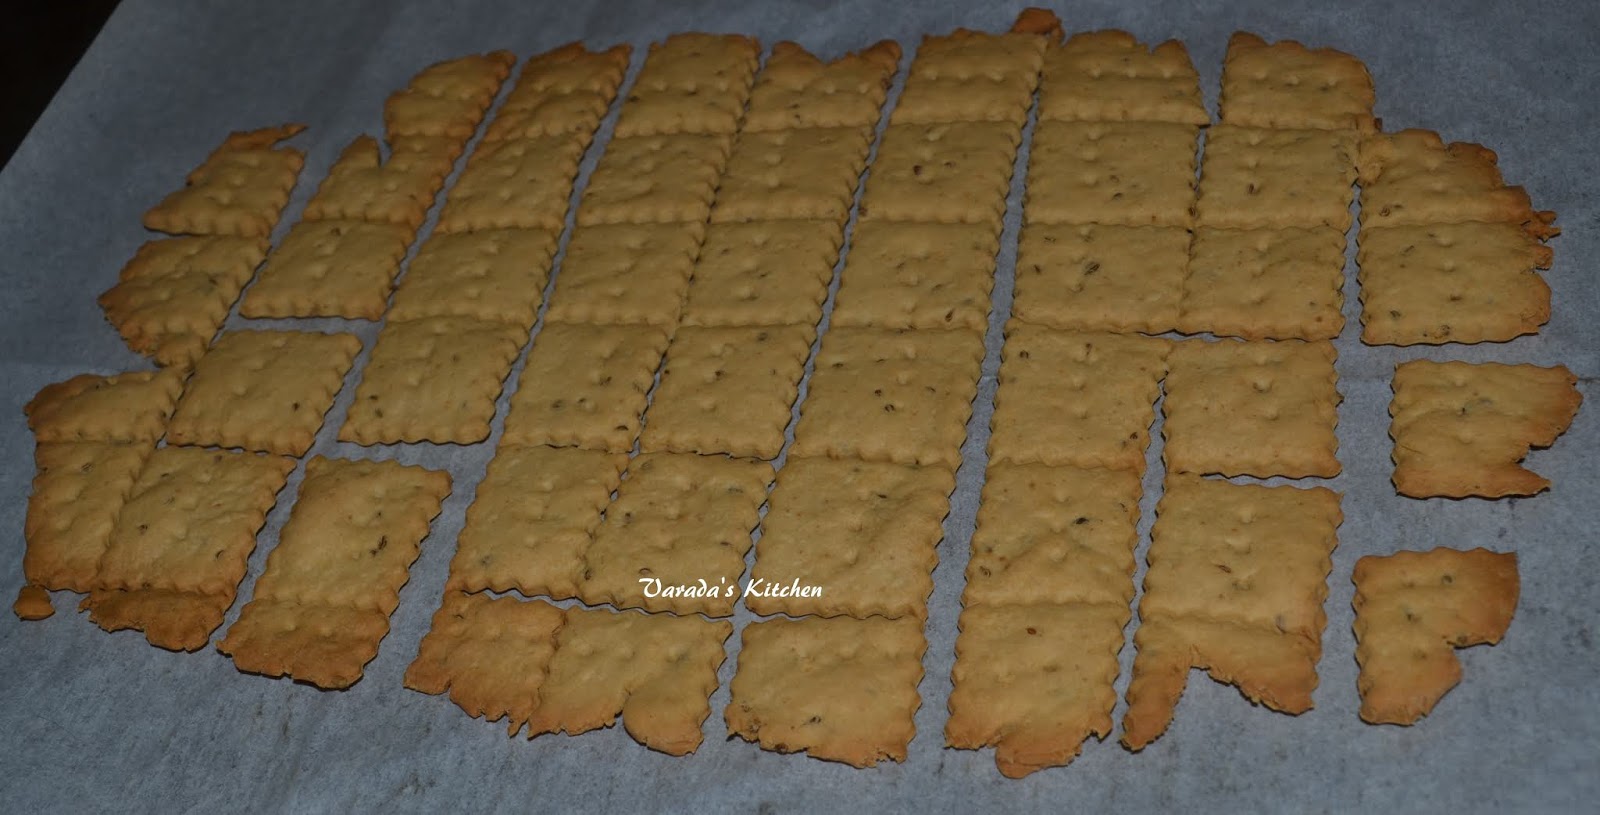
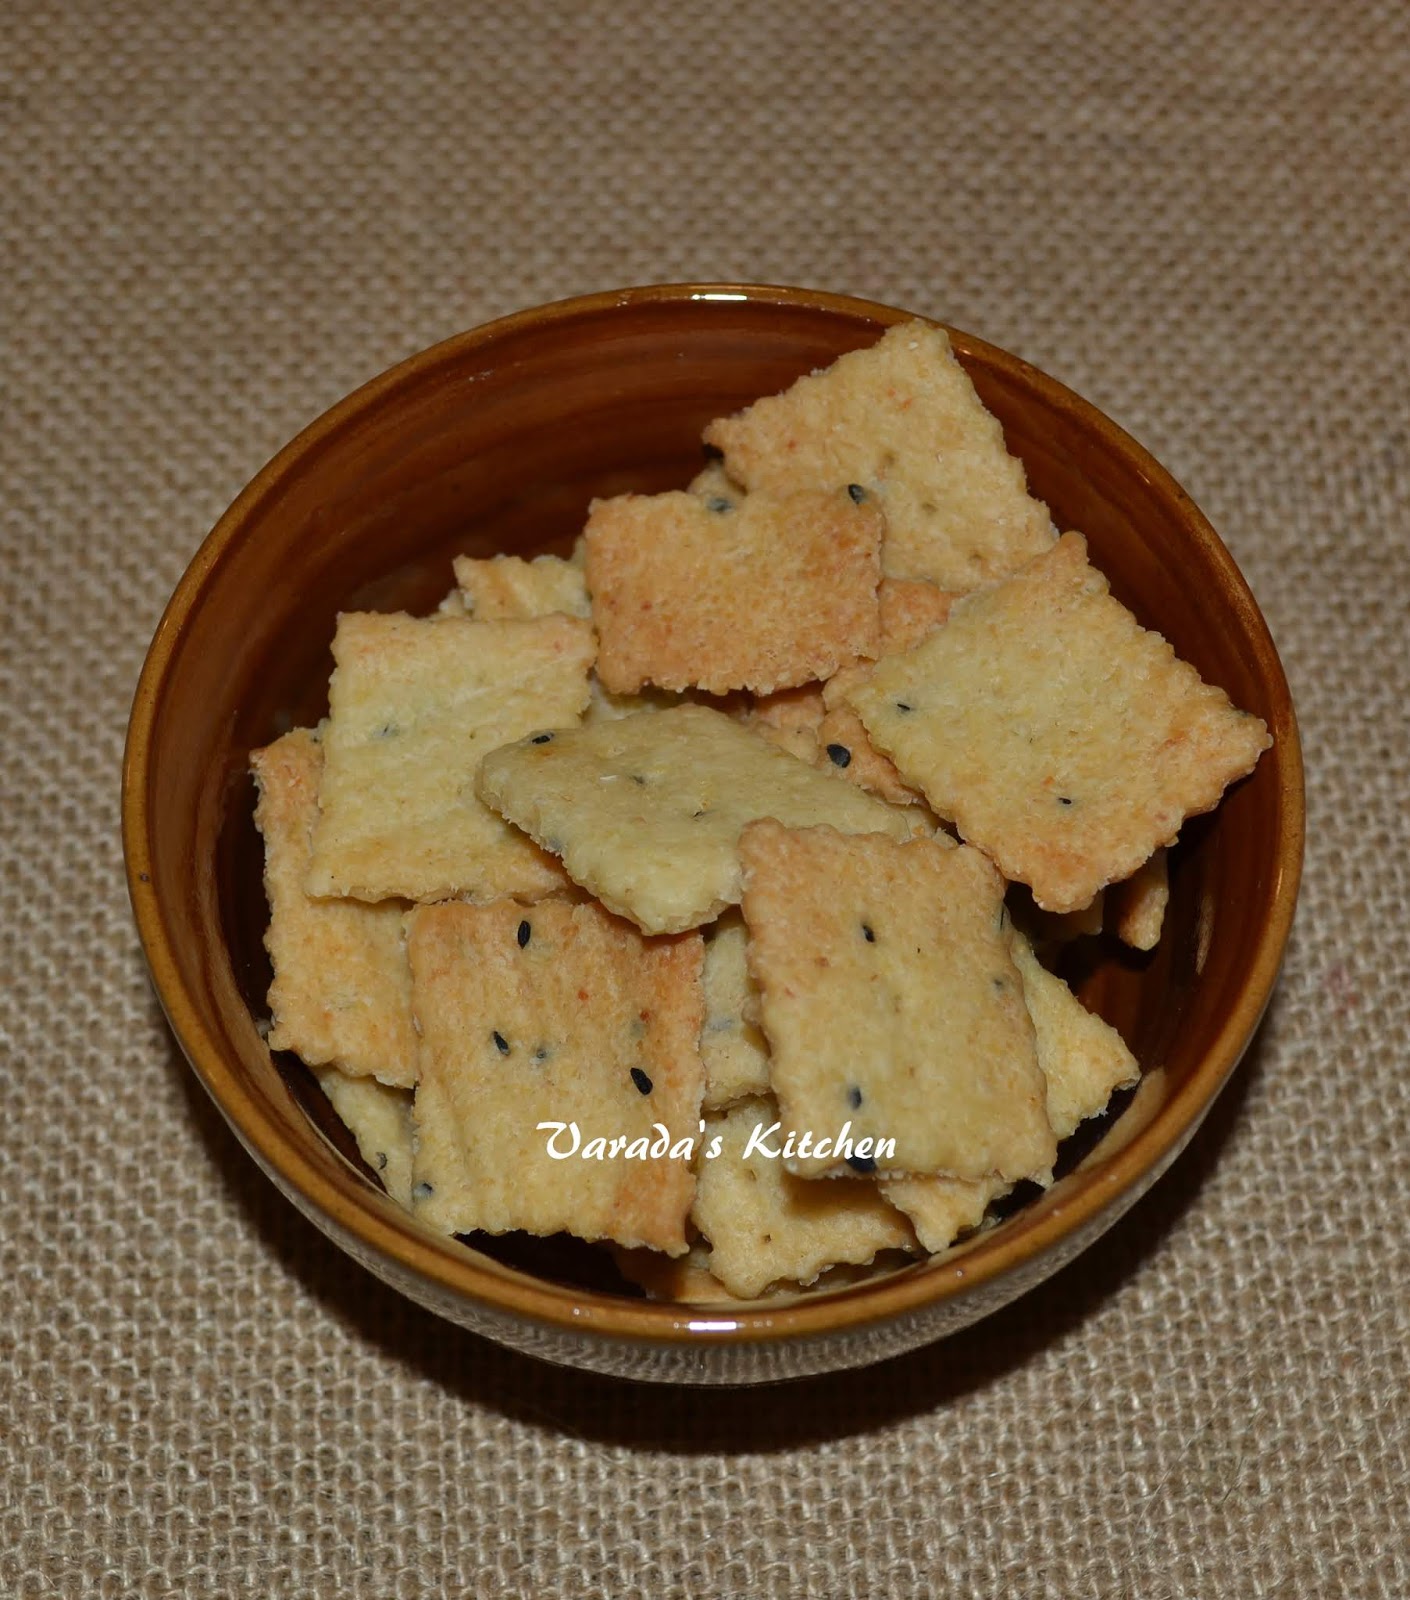
Baked Semolina Crackers
I usually take a small afternoon snack with me to work. Whole wheat crackers are my favorite. About 10 1x1 inch crackers usually suffice. I would bake the crackers over the weekend. They would make a filling snack.
After a few weeks I began to crave variety. So last month I began experimenting with different flours. Some experiments were failures and some were successful. One Saturday my husband decided to make upama for an evening snack. When I saw the fine semolina I realized it was a good candidate for my experiment. Unfortunately the experiment failed. The flavor was really good but you could taste the gritty semolina as an after taste. I realized I had to roast the semolina before I made the dough. The next attempt was a roaring success.
You will need (~50 crackers)
1/3 cup fine semolina
1/3 cup unfed sourdough starter (100%)
1/4 tsp. salt
2 tbsp. oil
1 tsp. onion seeds (kalonji)
Place the semolina in a pan and roast it on low flame until it begins to change color. Turn off the heat and let it cool. Mix all the ingredients in a bowl to form a ball. Cover and refrigerate for an hour.
Preheat the oven to 350 F. Take the ball of dough from the refrigerator and place it on a sheet of parchment paper. Roll it to an eighth of an inch. Using a pizza cutter, a knife or a decorative roller cut the dough into 1"x1" squares or diamonds. Pierce each cracker with a fork.
Place the parchment in a baking sheet. Place the sheet in the preheated oven for 20-25 minutes. The crackers will be soft when taken out of the oven. The will harden and turn crispy as they cool.
Perfect as a snack or with a cup of tea.
Enjoy!
After a few weeks I began to crave variety. So last month I began experimenting with different flours. Some experiments were failures and some were successful. One Saturday my husband decided to make upama for an evening snack. When I saw the fine semolina I realized it was a good candidate for my experiment. Unfortunately the experiment failed. The flavor was really good but you could taste the gritty semolina as an after taste. I realized I had to roast the semolina before I made the dough. The next attempt was a roaring success.
You will need (~50 crackers)
1/3 cup fine semolina
1/3 cup unfed sourdough starter (100%)
1/4 tsp. salt
2 tbsp. oil
1 tsp. onion seeds (kalonji)
Place the semolina in a pan and roast it on low flame until it begins to change color. Turn off the heat and let it cool. Mix all the ingredients in a bowl to form a ball. Cover and refrigerate for an hour.
Preheat the oven to 350 F. Take the ball of dough from the refrigerator and place it on a sheet of parchment paper. Roll it to an eighth of an inch. Using a pizza cutter, a knife or a decorative roller cut the dough into 1"x1" squares or diamonds. Pierce each cracker with a fork.
Place the parchment in a baking sheet. Place the sheet in the preheated oven for 20-25 minutes. The crackers will be soft when taken out of the oven. The will harden and turn crispy as they cool.
Perfect as a snack or with a cup of tea.
Enjoy!
Subscribe to:
Posts (Atom)