Friday, December 7, 2018

Cauliflower and Tomatillo-Red Bell Pepper Chutney Stuffed Sourdough rolls

Stuffed bread rolls are perfect for weekend brunch. Most of the prep work happens the night before. The day you want to bake these all you have to do is heat the oven and pop them in. This is the reason they are my favorite when my daughter is visiting. I can prep everything ahead of time and let the refrigerator and then the oven do all the work.


I like to make something new and different when my daughter visits from college. I have made stuffed rolls before but changing the stuffing makes for a completely new recipe. This time I used tomatillo and red bell pepper chutney mixed in with some cauliflower. You can take any chutney/sauce you have on hand, mix it with minced vegetables, saute until almost dry and use it as stuffing for these rolls.


The sourdough rolls are my recipe made with whole wheat flour. The end result is wholesome, filling and flavorful.

You will need (for 6 buns)
For the bun
100 gm 100% sourdough starter
190 gm water
20 gm sugar
30 gm olive oil
330 gm white whole wheat flour
8 gm salt

For the stuffing
1 head cauliflower, cut into tiny florets or minced
1 cup chutney, I used tomatillo and red bell pepper chutney
1 tbsp. oil (vegetable or olive oil)

For the chutney
1 large tomatillo
1 red bell pepper
1 tbsp. oil (vegetable or olive)
1 tsp mustard seeds
1 tsp channa dal
1 tsp white sesame seeds
3-4 curry leaves
1/4 cup roasted peanuts
salt and red chilli pepper powder to taste

The night before combine all the ingredients for the buns in a mixing bowl and form a soft dough. Cover and keep aside for 30 minutes. Uncover, reach down to the bottom of the far side, pick up the dough and fold it over the top towards you. Turn the bowl 90 degree and repeat. Continue until you have gone around twice. Cover and keep aside. Repeat this stretch and fold procedure two more times every half hour. Finally cover and keep aside for at least 4-5 hours. Alternately, keep refrigerated overnight.

Before you are ready to stuff and shape the rolls prepare the stuffing. For the chutney chop the peppers. Peel and chop the tomatillos. Heat oil in pan. Add the mustard seeds, sesame seeds and channa dal. When the mustard seeds sizzle add the curry leaves and peanuts.


When they change color add the chopped vegetables. Saute until cooked.
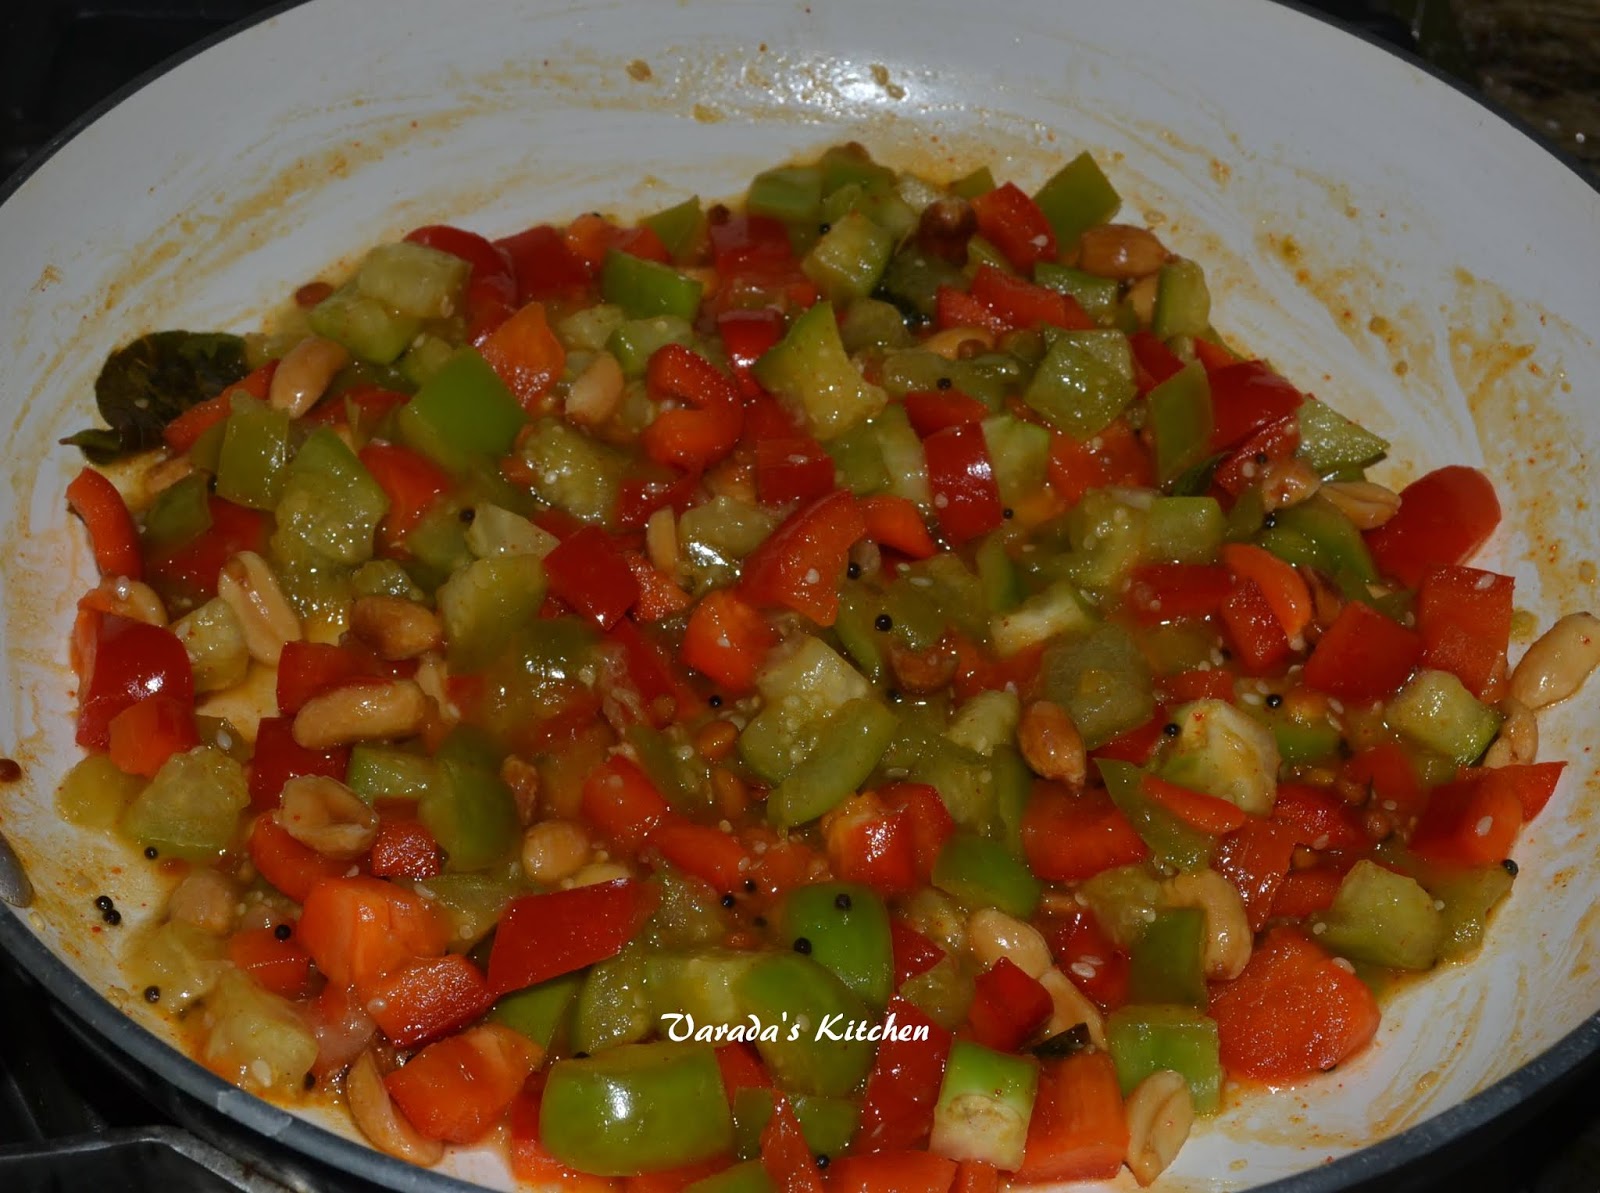

Turn off the heat and let it cool. Run it through a blender to desired consistency and keep aside.


Heat a 1/4 cup of water in a pan. Finely chop the cauliflower, you could mince it if you like. Add it to the heated water and let it cook on medium/high heat until done but not mushy.


Lower the heat a little to medium/low. Add the chutney and adjust seasoning. Remember the bread does not add much flavor so the stuffing has to compensate for that. Saute until it is dry with very little moisture. Cool.


Take the dough out on to a lightly floured work surface. Divide the dough into equal parts of about 70-80 gm each. Begin working each piece of dough into a bread roll like in my original sourdough buns recipe. When you have a smooth surface flatten the dough and stuff it with the stuffing. Bring all the sides together and continue shaping.


Place each roll in a baking sheet. Cover and place the sheet in the refrigerator and let it rise overnight. When you are ready to bake preheat the oven to 375 F. Place the baking sheet, uncovered, in the oven and bake for 30-33 minutes.


Cool on a baking rack and enjoy!

Wednesday, December 5, 2018

No Knead Light Sourdough Wheat Loaf

Last week I had the sudden urge to have sandwiches for breakfast. I decided to bake myself a loaf of bread. I got some fresh squeezed orange juice from Whole Foods to go along with the breakfast sandwiches. I put the sourdough starter out on the counter top to come to room temperature and bubble up. That is when I realized my favorite loaf recipe uses commercial yeast. I don't buy that stuff anymore so I decide to convert my old recipe to use the starter instead.


In case you are not into baking with sourdough here is the original recipe. It is simple and makes a super flavorful loaf. Do not get intimidated with the time it takes. That is what makes it so flavorful.


I followed these instructions that I had written up long ago to convert recipes to sourdough. The original recipe I had was in cup measure so I converted it to weight. I got 560 gm of flour and 430 gm water. Once you have these two numbers you can easily convert the recipe. If you are interested the math is as follows: First I calculated 40% of 560 and got 112 or round to 110. This is the weight of starter needed for this recipe. Since my starter is 50% flour and 50% water I reduce both water and flour by 110/2 which is 55 gm. My new flour by weight is 560-55=505 gm or rounded to 500 gm. The water needed by weight is 430-55=375 gm.

You will need for 1 loaf
110 gm 100% sourdough starter
505 gm flour (I used whole wheat flour, you can use 50% all purpose or any combination)
375 gm water
10 gm salt
3 tbsp. oil (vegetable oil or olive oil)

Mix all the ingredients in a bowl and keep aside. After 15 minutes, reach over the far side of the dough and pull it over the top. Turn the bowl 45 degrees and repeat. Repeat two more time and keep aside. Fold and turn every 15 minutes another 3 times. Cover the bowl and let it rest for 4-6 hours.


Keep you loaf pan ready. Remove the dough from the bowl to a floured working surface. Fold over from both sides and place seam side down in the loaf pan. Cover and place in the refrigerator overnight.

When you are ready to bake preheat the oven to 375 F. When the oven is heated remove the loaf from the refrigerator and take off the cover. Score the top of the loaf with a sharp blade or knife. Sprinkle a little flour over the top to add some interest. Bake for 50-60 minutes. Check after about 30 minutes and if the top is browning too quickly, tent it with foil.

Take the loaf out of the oven and let it sit for a couple minutes. Slide the loaf out of the pan and cool it on a cooling rack.


Slice and enjoy!

Monday, December 3, 2018

Eggless Banana Bread

This month I am going to post a few baked recipes as part of bakethon, an excuse to post recipes of baked goods with a few blogging friends. I am starting with a sweet basic banana bread. I baked this version of banana bread during the summer with my daughter. She was home for the summer and needed an afternoon snack when she got home from her EMT training. I did not have eggs and so I decided to bake the bread without eggs. I used mostly whole wheat flour so it was filling and tasted perfect.


Banana bread is one of the simplest sweet breads you can bake. It is almost impossible to get the recipe wrong and it tastes great. This is a great place to start your baking journey. This was one of my first breads.


Whenever a banana is overripe I put it in the freezer to use later. We usually buy the medium or small bananas so I have to wait for 3-4 to be able to use them.

You will need
1/2 cup brown sugar, packed
1/4 cup unsalted butter, softened
1/4 cup olive oil
1 tsp. cinnamon powder
1 tsp. baking soda
1 tsp. baking powder
1 tsp. vanilla extract
1 tsp. salt
4 small overripe bananas
1 1/2 cup whole wheat flour
3/4 cup all purpose flour

Preheat oven to 350 F. Mash the bananas. Cream the sugar, butter and oil. Add the cinnamon and continue mixing in the ingredients in the order they appear above except the flours. Add the flours a little at a time until you have a sticky batter.

Pour the batter into a loaf pan and place in the oven center rack. Bake for 45 minutes. Remove from the oven and tent with a foil. Return the pan to the oven and bake for another 20 minutes. Take the pan out of the oven and let it rest on the counter top for 5 minutes. Slide the loaf out and cool completely on a cooling rack.


Slice and enjoy!
Thursday, July 26, 2018

Masala Tea in Instant Pot

My husband loves tea, strong tea, especially Masala Chai. I dislike tea and have never taken an interest in making strong tea. My husband makes his own cuppa every morning and evening. Unfortunately, some times he forgets he has the pot on the stove and leaves the kitchen. Many a time he has had to spent time cleaning up the mess. When I heard chai can be made in the instant pot my immediate reaction was "No hovering around the kitchen stove!".


This is my attempt to make two cups of tea using the instant pot. My husband liked it. My opinion does not matter as I am not a fan. If you had guests or had a lot of cups of tea to prepare in a hurry then this would be a really good option.

You will need
1 cup water
1 cup milk
1 1/2 tsp. tea powder
2-3 peppercorns
1/4 in cinnamon
2-3 pods cardamom, shelled

Add all the ingredients to a small stainless steel pan. Insert the trivet in the instant pot and add 1 cup of water. Place the pan with the ingredients for tea on the trivet. Turn on the instant pot and cook on manual mode for 2 minutes. NPR (Naturally release pressure) from the instant pot for 2 minutes. Then slowly turn the venting knob to vent the steam. If you release the steam all at once the tea leaves and tea will make a mess in the pot.


When the pressure pin drops open the pot and enjoy the tea!

Wednesday, July 25, 2018

Baked Peaches with Ice Cream

I first tasted these baked peaches at a restaurant and fell in love with them. I have always wanted to try this recipe at home. The caramelized sugar infused with the juices of the fresh peach makes a fabulous sauce for the soft baked peaches. It is a very simple recipe but every summer for some reason or the other I never got around to making it. Last weekend on our weekly grocery trip I insisted on taking my time finding perfectly ripe peaches that were perfect for this recipe. I also bought a small tub of vanilla gelato made by a company called Talenti. It was the perfect combo with the baked peaches.


You could use any stone fruit for this recipe like nectarine or apricot. Make sure the fruit is ripe. The recipe works even if the fruit is not ripe, but for best results use ripe fruit.

You will need (4 servings)
4 small ripe peaches
8 tbsp. brown sugar
2 tbsp. butter

Preheat the oven to 400 F.
Cut the peaches in half and remove the seed. Keep aside.


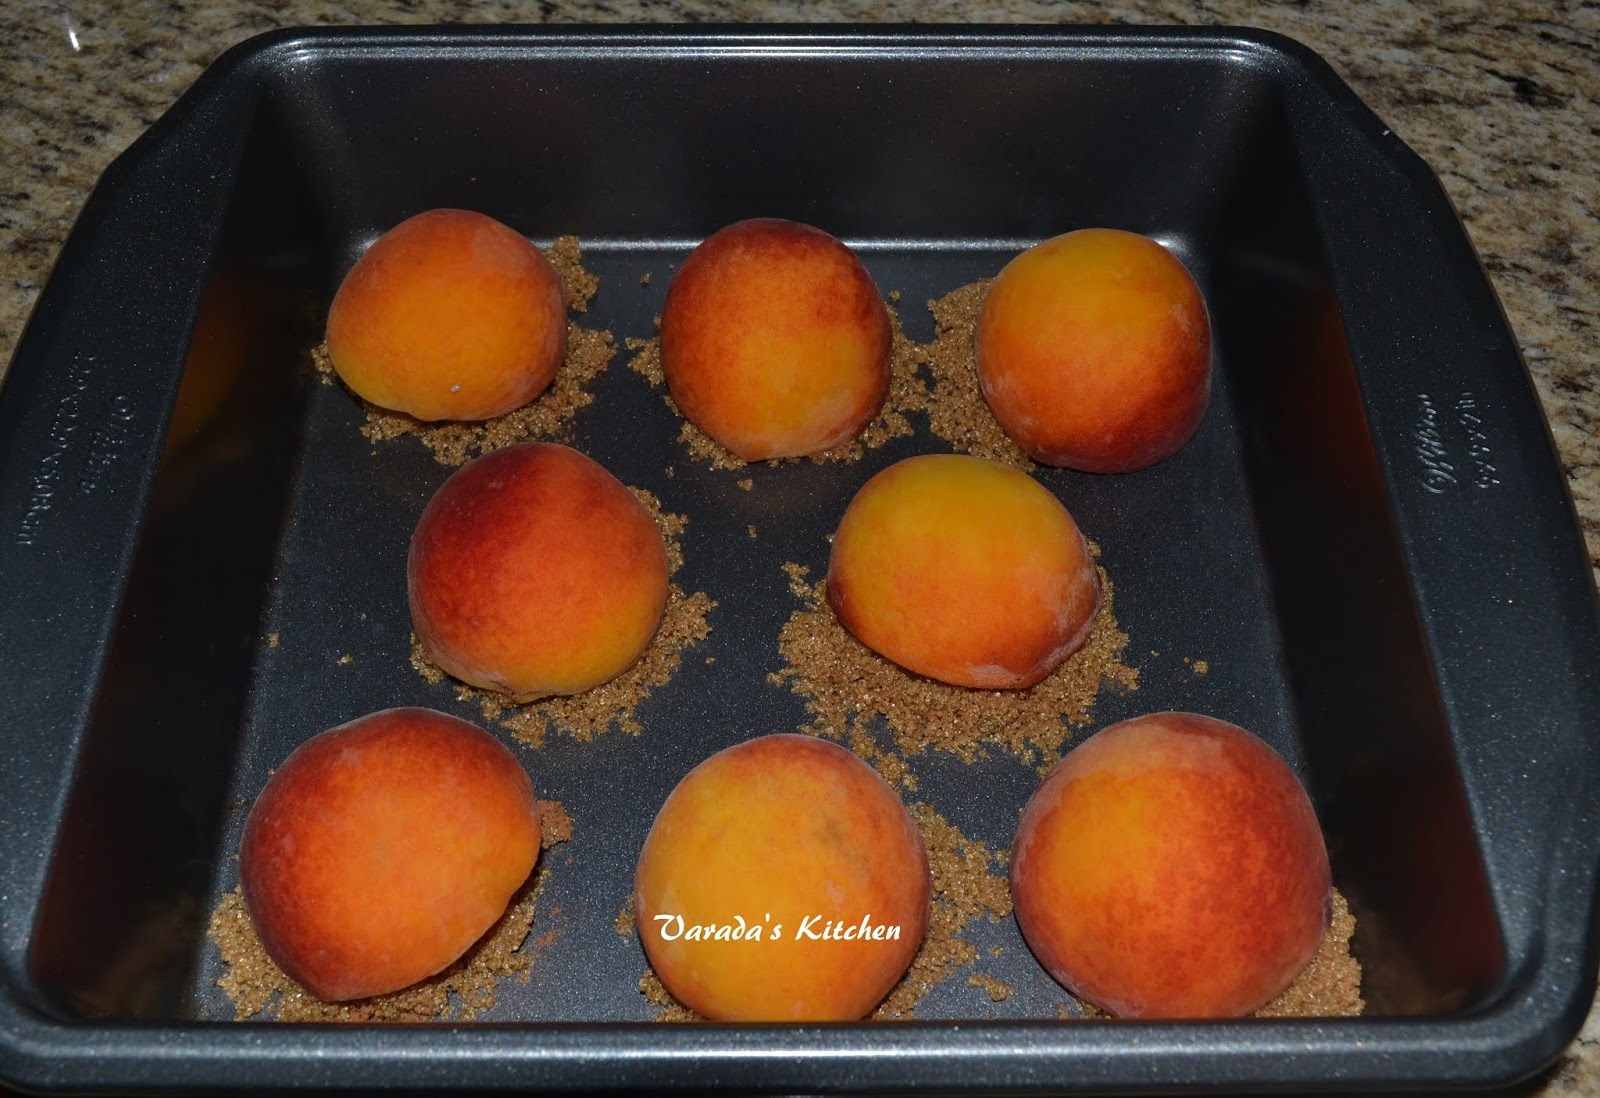
Cut the butter in half. Continue to half the butter until you have 8 equal pieces. Keep aside. Prepare a baking tray. Using a tablespoon measure place a mound of brown sugar in the baking tray. Repeat seven more times so you have 8 mounds. Place a piece of butter on the sugar and one half of a peach, cut side down. Repeat for all the pieces.


Bake for 15 minutes. The peaches should be soft and done. Flip them over so the cut side is facing up. Pour some of the caramelized sugar from the baking tray over the top and return the tray to the oven for another 5 minutes.


Plate the baked peaches with your favorite ice cream and serve. Drizzle the sauce over the top.


Enjoy!


Tuesday, July 24, 2018

Peanut Dipping Sauce

This is one of the tastiest condiment you will ever make. When I first decided I wanted to try spring rolls I noted down this recipe from a magazine. I never got around to making it until I finally made fresh spring rolls. This sauce was the perfect condiment.


My daughter who is not a fan of nuts fell in love with the sauce. It is the perfect combination of sweet and sour. It goes perfectly with the flavors in the spring rolls. The amounts listed against the ingredients are estimates. Adjust as per taste.

You will need
1/2 cup peanut butter, smooth and creamy, not chunky
1/4 cup warm water
1 tbsp. lime juice
1 tbsp. soy sauce
1 tsp. sugar

For the garnish
roasted peanuts, chopped coarsely

Whisk all the ingredients for the sauce in bowl. Garnish with chopped roasted peanuts. The sauce is ready


Enjoy!


Thursday, July 19, 2018

Fresh Vegetable Spring Rolls

Spring rolls is all forms have been on my list of recipes to try for the longest time. When my daughter was home for spring break we visited the Asian supermarket and brought home rice stick noodles and rice paper. For some reason it just sat in the pantry until she came home for summer.


Finally one evening, even though dinner had been cooked in the morning, I decided I was going to make the fresh spring rolls for a snack. I made a peanut dipping sauce to go with it.


My daughter loved the rolls so much she decided she would have them as dinner. The rolls are addictive and it is hard to stop after one. I am glad I am able to post these rolls to this space.

You will need (for 12 rolls)
12 rice paper wraps
nickel size bunch of rice stick noodles
1 carrot, shredded
a bunch of green leaves, I used kale
1/2 cup cabbage, shredded (I skipped this as I ran out)

Prep the vegetables. Boil water in a glass measuring cup or any microwave save bowl. Place the cup/bowl on the counter top. Add the rice stick noodles to the boiling water and let them cook. Stir them after every few minutes with a fork until they are tender and do not stick to each other. Pour out the hot water and rinse in a cold water bath. Drain and place in your assembly line.


Take a large plate or bowl with a flat bottom and fill it with an inch of water. Prepare a prepping area. I used my cutting board. You could use a plate. Place one of the rice papers in the plate until it is soft. Remove the paper from the water, Place for a few seconds on a paper towel to soak up the dripping water and place on your prepping area. Layer the filling and fold as in the pictures.


The roll is ready. Repeat the process for all the other rolls and serve with the dipping sauce.


Enjoy!


This is my entry for week three, day three of BM #90 for the theme Wraps and Rolls. Check out the Blogging Marathon page for the other Blogging Marathoners doing BM#90.

Wednesday, July 18, 2018

Eggplant, Heirloom Tomatoes and Olive Wraps

I am excited to post this wrap today. It has ingredients I do not normally combine. The summer has been very hot so far and no one is hungry for the same old recipes. Coming up with new combinations to the same recipes is a fun way to tackle the summer woes. I had bought a shiny fresh eggplant to make eggplant chips. I decided to present these in a wrap as opposed to having them as a side. I had heirloom tomatoes and they go well with eggplant. Next I chose olives and feta cheese. Not sure why I put these together other than a feeling that they would all go well together. The wraps made for a nice weekend lunch and were very filling.


I am not a fan of eggplant. It cooks up mushy and I have problems with mushy texture. My husband and daughter love it. When they feel like eating eggplant they buy, cook and eat it. I usually have nothing to do with the whole process. The only two recipes I make with eggplant are the eggplant chips with the large eggplant and the stuffed mini eggplants (bharli vangi).

You will need
whole wheat poli/chapati
20 eggplant chips (a large long eggplant)
2 large heirloom tomato, sliced
10-12 olives, sliced
1/4 cup crumbled feta cheese

Using a large shiny fresh eggplant prepare the eggplant chips. You could skip the besan in the linked eggplant chips recipe and cook it sprinkled with salt, pepper and cayenne pepper. Keep aside. Slice the tomatoes, use heirloom tomatoes if possible. Slice the olives. You can use green or black olives.


Assemble the wraps. Heat the fully cooked poli on a hot griddle. This makes the poli less prone to tearing. Layer the eggplant over the bread. place the tomato slices and add the olives and feta cheese. Wrap it up and secure with a toothpick.


Enjoy!


Tuesday, July 17, 2018

Pita Bread Wraps with Mixed Vegetables and Feta

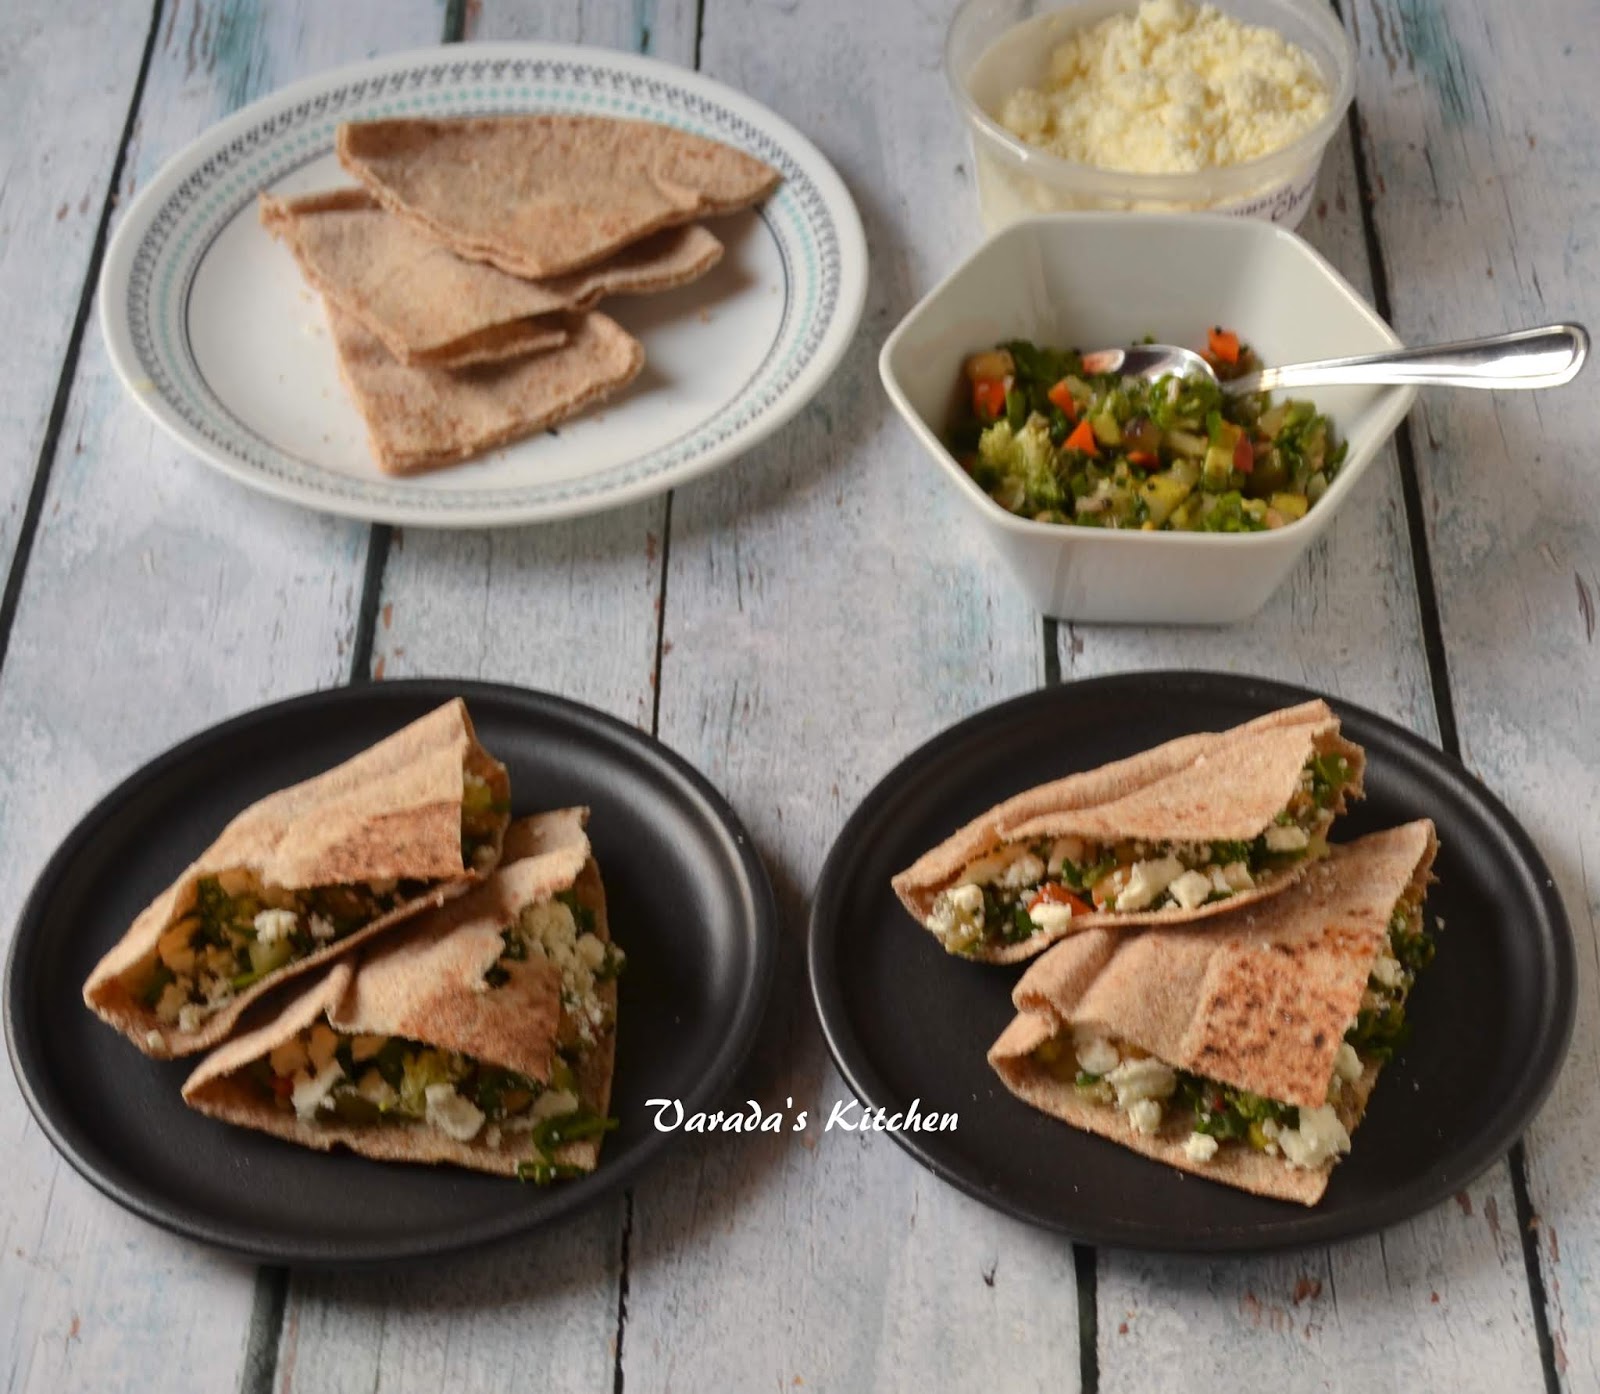
Sometimes you put ingredients together just because you need to get a meal ready quickly and end up with something delicious. This wrap is one of those. It was not planned. I made the ultimate mixed vegetable salad for lunch and then we headed out to run errands. We got delayed and got home just before dinnertime. All I had was some leftover salad, some pita bread and some feta cheese. I put it all together in this wrap and it was all gone very quickly. Luckily I had the foresight to click pictures.


While there was no reason for this combo to taste anything but good, the flavors blended so well it was a total surprise. What started out as using up leftovers to make dinner turned into a keeper recipe.


I wanted to put the filling in the center of the unopened pita and wrap the pita around it but since the vegetables were diced into small pieces and not bound together very well I decided to cut the pita bread into quarters. This made it easy to eat. I guess any salad with a lot of blended flavors should work for this recipe.

You will need
3 pita breads
2 cups  Ultimate mixed vegetable salad 
1/4 cup feta cheese

Heat the pita bread on a griddle. Cut it into quarters. Stuff with the salad and sprinkle some feta cheese.


Enjoy!


Thursday, July 12, 2018

Coleslaw

Coleslaw is a very basic salad with few ingredients. It is near impossible to get this recipe wrong. It is also the first salad I tried in a restaurant and loved as a child. I have always loved the chilled crispy cabbage with the flavorful dressing. The little pieces of carrot peeking through an otherwise white salad. I like the slaw a little dry and not loaded with dressing. My daughter adores this salad too.


Last month I realized I did not have this recipe on my blog and decided to set things right. My daughter wanted to try it so we bought the cabbage and I waited. She got busy and the cabbage was used up for some other recipe. I shredded some more cabbage and waited for her to make the coleslaw. Finally this afternoon she brought out the mayo and other ingredients and we put this together. I am happy. I finally have coleslaw on this space. We enjoyed this salad with our dinner.

You will need
2 cups shredded cabbage (about 1/4 of a large cabbage)
1/2 carrot shredded
1/4 cup mayonnaise
juice of 1/2 a lime
salt and pepper to taste

Combine the last four ingredients and whisk until smooth. Mix in the shredded cabbage and carrot. Chill before serving.


Enjoy!


Wednesday, July 11, 2018

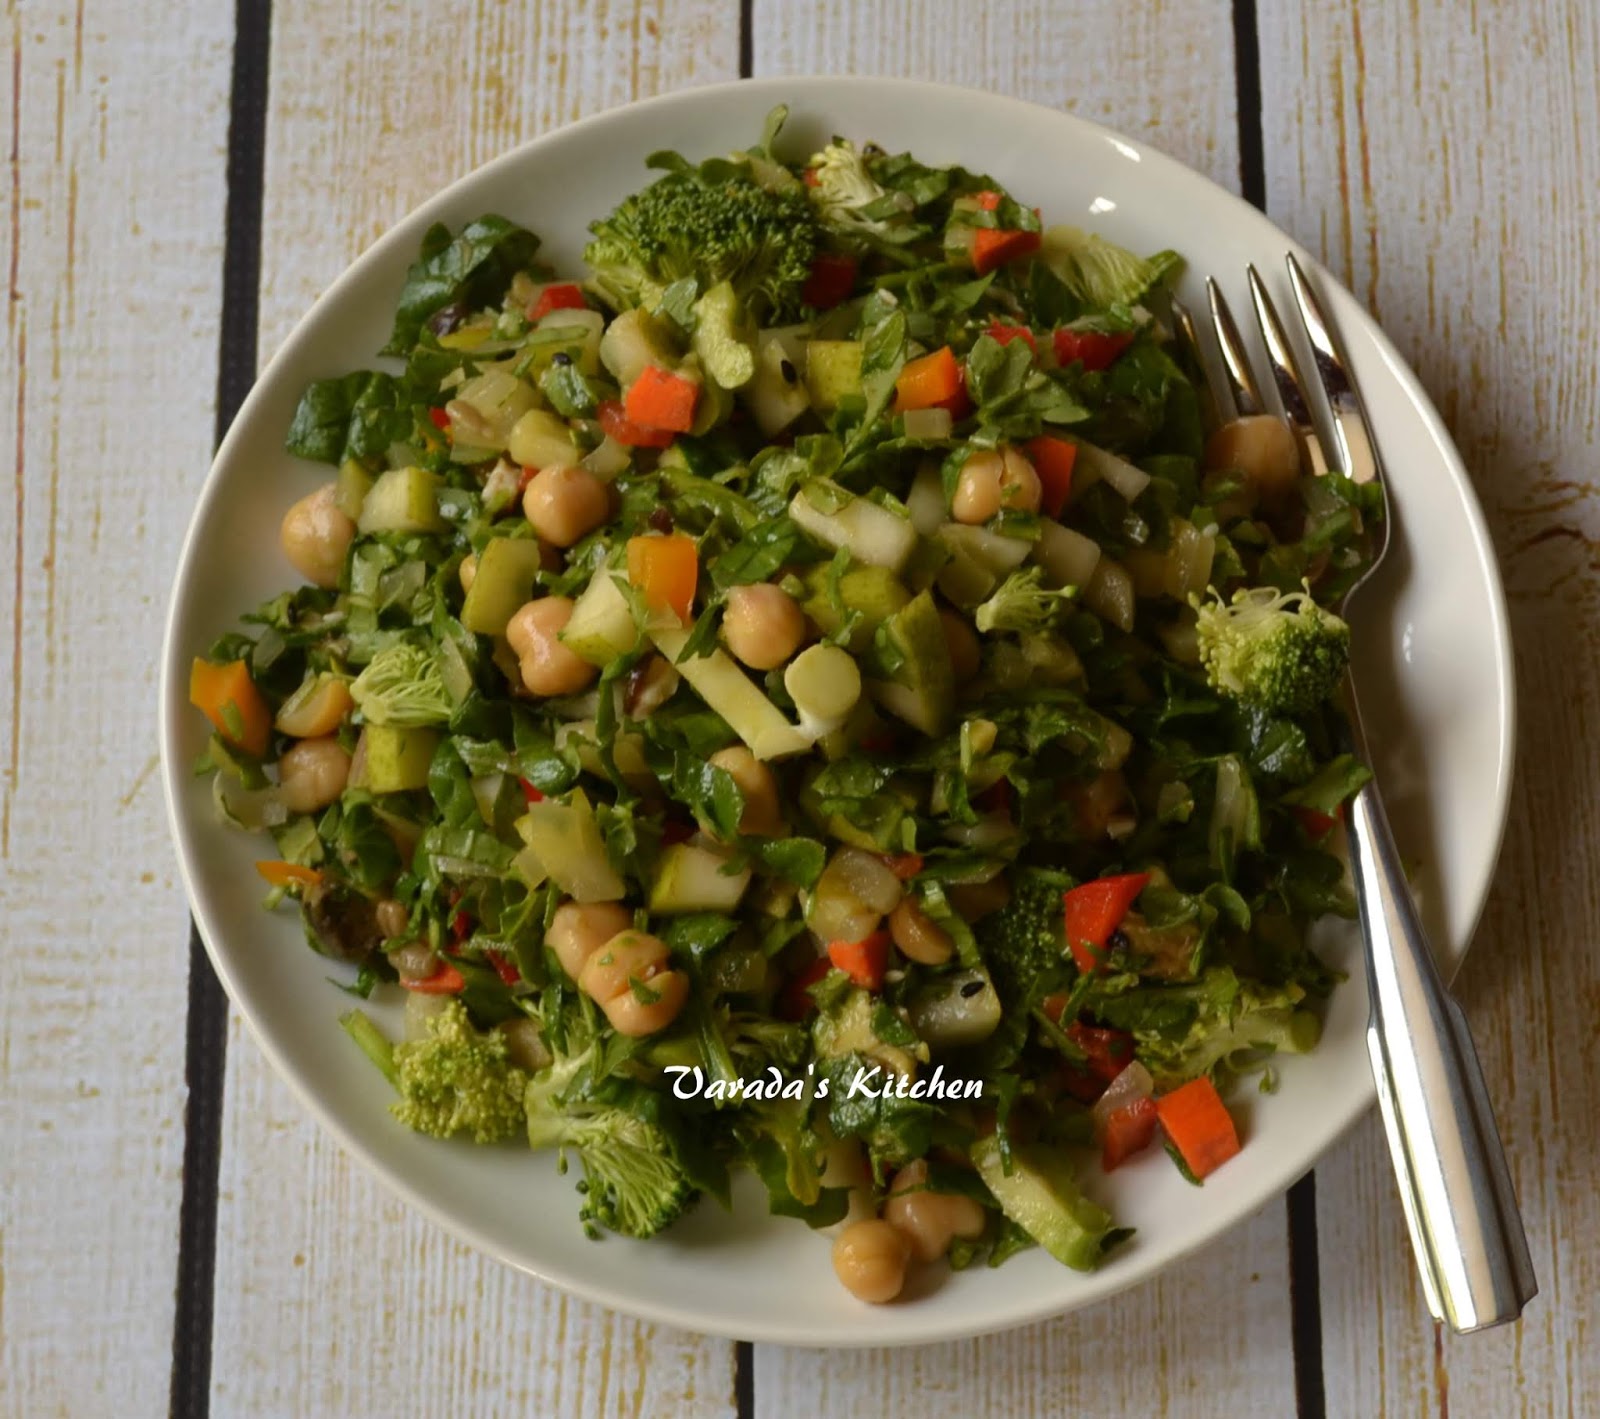
Ultimate Mixed Vegetable Salad

This salad is put together like you would assemble a salad at a salad bar, a little of this and a handful of that. It reminds me of a trip I took a long time back with my Dad to Mumbai, India. It was a work trip to Gujarat via Mumbai and I had tagged along. In Mumbai we visited a new pizza place and they had a salad bar. I was in school then and had never seen a self serve salad bar before. I took my time choosing the ingredients and I loved it. When my daughter was little I frequently took her to the local salad place. Luckily she is not a picky eater and enjoyed the salad. I remember when she was five an elderly lady from the next table commented on how she and her husband were pleasantly surprised to see a little girl enjoying her vegetables. As a family we enjoy salads and love salads as lunch especially in the hot summer months.


I have been working on salads as meal substitutes for a while. I started with 4-5 ingredients and worked my way up. With my earlier efforts my daughter usually got hungry in a couple of hours. Which meant the salad was more a side than a meal substitute. Given the number of people in the house it is hard to keep a wide variety of ingredients. Finally I believe I have the ultimate mixed vegetable salad. With this salad I have reached my goal of a satisfying meal. It is great as packed lunch as it keeps you feeling full for a long time. If you have a child who loves vegetables and fruits you have to try this.


This is a complete meal in every sense. It is very nutritious and has a good mix of all the major food groups. The beans, broccoli and greens provide the protein. There is no oil but there are healthy fats in the avocado and the sunflower/sesame seeds. Vitamins and minerals in the colorful vegetables. And a healthy carb content. You could add cooked grain groats to increase the carbs if you like. This is our everyday lunch salad.

You will need (2 servings)
1 cup cooked Garbanzo beans or any beans of your choice
a handful each of 2-3 different greens, I used baby spinach, baby kale and baby arugula
a variety of vegetables, diced
at least 1 fruit, I used a pear, apple works well too
2 mushrooms, diced (optional)
1/2 avocado, diced (optional)

Dressing
juice of 1/2 a lime
salt and pepper to taste
red chili pepper powder to taste (I skip it)

Topping
1 tbsp. sunflower seeds, raw and unsalted
1 tsp. while sesame seeds
1 tsp. black sesame seeds

If you are using dry beans, soak them overnight and pressure cook them until tender. Alternately, use canned beans. These are the ingredients I used today. Please note: the quantity of the vegetables shown here is not the quantity used in the recipe. I used only a handful of each of the vegetables.


I dice all the vegetables over the weekend and store it in the refrigerator. I pick and choose quantities of each as needed. The greens, onion, mushroom and fruit I dice as needed as they do not store well when diced.

Cooking vegetables: Diced mushrooms (if using), onions (can be left raw but I prefer them cooked), zucchini, greens beans (I did not use them today), and colored bell peppers. In a pan heat a little water and cook a handful of each of the vegetables. Cooking in water retains color and flavor without an oily coating.


Turn off heat and let them cool. You want the vegetables to be cooked but not mushy. They should retain their shape.


In a large bowl add the beans, avocado, raw vegetables like carrots, broccoli, fruit like pear or apple, the cooked vegetables and the greens.


Add the toppings like sunflower seeds, sesame seeds, slivered almonds or any seeds or nuts of your choice. Squeeze the juice of half a lime. Add salt and black pepper to taste.


Mix it all up and let it rest for at least 15-20 minutes. The salad is ready.


Enjoy!


Tuesday, July 10, 2018

Watermelon, Olives and Feta Cheese Salad

This salad was an experiment. Everyone in my family loves watermelon eaten on its own. I rarely make anything with watermelon. On this space I have a cooler and a jello made with watermelon. Both were great but not made frequently. Then I saw the pictures of this salad. They are everywhere and I I had to try it.


I got a watermelon and cut it up into cubes. Luckily, I reserved a quarter of the melon to be cut later. By the time I got ready to make the salad the bowl of the cut up watermelon was almost empty. I had forgotten to tell the family that I needed it for a recipe. I chopped up the reserved quarter and forbade anyone from even looking at the sweet juicy fruit.


This salad has a very surprising blend of flavors with the salty feta, the olives and the sweet watermelon. I added mint as a garnish. If I make this salad again I would use a watermelon that is not as sweet and juicy as the one I had. In fact this salad would be perfect to use a watermelon that is not very sweet to eat on its own. There are no proportions to the recipe. Add the ingredients in the proportion that best suites your taste.

You will need
1 large bowl watermelon, cut up in cubes
6-7 olives, pitted and cut into slices
1-2 tbsp. crumbled feta cheese
2 mint leaves, as garnish

Combine all the ingredients in a bowl. Let it rest for a few minutes to allow the flavors to blend together. The salad is ready.


Enjoy!